Having a reliable backup is essential to every business. You may think that your backup is bulletproof when you receive the email notification saying backup is complete without errors. But what happens when a disaster strikes and your backup is not able to restore your data? I would hate to be in that person position. Imagine the feeling when you have to explain to your boss why the latest backup can’t be used to restore data. In addition, you would probably guess how much data you lost.
Every IT Professional would tell you that you need to test backups so that you can confirm that restore can be done. The truth is that it takes a lot of time to test every backup. Now, let’s think about this for a moment. Is testing every backup, even daily, time-consuming? Hell, yes. Would you appreciate that every backup is tested automatically? I know I would. I know I would appreciate the additional layer security and saved time.
Automated backup screenshot verification in Nakivo Backup and Replication
Nakivo knows about this problem and they decided to solve this problem for IT Professionals like you and I. I still remember a time when I was using Symantec Backup. I was never sure If I could recover our company data in case of disaster. Restore was time-consuming and usually, you had to read through their forums to find a solution. Luckily, a situation is much better in present time. You see, Nakivo has a very fast backup engine and the whole backup process is much more reliable compared to anything we used to in the past. Not only you can backup your servers, you can easily replicate the same data to a secondary location. Just in case. The need for reliable backup grows with the features provided by the latest technology. Knowing that backup and a replica can be both restored is priceless. To help IT Professionals, Nakivo developed a technology that can help us save some time. Automated backup verification.
They call technology Screenshot verification. Behind a simple name is a powerful technology that works like this: When a backup is completed, Nakivo creates an isolated environment. It starts the server. Only after the server is up and running, it creates a screenshot as a proof, that backup has been restored and the server can be run. Because the server is running in a sandbox, you won’t run into any conflicts with the real server.
One more thing, this functionality is part of all editions, unlike the competition, where they charge a premium for similar tech.
Just a simple setting
In order to enable Screenshot verification, we have to set up email settings first. Go to settings and verify all the settings under Email settings. Once we confirm that we received test email, we can proceed to the backup job.
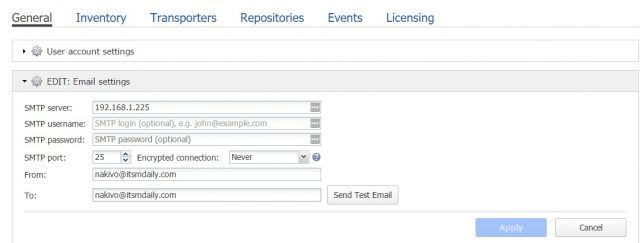
Let’s take a look how we can enable screenshot verification when we start a new backup job.
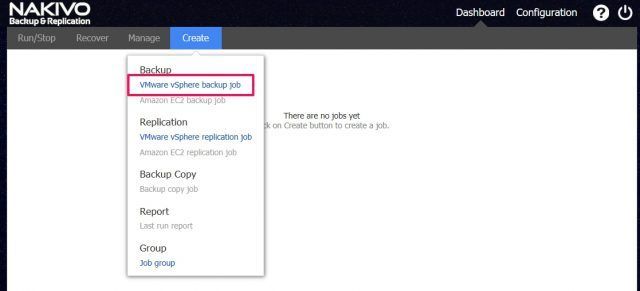
First, go to Create and click on a VMware vSphere backup job.
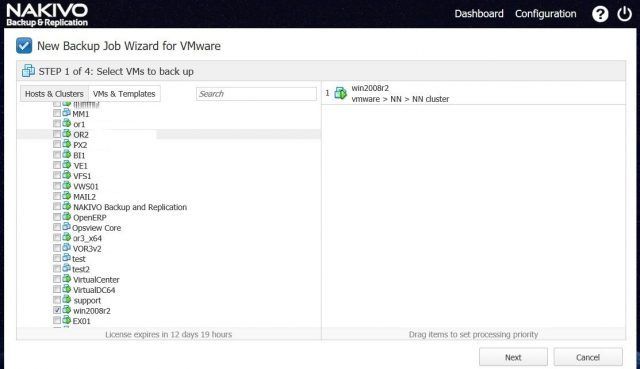
Select a server that you would like to backup and click on a Next button.
Select backup repository.

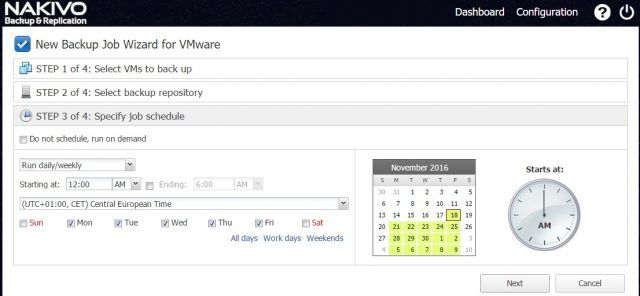
Select job schedule. You can create a daily/weekly schedule or you can run a job on demand.
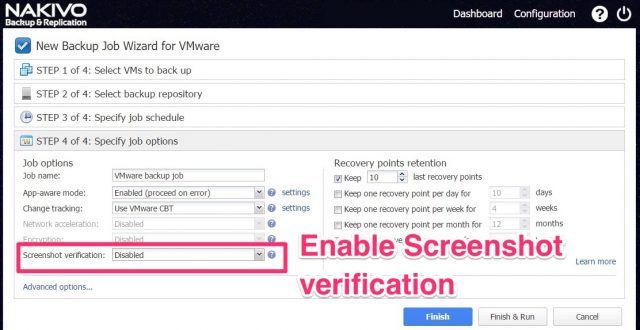
When you reach step 4 out of 4, you have to select Screenshot verification to enable that feature.
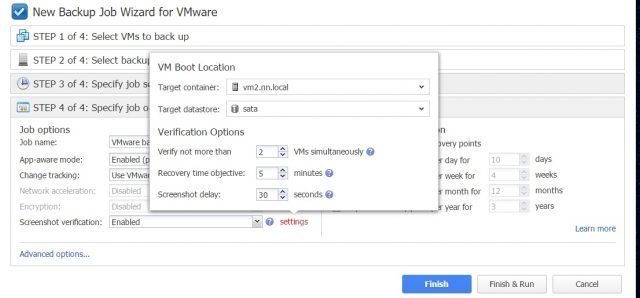
A new window will pop up. Here you select the server and datastore where the server will be run in order for a verification process to complete. This feature is welcome as you want to select a server which has more resources and a datastore with more space.
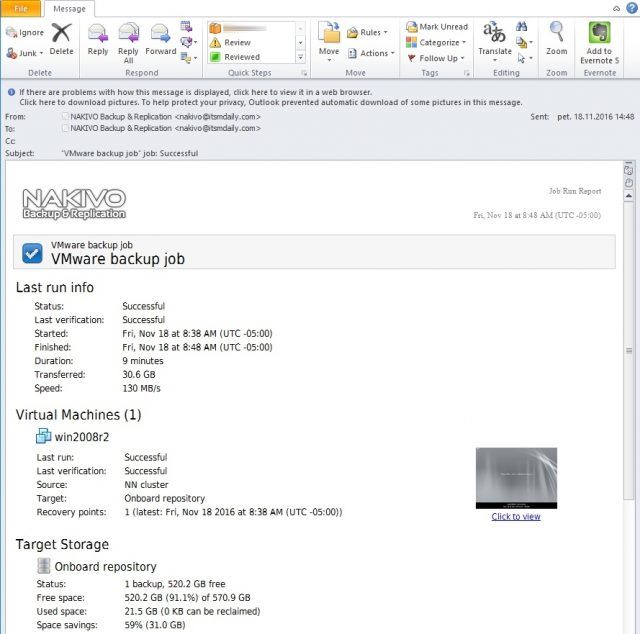
When you complete the last step, you can press on Finish & Run button. The backup process will begin and once complete, Nakivo will run and verify backup for you. It will do this in a sandbox environment so that it avoids any conflicts with the real server. Once the job is complete, you will receive an email notification with all the information about the backup.
A note to take: Screenshot verification feature does not perform a full restore, but rather boots the VM directly from the freshly created backup, which takes seconds.
You will see information like Status, Source, Target repository and Target storage. You will see usual information like backup duration, Transferred size and Transfer speed. There is also additional information that was not present before. – Screenshot. It’s just a thumbnail, but when you click it, it will scroll the view down to the bottom of the email.
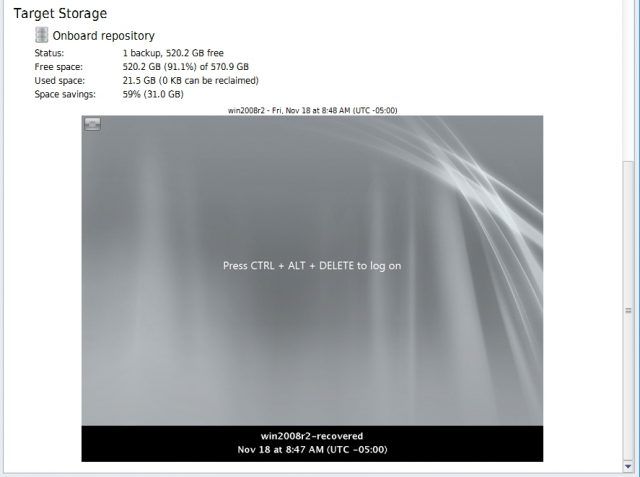
Here you see a screenshot in a bigger state. You will also see the server name, date, time and status. In our case, it was successfully recovered.
Conclusion
I wish I had access to this technology sooner. I lost many nerves when using old technology. Sometimes I couldn’t sleep knowing that I have a problem with the backup and will need two days to fix the problem. Sometimes I couldn’t sleep because I had to recover the backup but was unable to, due to a problem with the software or backup data. In addition, imagine how much time you save and how much better sleep you have knowing that you are able to restore.


Leave a Reply