One of the best Nakivo 7.4 features for me is a feature called Nakivo Automated VM Failover. I hope I can explain how you can benefit from this feature and save money at the same time.
Just for a moment think about the name – Nakivo Backup and Replication. You can see immediately from the name that the product can backup and replicate data. Usually, we backup data so that we can restore in case of failure. On the other hand, we can replicate data so that we fall back to that replica and continue working. Replication saved my behind once. At one point we had a site with two servers, virtualized, but without shared storage. In addition to backup, virtual machines were replicated to the second server. One night the main server failed, and in the morning I received a call from the branch manager that the ERP and file server don’t work and that printing is impossible.
All I did was to start a replica and the site was operational. This was simple. Mainly because replica was being used on the same site, with the same network.
Nakivo Automated Failover – it’s show time
When you want to apply the same principle to the off-site data center, things become a little more complicated – or not. In the past, there was only one solution. It’s called “Enterprise” way. You had to have very expensive “Enterprise” storage on both locations – primary location and offsite location. In addition, both locations were ideally connected via dark fiber for the super fast link. Another component was an L2 network which was expensive. In general “Enterprise” solutions are very expensive. Now, in 2018 in the world of software-defined, things are so much easier. For example, you can replicate data to the off-site data center and use a feature called Automated Failover which ensures that the failover is successful.
How come it”s possible to replicate data to off-site without super speed?
This question is one of the most popular regarding off-site replication. You see, Nakivo is engineered for those scenarios:
1. Incremental replication replicates full VM data for the first time, but then you can use incremental replication which will send only the changes between the last replica. That way, you need to send much fewer data.
2. WAN Acceleration will optimize, deduplicate and compress data so well, that amount of data being sent, is much lower and therefore much faster compared to non WAN accelerated transfer. In addition, it will save you money as dedicated WAN acceleration appliances cost an arm and a leg.
How to create Nakivo Automated Failover?
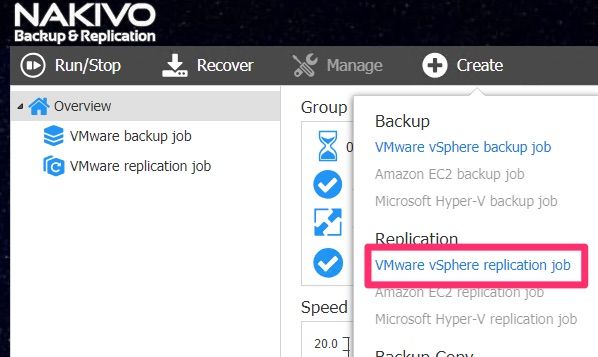
It’s simple, it requires just a couple of steps. The first requirement is that you have a replication job.

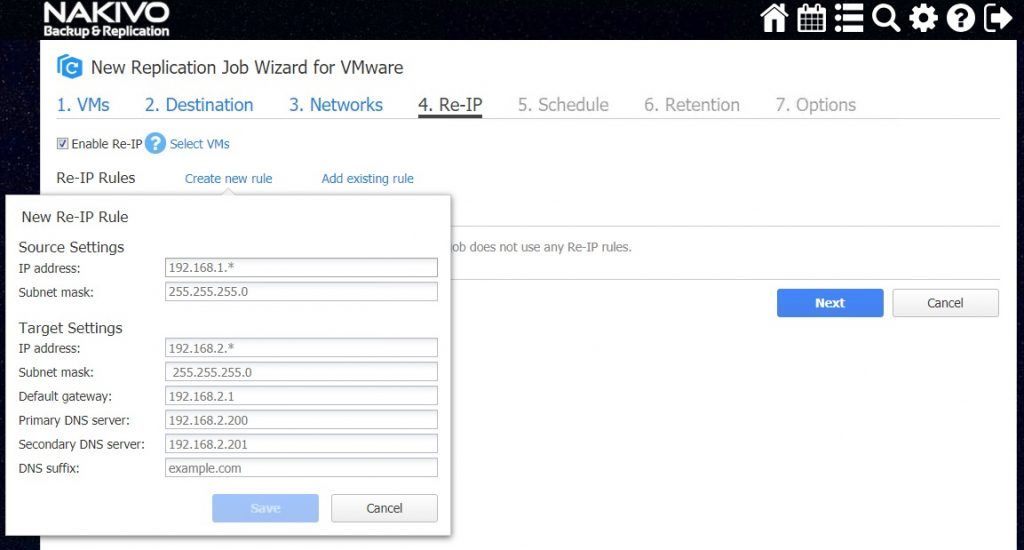
We can create re-IP rules which are used to change IPs on a remote location. Re-Ip rules can be saved and re-used.

Enable Network mapping, that way, source network will be mapped to the destination network and the virtual machine after it boots.
One we have replication running, we can do a failover. One of the benefits of Failover job is that if you have multiple replication jobs, you can combine them in a Failover job.
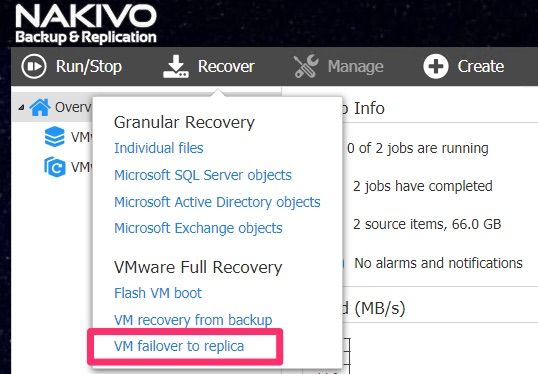
Let’s take a look at how easy it is to do a failover. Go to Recover – VM failover to replica

Next step is to enable network mapping. That way we tell the Failover job how it should handle mapping of the virtual network of the remote location.

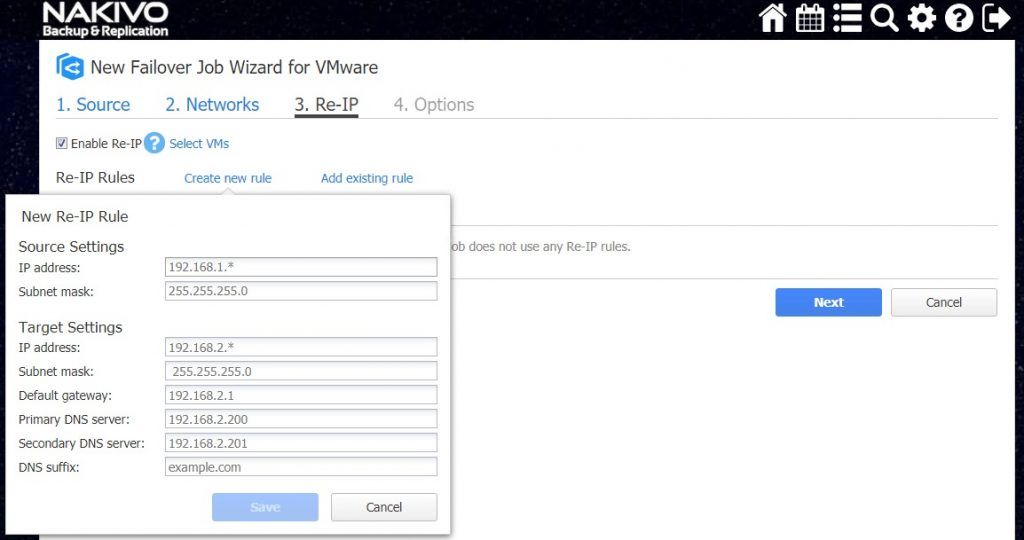
Next step is to create Re-IP rule we can also use one we saved before. That way we tell the failover job which IP’s it should assigin to the VM’s.

Remaining step is to select VM’s which will have enabled VM failover. Good stuff is that failover jobs can be populated with existing replication jobs and thus enable automated recovery of the services.
Conclusion
Nakivo Automated VM failover is a major feature. Even small businesses can benefit from this feature as it enables very affordable disaster recovery. Automated VM failover takes care of the network aspect by using Re-IP functionality. Now, you only require one click to be up and running.


Leave a Reply