Nakivo Backup and Replication is one of the best and fastest growing backup solutions for VMware, Hyper-V and Amazon AWS. It is quickly gaining in popularity. I like to write about features that are kind of logical but can be easily forgotten. Well, forgotten until you have a problem. Did you know that you can use a feature called Self Backup in Nakivo? I would like to show you how easy it is to use that feature, importance and why to self-backup at all.
Nakivo Self-Backup is a feature you can use to the backup configuration so that in case of a major problem, you can be up and running as soon as possible. Just think of all the bad scenarios that can happen in the data center, think about the worst case scenario. Let’s say that your data center goes down and you lose Nakivo Backup and Replication server. Just think what configuration you lose, it is crazy. Information like Amazon AWS config, connections to vCenter servers, connections to Hyper-V servers, all repositories that you have and all the transporters you have configured.
In addition, if you are a replication freak like me, you will also loose configuration for remote repositories with the backup. If you lose Nakivo Backup and Replication server and you have to restore your datacenter or just the main servers, what do you do? How much time you lose with a new installation and with all the credentials and IPs you have to enter? I would rather put that time to a minimum and drink a tea in peace while servers and data is being restored. Well, as it happens, Nakivo has crafted a feature to prevent such scenarios and really make Administrators job much easier.
How to configure Nakivo Self Backup
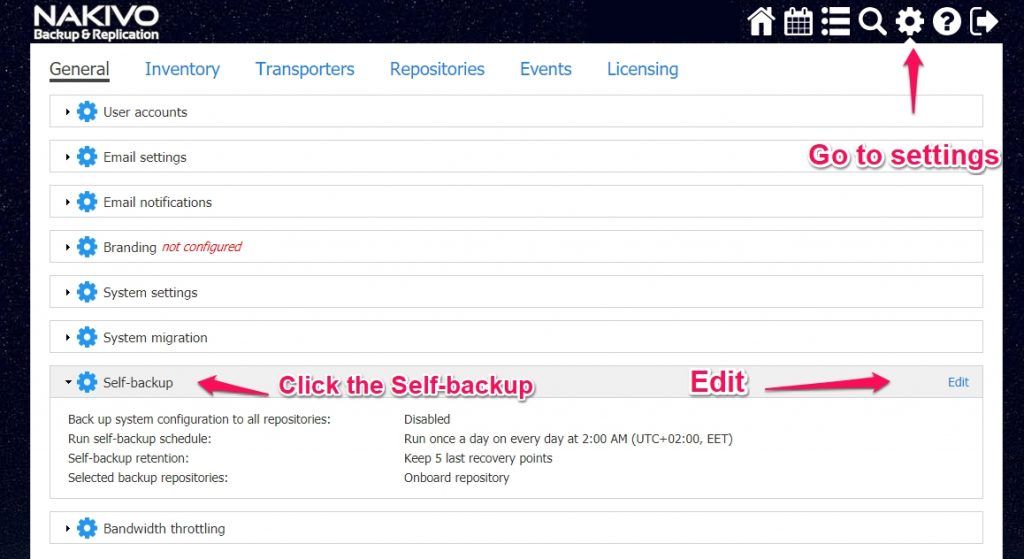
In order to configure Nakivo Self-Backup, you have to log in to the Nakivo backup console first. Then go to Configuration via Settings button, General and select Self Backup. Once you click on an Edit button, you can start editing the settings.

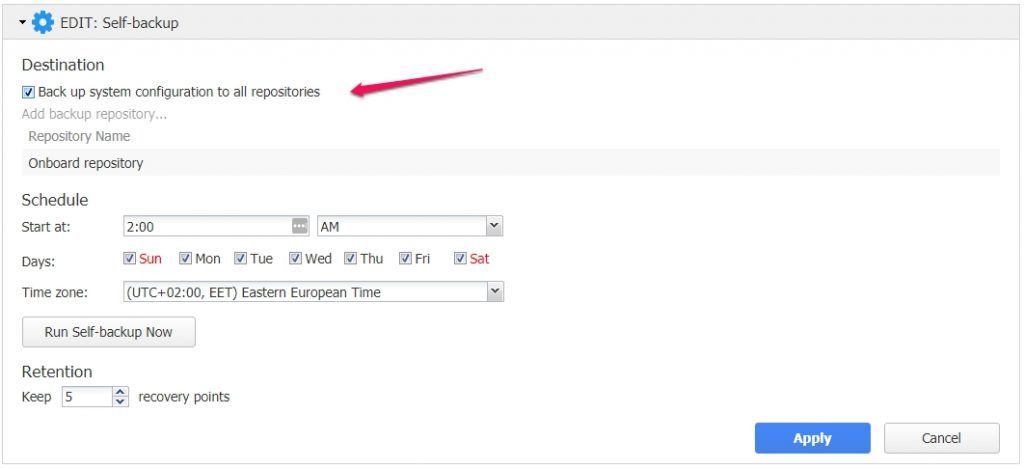
A new page will open. There is a pretty smart option which you can select Backup system configuration to all repositories. This option will ensure that backup will be sent to all repositories that you have. That way you don’t have to worry about one node only.

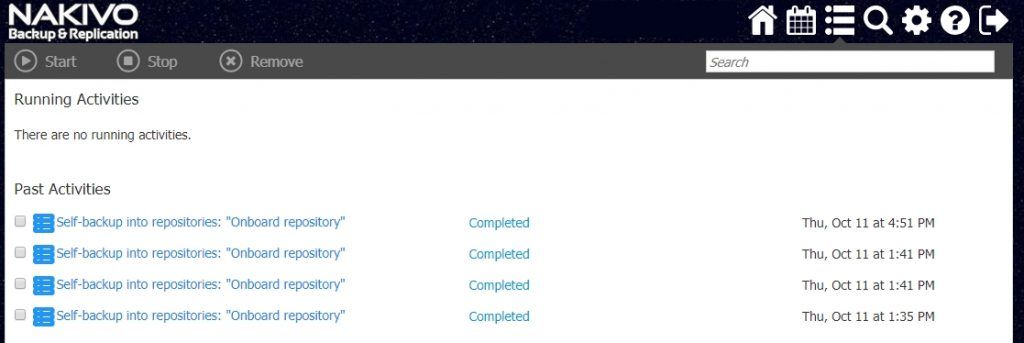
You can schedule self-backup. That way Nakivo will backup configuration automatically on selected days. But if you do major changes to the system, like for example add a new repository or new node in another location, you can start the self-backup manually via Run Self backup now button.

When you need to restore
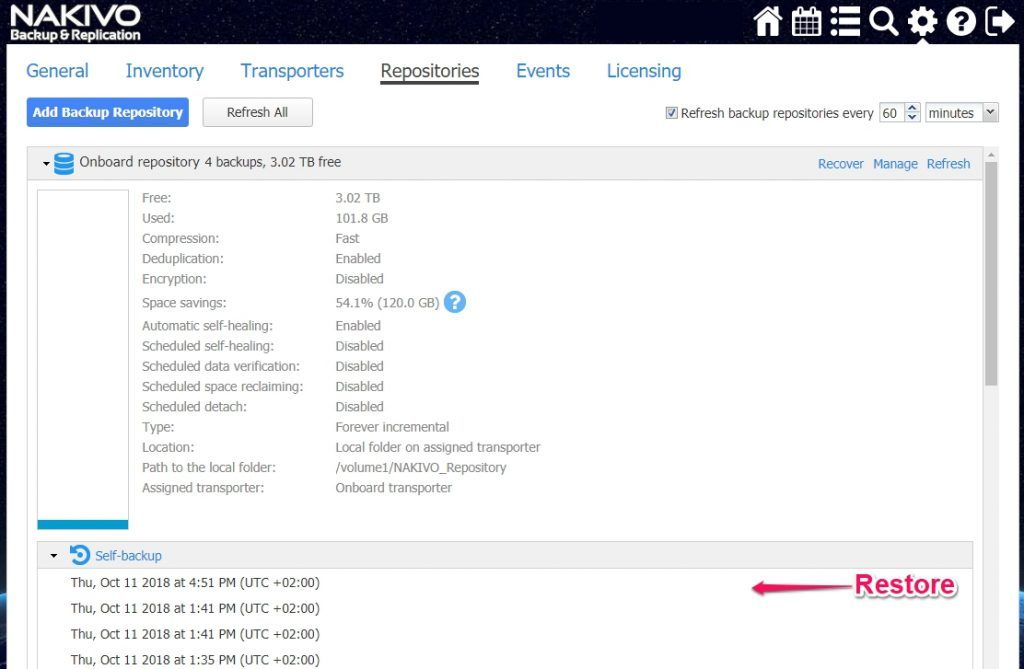
When you have to restore settings from a backup, you can easily return to the previous configuration by going to a Configuration section.
Restore Self-Backup
By using a restore function, you can restore the configuration to a previous state easily, like if you entered the wrong passwords or if you have removed repositories or vCenter. But if you lose Nakivo Backup and Replication like in an event that the server is deleted, you can easily connect to the repository and your configuration backups will be there. Then it is just a matter of a click to restore Nakivo Backup and Replication configuration.

Another cool trick you can use when migrating to another server is to export configuration which you can import on the new server. To export configuration, go to Configuration, General, System Migration -> Export System migration. Then proceed with the new installation on the new server. To restore a complete configuration, go to Configuration, General, System migration and click on Import System Configuration. Voila. This will make migrations easy, very easy.
I really hope that potential users can see all the simplicity Nakivo uses in their software design. Everything is done in a way that is simple to use and saves users time. A lot of time. You can try Nakivo and see for your self, pretty quickly as well, as there are multiple deployment options available, including NAS installation packages.


Leave a Reply