Flash VM Boot is one of the features that reduced stress on backup administrators tremendously. What used to be a daunting process is now a simple process which enables administrators to recover their virtual machine quickly and easily.
Ransomware, which is one of the most feared threats currently, can be dealt with ease with Nakivo Backup and Replication. Still, issues like 12-hour power outage, broken storage or a flood can occur – you know Murphy’s law. Even more common scenarios like problems with bad patches after windows update can be solved quickly, easily and most importantly – without downtime to your business.
Files servers can quickly occupy 1TB space and even more. Imagine restoring process after ransomware infection. 1TB data to restore takes a lot of time.
Luckily, Flash VM Boot can turn any backup to a virtual machine which you can boot and run. That way, you can only have a small downtime until the VM boots.
Nakivo Flash VM Boot
When you want to start a virtual machine from backup, you have to create a new Flash VM Boot job.
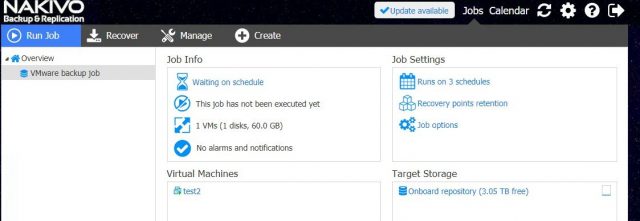
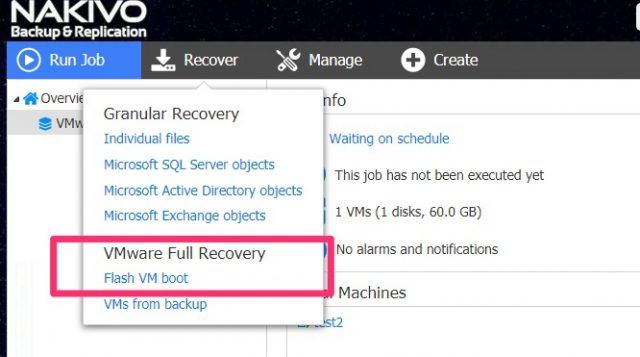
First click on “Recover” and click on a Flash VM boot.
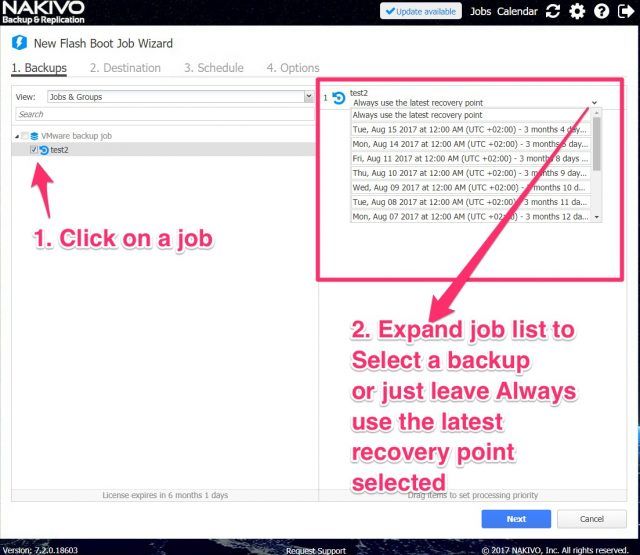
You have to select a VM from the backup job. Here you can use a default Always use the latest recovery point, or you can select a snapshot and run VM from an even older backup.
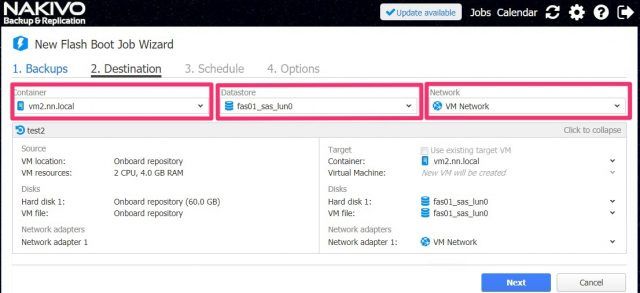
On the second step, you have to select VM host which will run the VM. You have to select Datastore and you can also select a VM network, which is very handy when you want to start VM in an isolated environment.
You can set up a schedule for Flash Boot Job which is pretty awesome as you can automate backup testing this way. You know, the feeling when auditors ask when was the last time you tested the backup… That feeling only gets better, because it’s really good to know that the backup can in fact – be restored. Honestly, how many times have you tested restore process? I have selected Do not schedule, run on demand for this article.

The last step is specify job options:
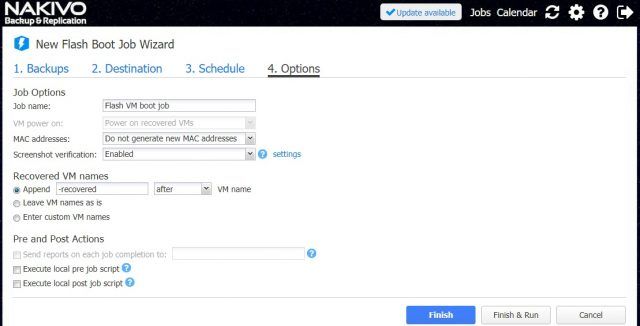
You can configure the following job options:
- Job name – you can choose the custom name for the job.
- VM power on – you can choose whether to power on VM or not after recovery.
- MAC addresses – Do you want the same MAC addresses for your VM? If not, Nakivo can generate new addresses, by default, this option is set to off.
- Screenshot verification – this is an extremely useful feature as it will run the VM and then take a screenshot which is delivered to your email as a proof that virtual machine works. If you schedule Flash VM boot job, this can be used as a backup verification more info on the screenshot functionality review.
- Recovered VM names – you can choose from Nakivo to append prefix before or after VM name. An example is -recovered. You can also leave the name as is or enter a custom name.
- Pre and Post actions – Nakivo can send an email with reports to an email address. It can also execute scripts before the job is run or after the job is completed.
When you confirm you will be redirected to the main page where you can see job information.
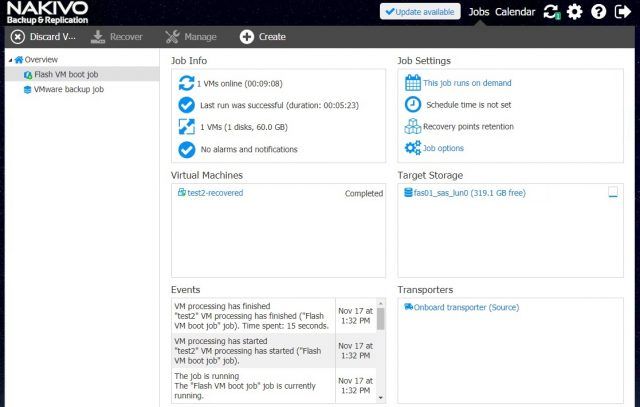
Nakivo will do the magic and will do everything necessary in the VMware environment like create new machine, it will re-scan HBAs, it will add ISCSI targets, attach backup, etc… so that in the end, you have a running machine from the backup
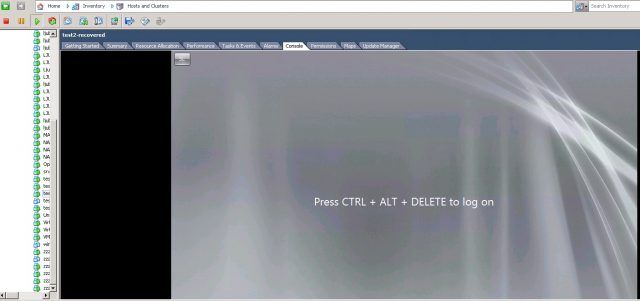
What to do after the virtual machine is run from backup?
You have saved the day and avoided disaster, emails or file server is working again. Now what? How to recover running VMs which were created by the Flash Boot VM? You have two options:
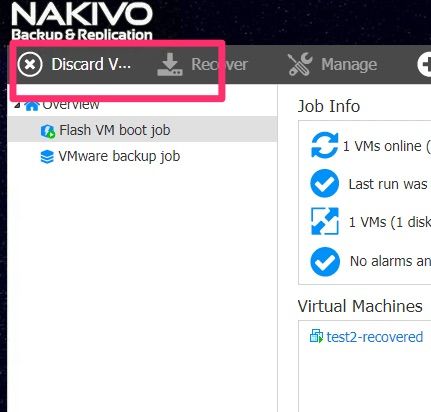
- You can migrate the booted VMs using VMware vSphere’s Storage vMotion. (Please make sure to set the option to convert the RDM disks to VMDKs). When you have migrated the booted VMs, you can click the Discard VMs button in the Flash VM Boot job. The job will detect automatically that the VMs were migrated and will not discard them.
- Replicate the booted VMs by following the below steps
- Refresh the inventory in the Configuration (in order that VMs created by the Flash VM Boot are added to the product).
- Create a new replication Job for the VMs that you want to recover permanently.
- Run the replication job
- When replication job has been completed, start the job again. This step is needed because the recovered VMs were running and in that time were obtaining changes while the initial replication was in progress.
- To make sure there is no data loss, power off the VMs created by the FLash VM boot in VMware vSphere client, and run the VM replication job one last time.
- Discard the VMs created by the Flash VM Boot.
- Power on the VM created by the replication job.


Leave a Reply