When I started with this blog, I was using shared hosting. Price was good, and it had an unlimited plan. Unlimited domains, disk space… For a while, it was ok until I installed several plugins. Then, out of the blue, the home page took long long time to load. Their response was that it’s a plugin messing with my page. I disabled most of them, but still, from time to time, there were problems. Then I tested page speed with Google page speed service. One of the issues I could not get fixed was server response time. It was always above recommended value. I had it. Even though I am no Linux expert, I managed to set up a VPS on Digitalocean with Virtualmin installed. Looking back, it was a great experience. Once installed, it’s easy to manage VPS. Then in January 2014, it happened. I got hit, Reddit effect in full swing. Poor VPS handled the load for a while but after a while, users experienced timeouts.
I knew there were 2 ways to solve Slashdot effect (The Slashdot effect, also known as slashdotting, occurs when a popular website links to a smaller site, causing a massive  increase in traffic). 1st option is to upgrade VPS to a better (more expensive plan), 2nd option is to optimize the same server with the software to improve serving and caching mechanisms. The same effect may not happen again, so spending money on a better plan is not an option. Optimizing VPS is a better way. To setup technologies like Varnish, Nginx, PHP-FPM, and Memcached is not easy for a novice user. Not because it’s not possible to learn, but because learning takes time. A lot of time. And then you have to choose what you would like to do, invest time in the content for your blog or invest it in learning and mastering Linux.
Setup $10 Speed monster VPS for WordPress in 10 minutes
I recently stumbled on a genius product from genius people called Easyengine. Easyengine is a program (actually set of scripts) that automatically installs everything you need to reach the full potential of your server. Nginx used by default? Tick. Memcached? tick. Varnish? well, no, but since the idea is based on Nginx it uses Nginx caching which has the same effect, tick. What about configuration? It does everything automatically. All you have to do is invest fraction of your time to set it up.
What can you expect after switching to Nginx powered speed server, WordPress optimized server? Well, this is a result:

Please note, the procedure is slightly different if you are setting up a new site or if you are migrating your blog to a new VPS with Easyengine. We will cover both options.
Setting up a new website on a $10 VPS with Easyengine
What you will need:
- $10 Digitalocean VPS Ubuntu 14.04 64bit (by signing up with this link you will get $10 in credits, meaning that you can use your VPS one month for free)
- 10 minutes of your time
Login to the server, on windows you can use putty. On OSX you can use Terminal – type ssh root@1.1.1.1 (you should replace 1.1.1.1 with your server’s IP)
First we have to secure our web server with the firewall. A firewall is simple but it will get the job done and will secure newly created virtual private server. Type:
ufw allow http
sudo ufw allow 22222/tcp
ufw logging off
ufw enable
We also have to create a swap file. Easyengine recommended swap size for VPS with 1GB RAM or less is 2GB.
sh swap 2G
this script will create 2GB Swap file in folder /swapfile, you can check if swap was created if you type
execute the following command to obtain the EE installation program:
wget -qO ee rt.cx/ee && sudo bash ee
Environment will be set, at the end EE will ask you to enter your name and your email. Name and email is required to track changes to git.
Setting up libsm6:amd64 (2:1.2.1-2) …
Setting up libxt6:amd64 (1:1.1.4-1) …
Setting up libxmu6:amd64 (2:1.1.1-1) …
Setting up libxaw7:amd64 (2:1.0.12-1) …
Setting up graphviz (2.36.0-0ubuntu3) …
Processing triggers for libc-bin (2.19-0ubuntu6.3) …
Cloning EasyEngine (ee) stable branch, please wait…
Installing EasyEngine (ee), please wait…
EasyEngine (ee) required your name & email address
to track changes you made under the Git version control
EasyEngine (ee) will be able to send you daily reports & alerts in upcoming version
EasyEngine (ee) will NEVER send your information across Enter your name [root]: Erik Blum
Enter your email address [root@dc4.itsmdaily.com]: email@mydomain.com
If you’ll start the installer now, it will return an error due to failed gpg key. We ‘ll fix this via procedure below
Change gpg-key-fix value to true. (to exit Nano press Ctrl+X, confirm with y)

Now Easyengine can be installed.
Once EE stack is installed, we can run a script which will set up complete environment for our site. You can choose from many options including multisite install but in general, options are: install Nginx + WordPress (no cache), Nginx + WordPress + WordPress cache (either W3TC or WP Super Cache, you can choose which one) or full blow solution that can serve and sustain many connections without any problem – Nginx with Fastcgi_cache + Memcached + W3TC cache. We will focus on the latter.
Enter the following command :
ee site create example.com --wpfc (instead example.com enter a name of your domain)Congratulations, you have built yourself a super fast WordPress environment.
You can point DNS to your newly created website. It can take a while for DNS to refresh globally.
Management tools are listening on port 22222, to access them, point your browser to https://10.11.22.333:22222 (replace 10.11.22.333 with your ip)
to secure access admin area use one of the following commands:
ee secure --auth (change default easyengine/easyengine username and password)ee secure --port (change default port)ee secure --ip (whitelist IP's)if you have a static IP, whitelisting can be the best option
Migrate your blog to $10 VPS with Easyengine
What you will need:
- $10 Digitalocean VPS Ubuntu 14.04 64bit (by signing up with this link you will get $10 in credits, meaning that you can use your VPS one month for free)
- A little bit more than 10min
- Plugin Local indicator for WordPress
- Caffe
First, install Local indicator in your WordPress site. It’s a nice little utility which indicates on which server you are logged in. It can be extremely helpful as you will know when you are logged in to the old server and when you are logged in to the new server. Each server gets color indication and once you hover with your mouse over it will show you it’s IP as well.
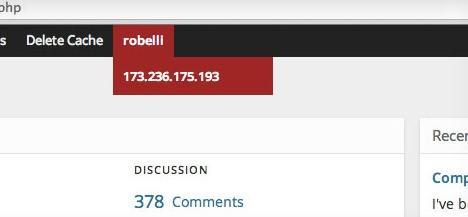
Login to new server and set up the Firewall and Swap.
Obtain EE stack:
wget -qO ee rt.cx/ee && sudo bash ee
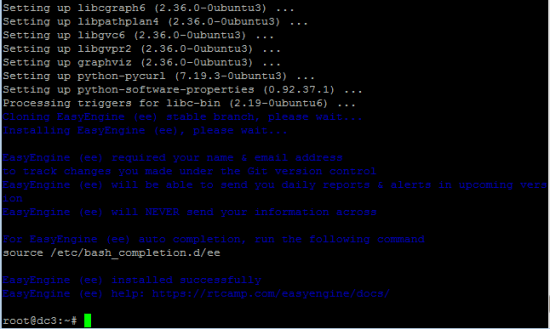
Now that environment was set, we have to make couple adjustments first
First we will fix GPG and then move on to mysql section and change entries db-name and db-user to true. We do that so that we can enter WordPress credentials for the database as part of the process.
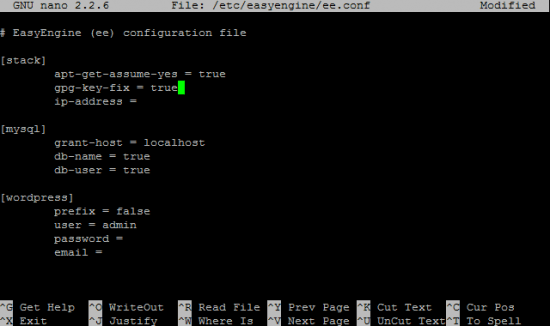
To install Eeasyengine enter:
now type (you have to replace example.com with your domain):
ee site create example.com --wpfcYou will be asked for MySQL database name, database user and database password. You get this information from wp-config.php file which is located in root of your public folder on the old server. Alternately you can enter new name, user and password and change wp-config.php once you migrate files from old server.
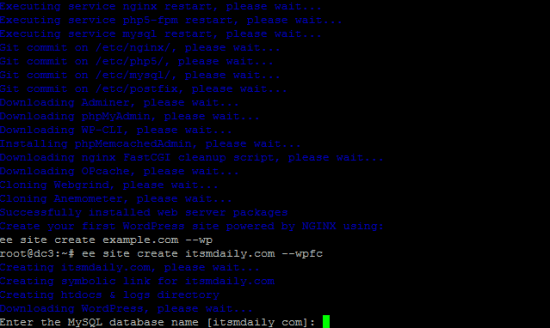
Once setup is completed, you will see WordPress username and password. Since we are migrating our website, this information is not needed. You also get a information how to optimize W3TC Total Cache for the best performance.
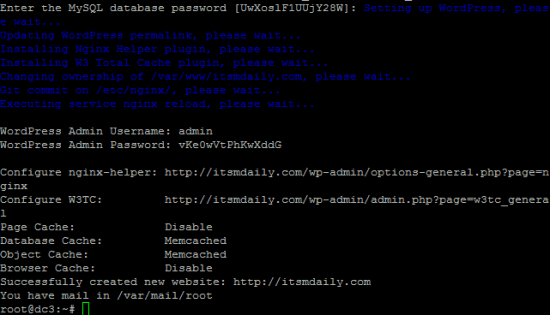
Server is ready. Now we have to migrate data from the old server to the new server.
SSH to your old server, and create a dump of database:
Login to your new server. First we have to install PV. Type: apt-get install pv
Now we can import a database
rsync -avz --progress root@1.1.1.1:/tmp/example.com.sql /tmpNow that we have database dump file in /tmp type:
change example.com (the one which is located at the end) to the name of your database
We have successfully imported a database, we have to copy files as well. Since this tutorial can be used by user migrating from shared hosting (copy via SFTP) as well as users migrating from VPS, we will use user www-data. By doing that we won’t have problems with permissions.
set a password for user www-data
change login shell for www-user
www-data:x:33:33:www-data:/var/www:/usr/sbin/nologin
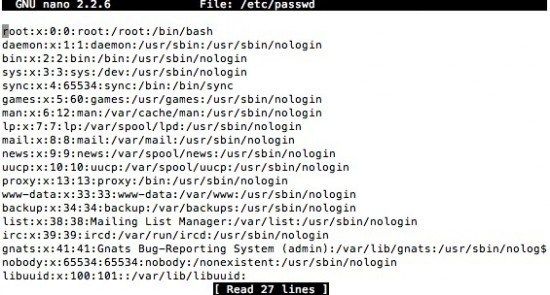
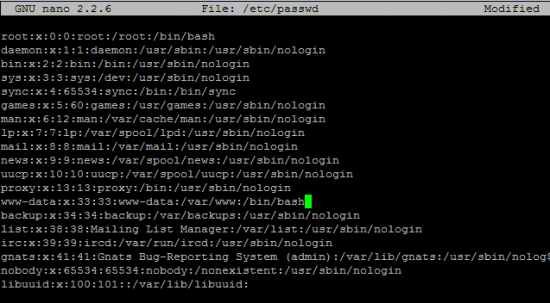
change it to: www-data:x:33:33:www-data:/var/www:/bin/bash
Now we have to copy WordPress data from the old server to the new server
cd /var/www/example.com/htdocs (go to public www folder)
rm -rf * (remove default WordPress installation created by Eeasyengine)
rsync -avz --progress root@1.1.1.1:/var/www/example.com/htdocs/* . (copy files from the old server to the new server, please note that you have to enter IP from the old server and your public www folder location Files from the old server were copied to the new server.
Users using shared hosting can copy data via Cpanel or you can download files first to your local drive and then via SFTP copy them to the new server, you will have to use www-data user for SFTP connection.
Installation and migration is now complete. Add IP of the new server and domain to your computer’s hosts file. This is done so that we don’t have to change public DNS just yet. Once we do that, we can log in to WordPress located on the new VPS. Confirm that all plugins work and change W3TC caching settings. Now that you confirmed that WordPress is live you can change domain DNS settings. The local indicator will let you know which server you are connected to. Before our mission is complete:
– Don’t forget to change the shell back for www-data user.
– Secure admin area.
– Install a plugin called Nginx helper which you will use to purge Nginx cache when using the new site, the plugin is installed automatically but in this case, it has to be installed manually.
You have completed a new VPS installation and migrated your blog to Easyengine. Under the hood, you have the best technologies like Nginx Fastcgi_cache, PHP-FPM, and Memcached. You can be at peace now as this server is able to survive 168 MILLION hits per day.


I’ve seen some discussion advising the creation of an EE site using “ee site create example.com –wpfc” and then setting up Redis with “ee stack install –redis” and “ee stack install –phpredisadmin”
Thread can be found here http://community.rtcamp.com/t/witch-cache-to-choose-if-hhvm-also-installed-if-it-makes-difference/7925/8
Any thoughts on this?
Also thanks for guide on setting up the swap file!
Hi Mark,
I used to play around with nginx and redis cache on easyengine. There was always a problem of some sort. In the end, I switched to serverpilot (without any special cache) but it just works. I am tired of constant tinkering and fixing the server. I am really looking forward next generation of easyengine though, which will be web based (similar to serverpilot) and hopefully a complete solution with firewall and so on. As a side note, you can quite easily enable redis on serverpilot too.
Let me know how your redis experience goes on easyenigne.