With the latest release of Vembu BDR Suite v5.3, I decided to review the Vembu backup for endpoints, which is part of the suite. Endpoint protection is important since most data is being created and saved locally. Only after the document is complete is being shared on the network resources. Just think how many important files are saved on workstations – directors, managers, and HR personnel all create documents.
The number of ransomware attacks has increased over the last few years exponentially. Usually, the attacks start with phishing emails, if the employee is not careful, she/he can open malware files which will then start to spread across the network and encrypt everything it can. Another common way to lose data is with hardware malfunction. For example, an SSD can fail, and all data is lost for good. If we have a backup, the user receives a new computer, logs in to the domain, and we can push the backup agent and start the restore. The procedure is very simple and data is restored quickly.
If we have one great product for protecting our infrastructure, why not use it for client protection as well? That way we don’t have to maintain two separate products, backup admins don’t need additional training for the 2nd solution, and we can save on costs as well. In addition, Vembu does provide a FREE edition that can backup up to 10 endpoints for Windows, Mac, and Linux computers free of charge.
Vembu Backup for Endpoints Features
You are probably wondering what are features of Vembu Backup for Endpoints, let’s take a look at the features in no particular order.
- Files/Folders Backup – Backup individual files and folders from your Windows or Mac endpoints to the Vembu BDR Backup Server for free.
- Flexible Scheduling options – Vembu provides Continuous Data Protection for backing up files and folders on a minute-by-minute, hourly, daily, or weekly basis.
- Interruption-free Backup – After an interruption, Vembu will intelligently resume the backup from where it left off.
- Deleted File Retention – Retain any number of deleted files/folders based on their version count or the number of versions created within a time frame.
- In-built Compression & Encryption – All backups are compressed by the VembuHIVE file system & encrypted using the AES-256 bit algorithm both in flight and at rest.
- Restore anywhere – Instantly restore the entire backup files/folders to the original location or an alternate location.
- Bandwidth Throttling – This feature allows you to throttle the speed of the backup data transfer for a selected time, and helps in reducing the network traffic.
- Email Notification – Enable email notifications to receive notifications about the current status of the configured backups (like success, failure, missed, etc.)
Vembu Backup for Endpoints configuration
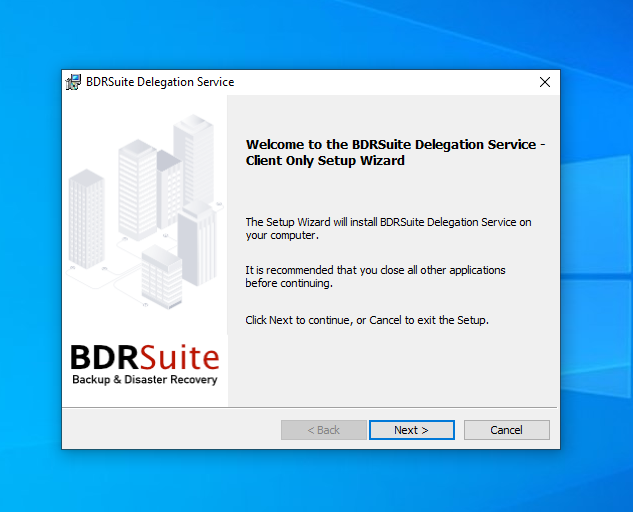
If you already use Vembu for backup of your virtual infrastructure, then you are already familiar with the interface, plus you have the benefit of one product that can back up your complete IT environment. Vembu BDR is very simple to configure and use. For example, To install the suite you start the setup program and click next, next, next. That’s how simple it is.
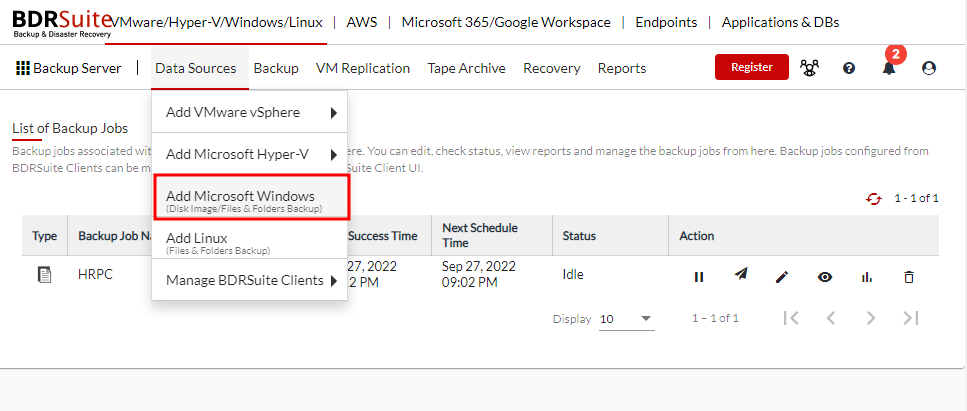
When we start the Vembu BDR, we have to login first. To backup endpoints, first, we have to add computer/computers sources. Click on Data sources and select Add Microsoft Windows.
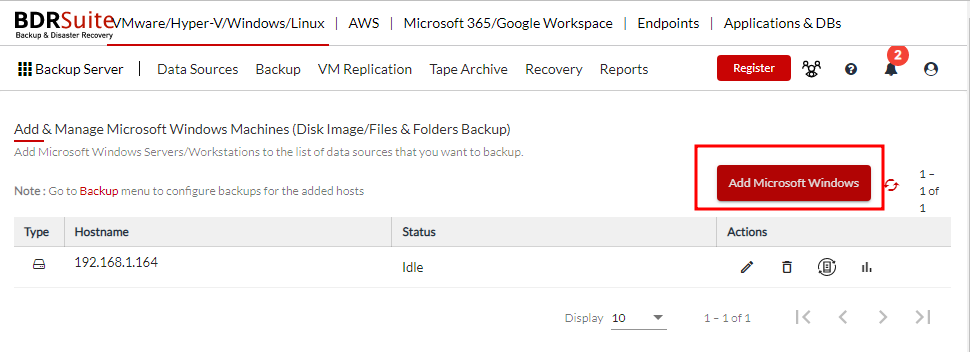
On the Add & Manage Microsoft Windows Machines page, we click Add Microsoft Windows button.
We have to enter the IP or DNS name of a computer. We also have to select the credentials we use to connect to the computer. In order to install Vembu backup agent, we have two options. The first option is to deploy the client automatically. In that case, the Vembu server pushes the agent to the remote computer and installs the agent automatically. The second option is a manual procedure. We have to download the agent and install it on the remote machine.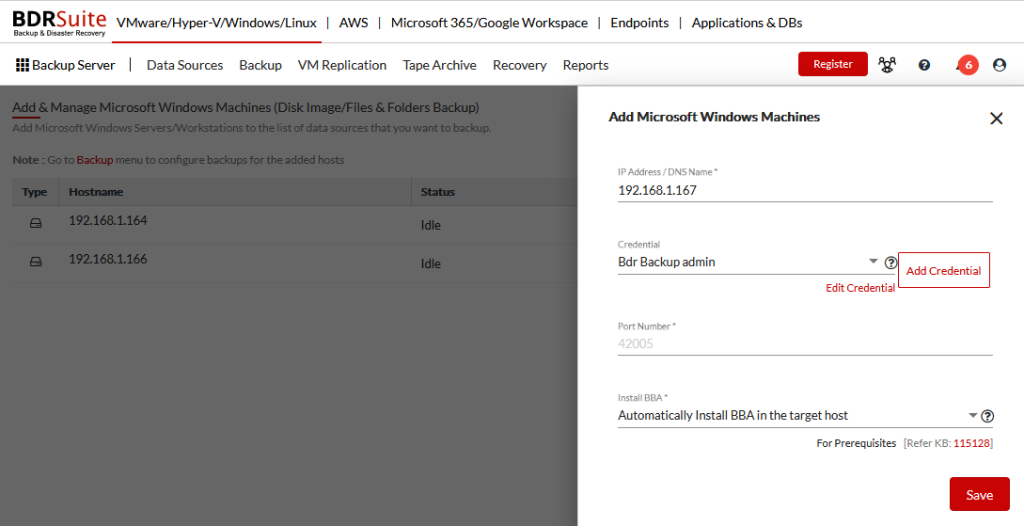
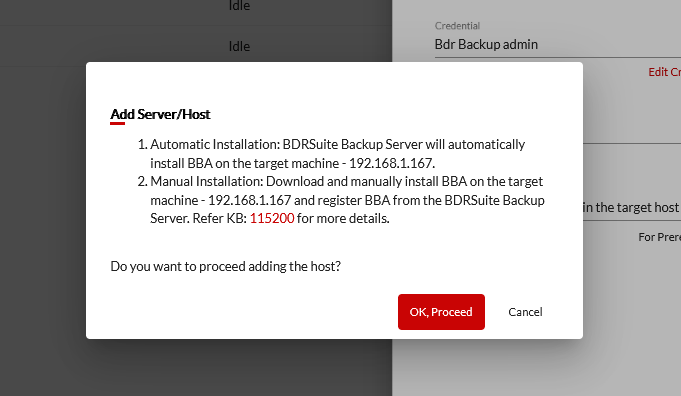
When we select Automatically install BBA in the target host, a pop-up will appear. It notifies us that the installation will start, and it also provides a link to the backup agent we can download if we prefer to do that instead.
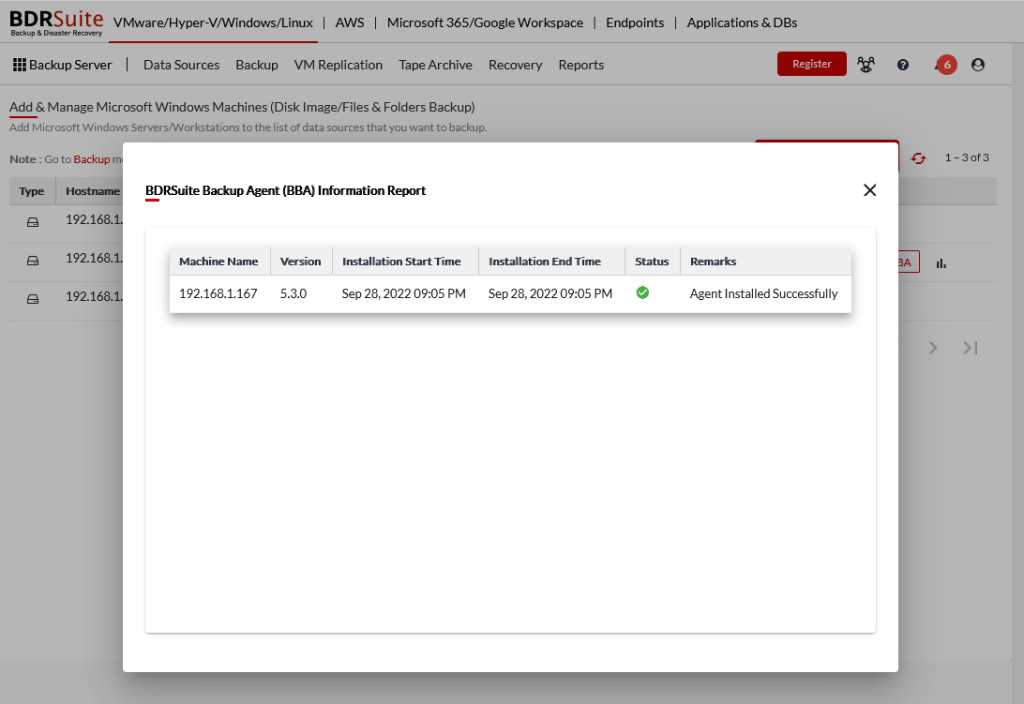
Once the action is completed, we receive notification of the task status.
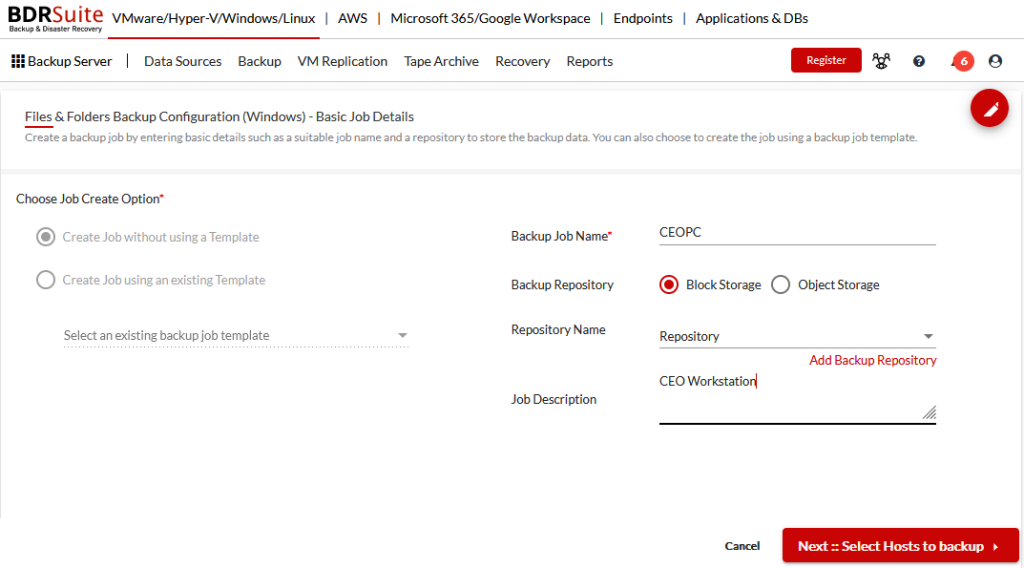
Now that we have installed the agent, we can create a Files & Folders backup job. Click on the Backup, Windows, and select Files & Folders.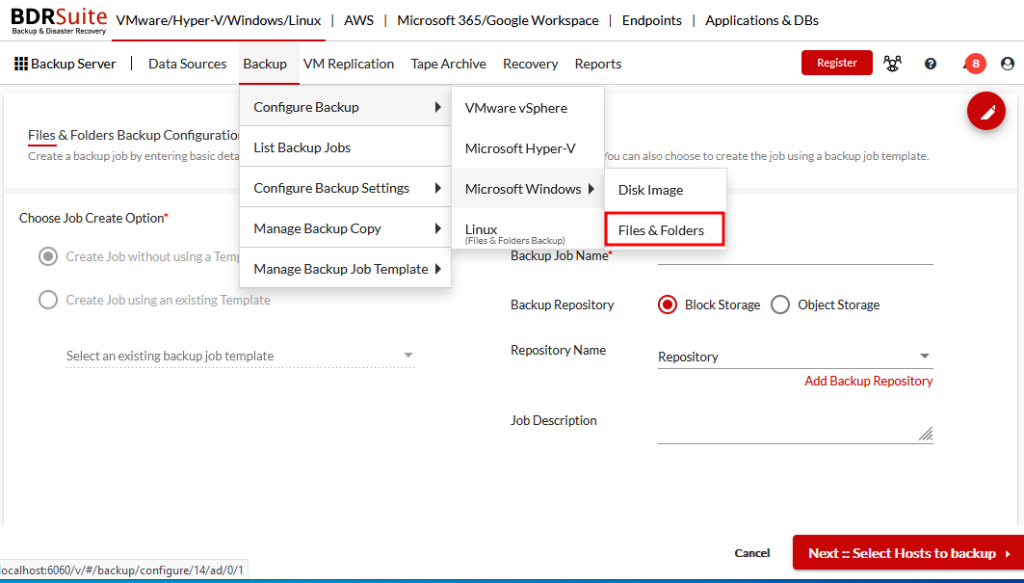 We have to enter the Backup Job Name, type of Backup Repository, and Job Description. Click on the Select Hosts to backup.
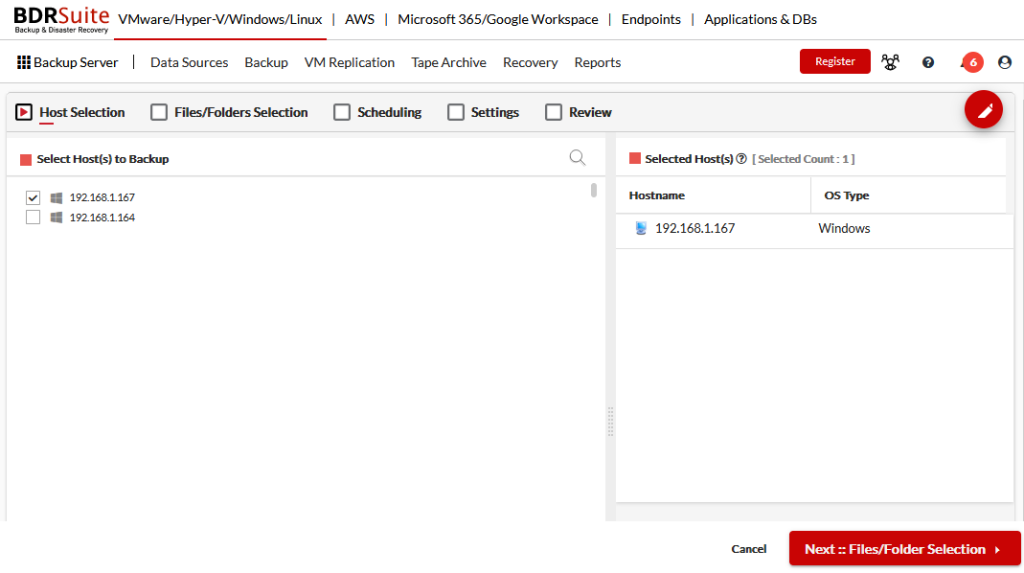
 We have to select a computer we would like to backup and click on the Files/Folder Selection.
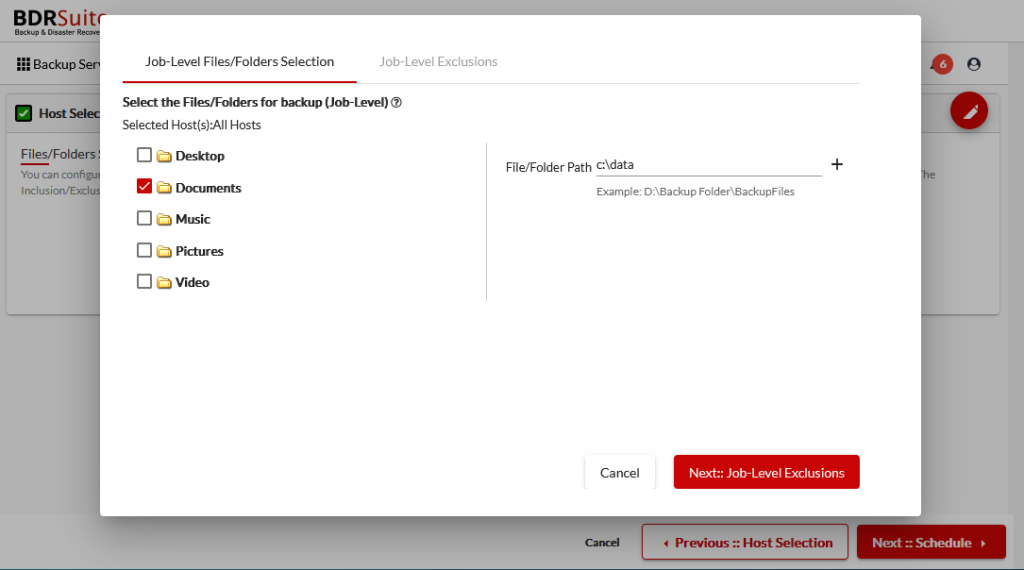
Here we can select folders we would like to protect. We can also add additional folders to the backup list. On the Job Level Exclusions, we can exclude files and Folders.
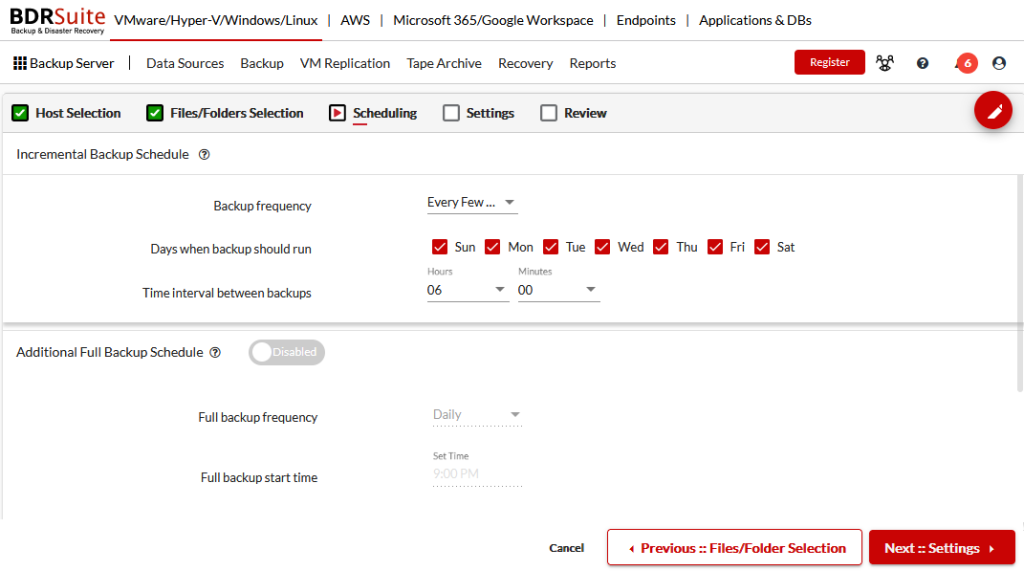
On the Schedule Settings, we set up a schedule for the backup job. Here we can select days on which the backup is run, for example, daily, or weekly…, we can also schedule full backup frequency… Click on Settings to proceed to the next setting.
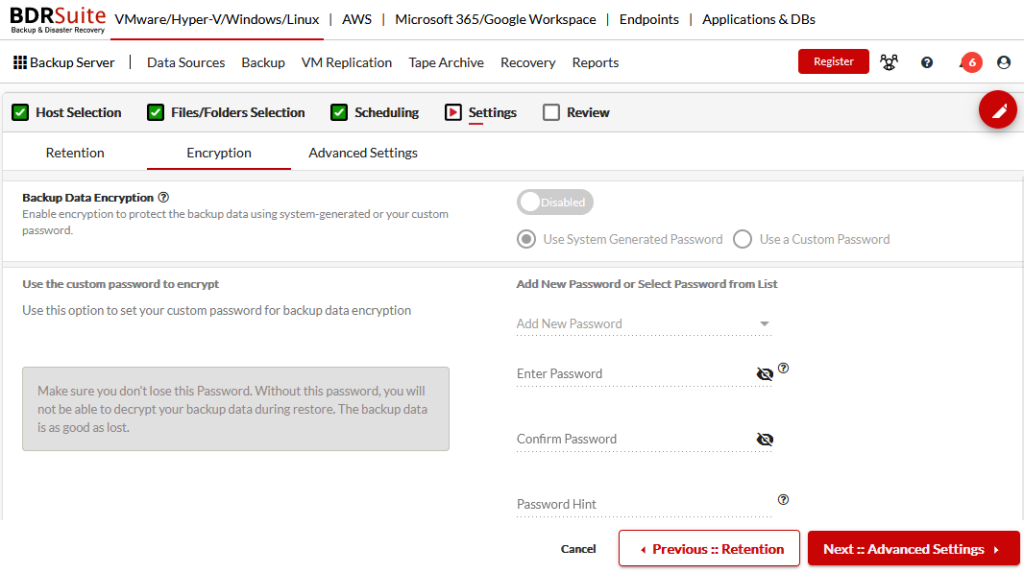
On the Settings tab, we can configure the number of versions to retain, the time period to retain – for example, the number of years, and the number of versions to retain for deleted files. To proceed, click on the Encryption button.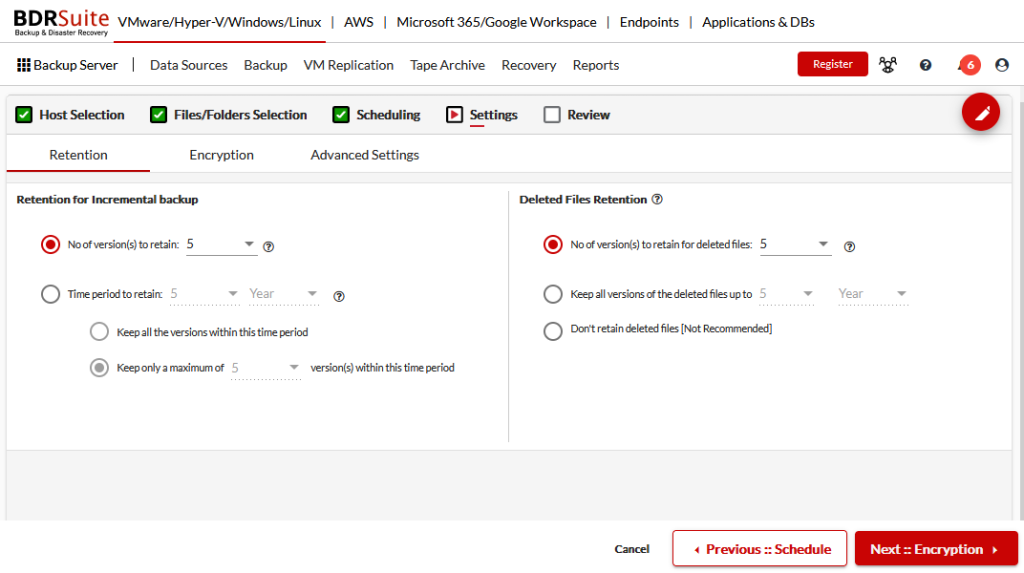 On the Encryption tab, we can enable encryption for the backup job. We can use the system-generated password, or we can use our own password. Click on Advanced Settings to proceed to the next step.
On the Advanced Settings tab, we can enable the feature to back up only the changed blocks during the incremental backup, Use Windows Directory Monitoring, and use the Microsoft Volume Shadow Copy service (VSS). 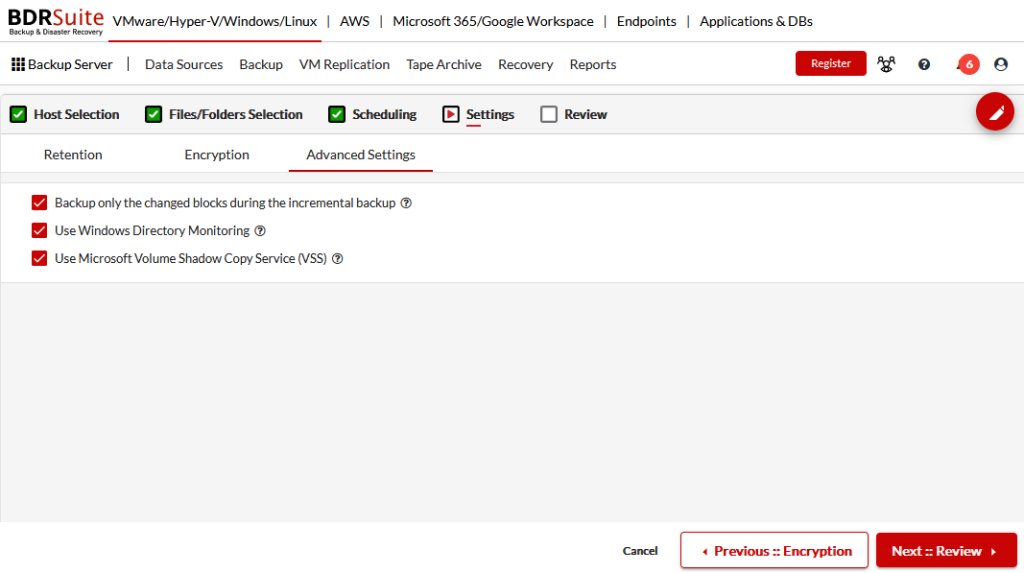
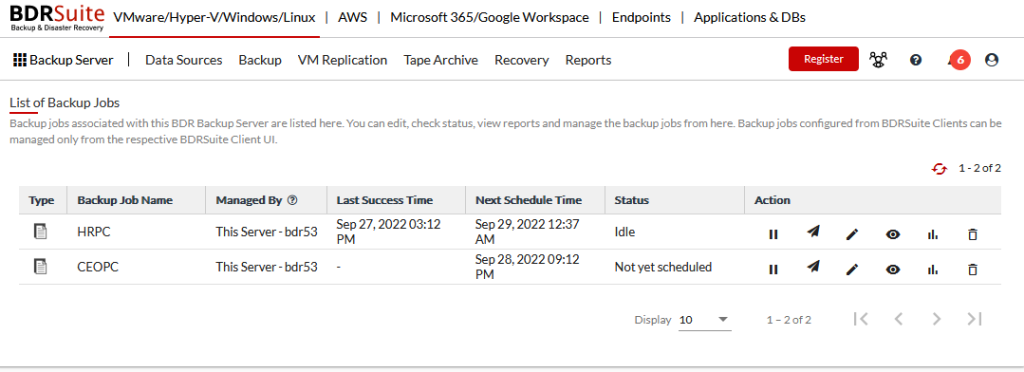
On the Review tab, we can review the backup configuration. When we click on the Save button, the backup job is configured.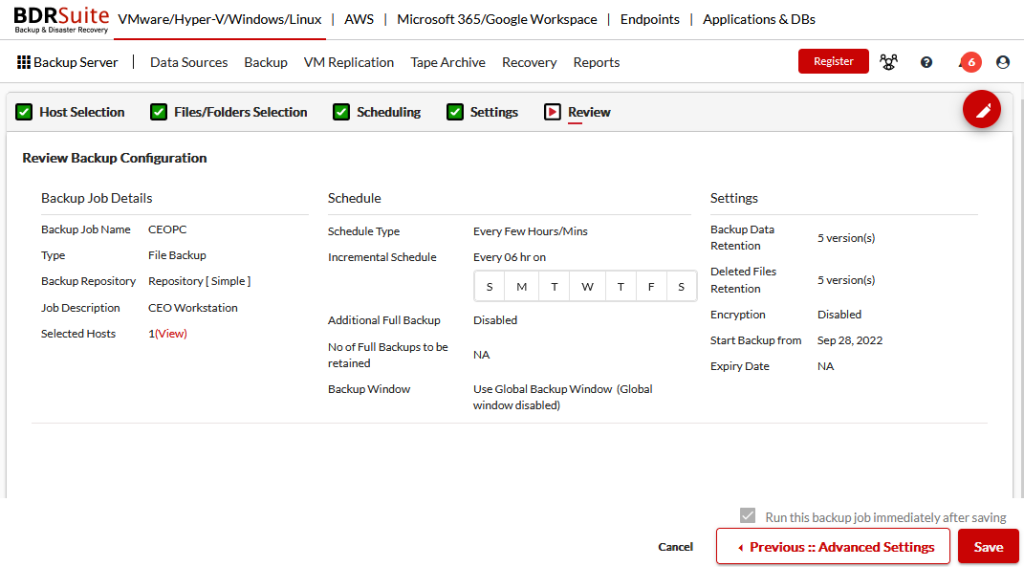 On the List of Backup Jobs, we can view all the backup jobs we have configured. We can pause the jobs, start jobs to run immediately, or look at the reports.
On the Dashboard for Backup Jobs, we can view the backup status of all the jobs for the last month. We can see if the job was completed, failed, or if there weren’t any newly modified files for when the job was run. 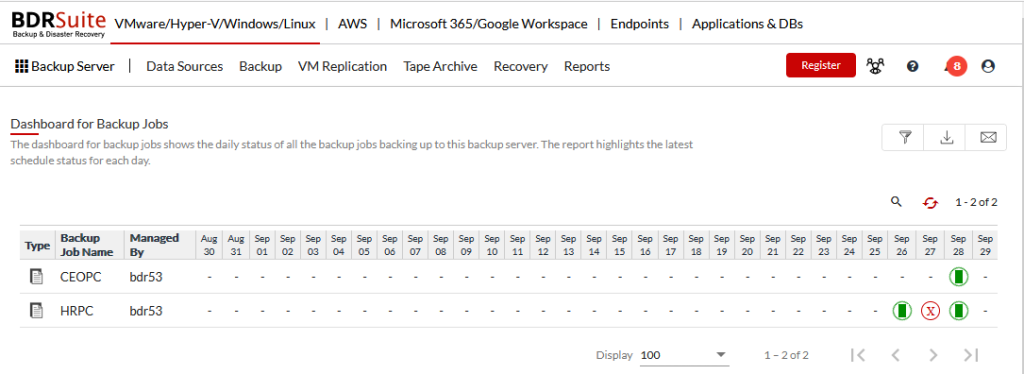
Conclusion
As you can see, the Vembu BDR Suite configuration is very simple. That applies to the installation and configuration. When choosing a backup vendor, it is important that the product can back up all parts of your IT infrastructure, from virtual, cloud, endpoints, and Office 365 / Google Workspace. That way, you will save time and costs. It is also important that the product is easy to configure/manage and is affordable. Vembu ticks all the boxes and I encourage you to try the product for free. They have a free edition and a full working trial edition where you can test the product for 30 days.


Leave a Reply