Nakivo Backup and Replication is one of my favorite backup solutions. It has been doing wonders for my friends and myself. When it comes to prices, I don’t think you can find a better deal, and the way they release regular updates is the way I prefer. Many points release between major versions so that you get constant improvements and reliability updates. If you already use Nakivo to back up your infrastructure, using it for Microsoft 365 backup makes the most sense. That way you have a unified backup solution, and you will save time and money. Did I mention that setting up a Microsoft 365 backup is very easy?
Let’s take a look at how easy it is to create a backup job and protect Microsoft 365 with Nakivo.
How to backup Microsoft 365 with Nakivo Backup and Replication
In order to create our first Microsoft 365 backup job, we have to add Microsoft 365 repository. That is easy, go to Settings, Repositories and click on Add Backup Repository. You can create a new backup repository, or you can use an existing backup repository. I chose to create a new backup repository.
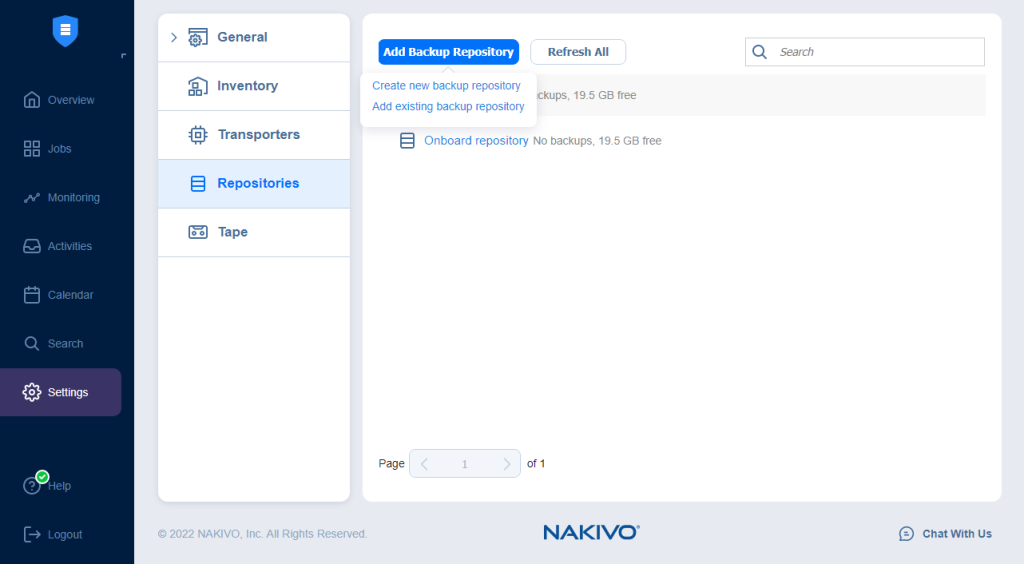
Click on a SaaS – Directly attached storage or locally mounted share on an assigned transporter used for storing Microsoft 365 objects. Click on Next.
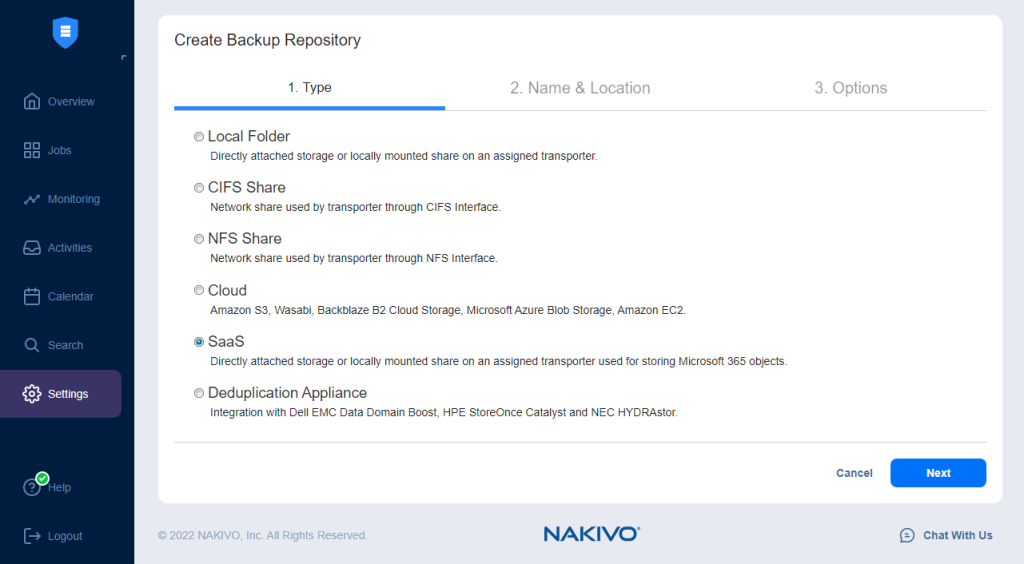
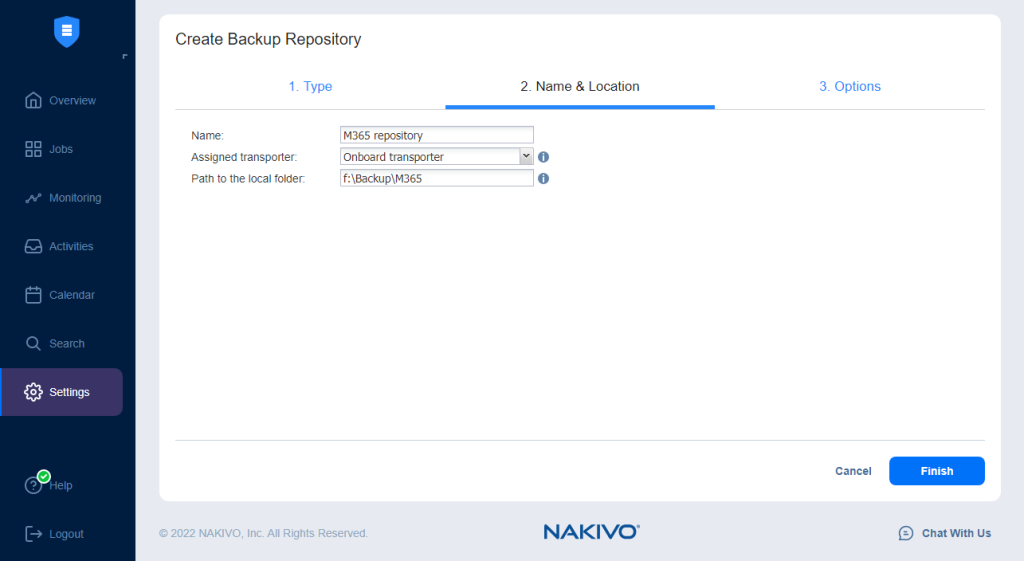
On the Name & Location section, choose a name for the repository, choose the assigned transporter and enter the path to the local folder. Click on the Finish button.
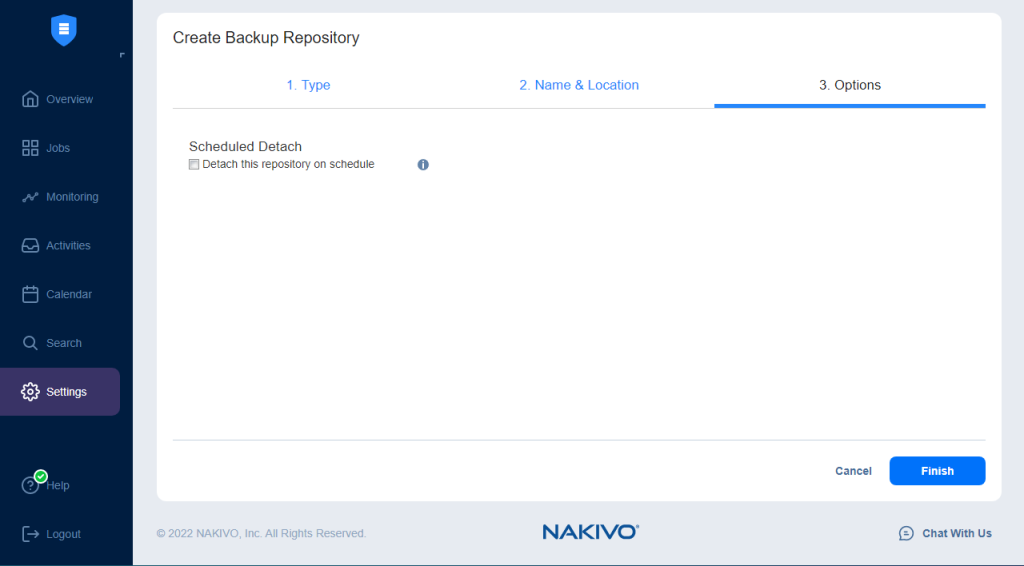
On the Options section, you can choose to detach this repository on schedule. Click on the Finish button to complete creating the backup repository.
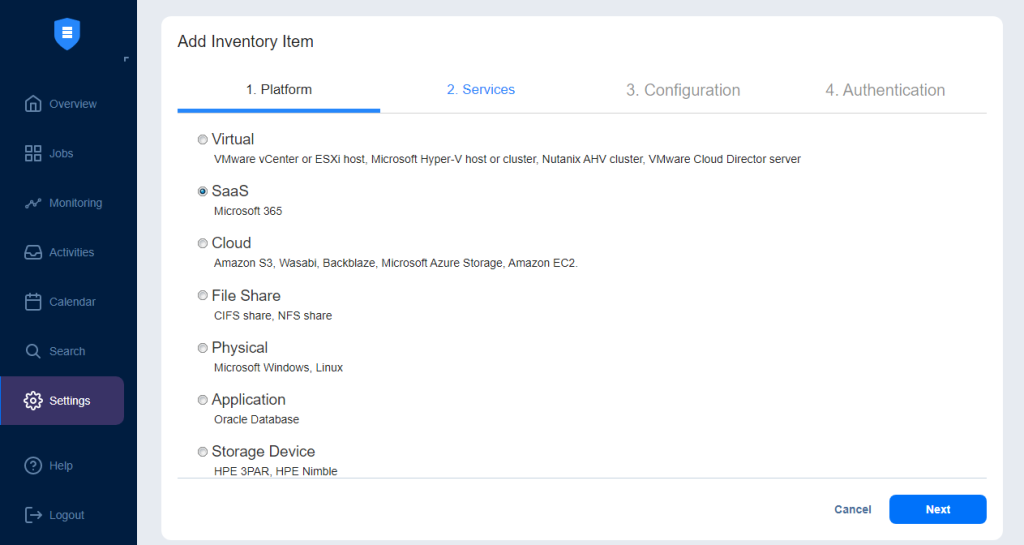
Now that the repository has been added, we have to add Microsoft 365 to the Inventory. The process is straightforward, and it only takes a couple of minutes to complete. Go to the settings, Inventory, and click on the Add New… button. On the Platform section, select SaaS Microsoft 365. Click on the Next button to proceed to the Services section.
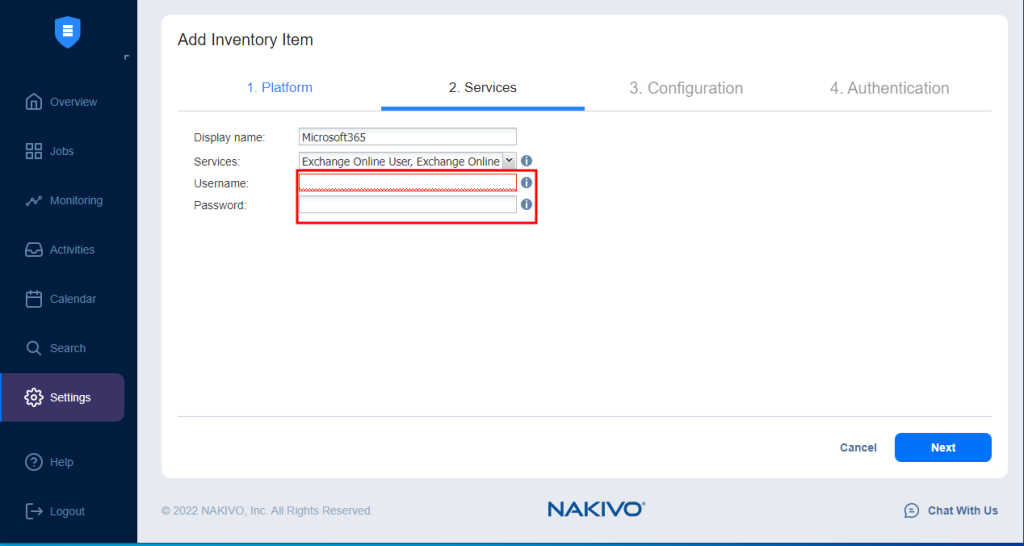
On the Display Name, enter the Display name, and select which type of service would you like to backup, Username, and Password for the Microsoft 365 administrator. Click on the Next button to proceed to the Configuration section.
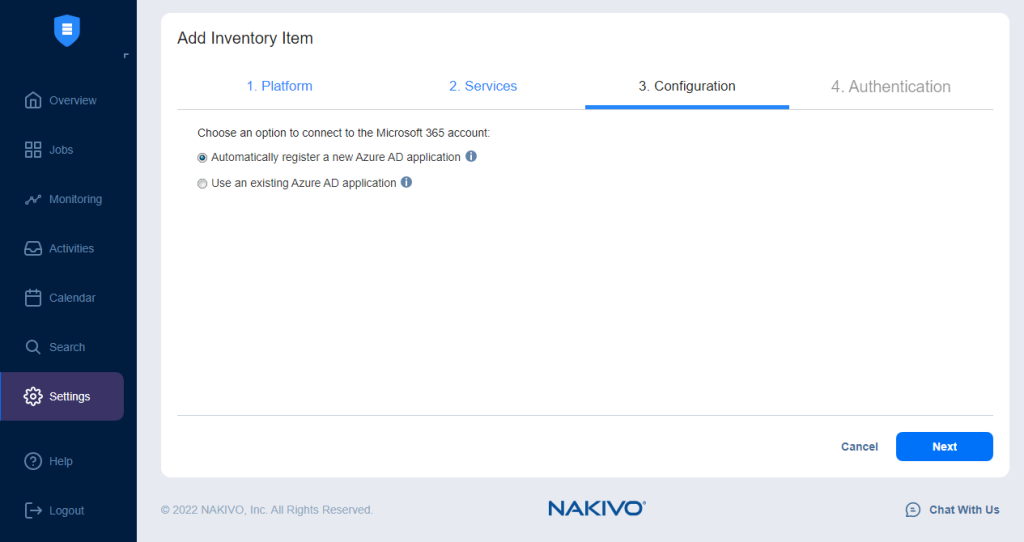
Here you have an option for Nakivo Backup and Replication to automatically register a new Azure AD application, but you also have the option to register it manually. You are provided with the necessary steps which make manual procedure fast. To proceed to the Authentication section, click on the Next button.
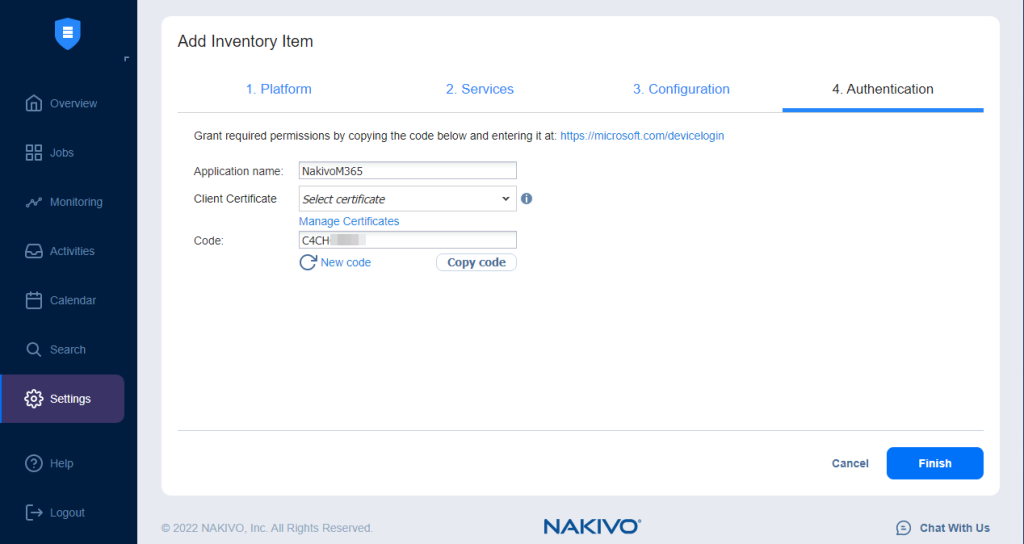
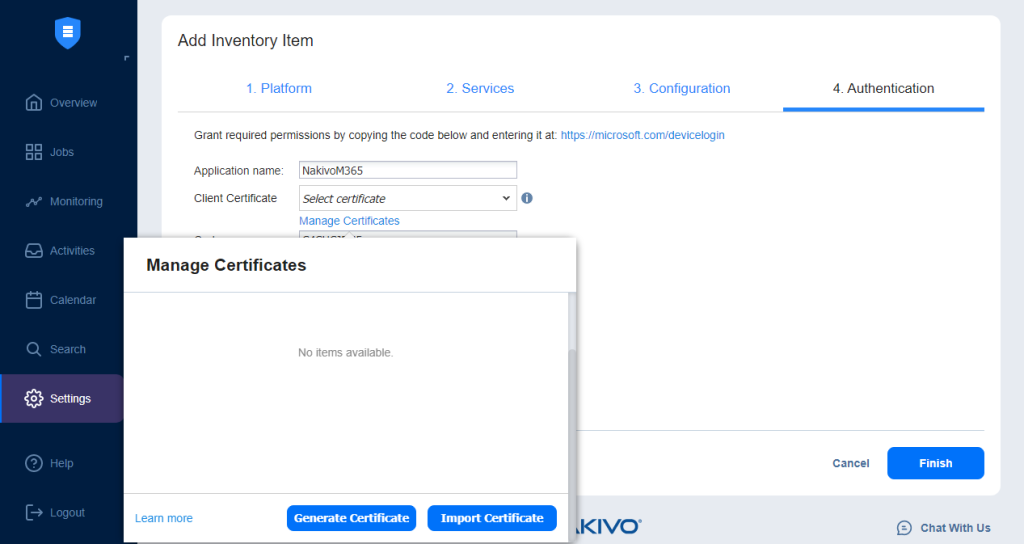
On the Application name, name the Application. On the Client Certificate pull down you have two options, you can let Nakivo generate a certificate, or you can use your own (see pictures below). The code is provided by Nakivo which you paste to the Microsoft application registration window.
Once you click on the Manage Certificates, a new window will pop up, where you can generate a certificate or use your own.
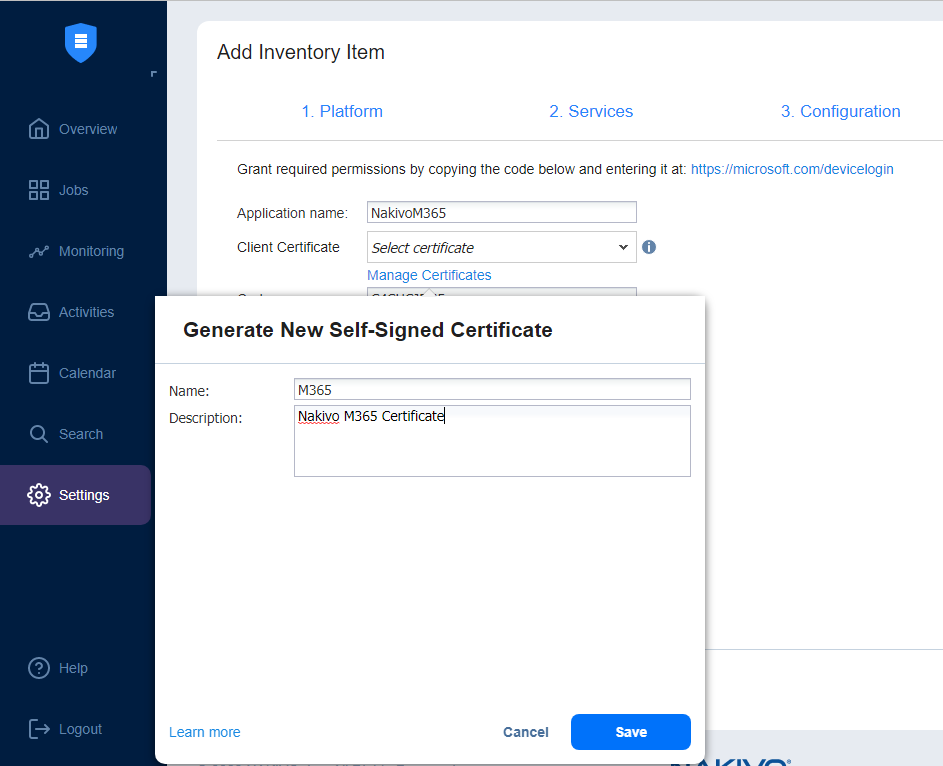
If you generate a certificate, you have to enter the name and the description of the certificate. Click the Save button once you put the name and the description in the fields.
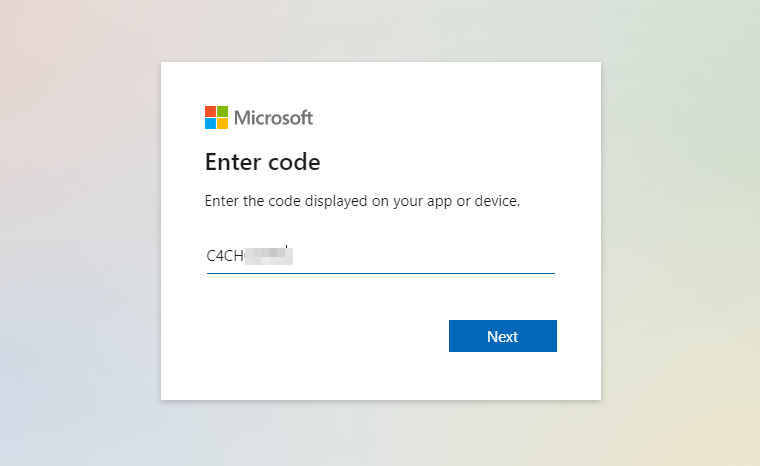
Once you enter the code provided by Nakivo, Nakivo will be able to ensure all proper application permission is set for Microsoft 365.
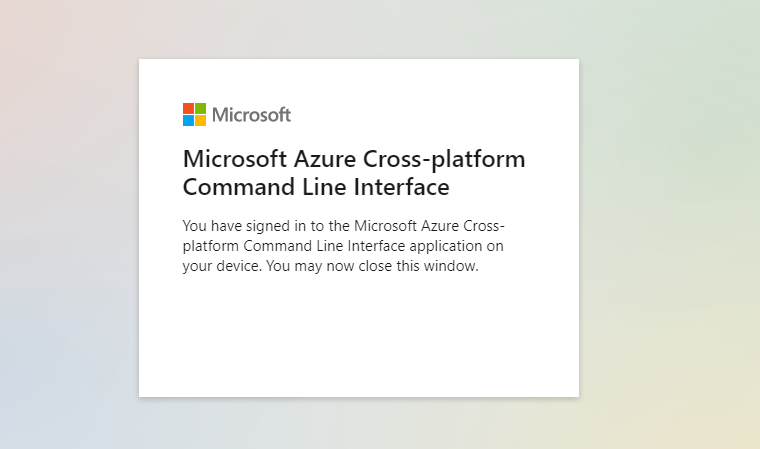
Once completed, you can close the window.
Once you complete all required steps, you will see a window similar to the one below. With the exception of a number of mailboxes, OneDrive, sites, and teams.
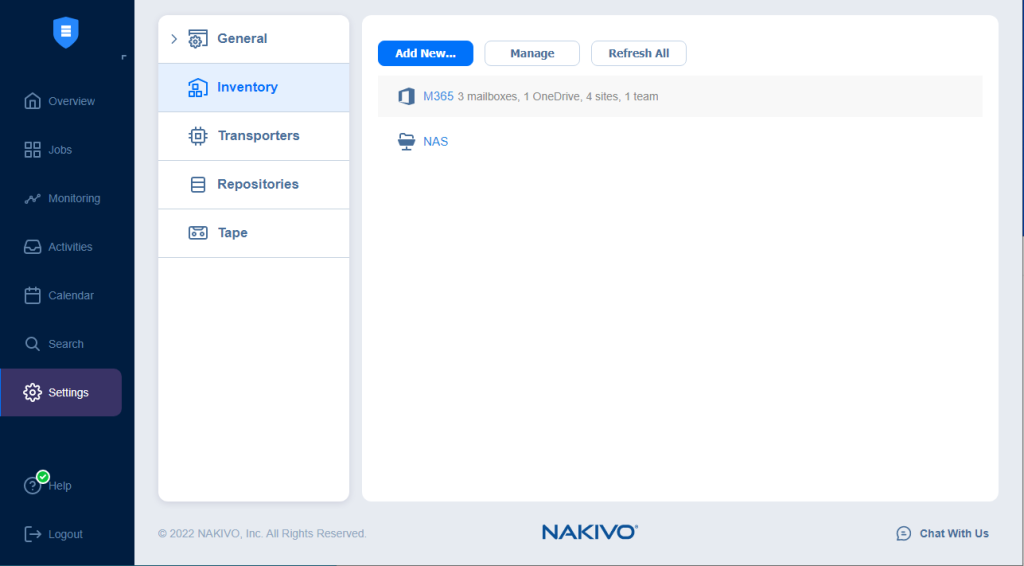
Now that we have set all prerequisites, you can create your first Microsoft 365 backup job. Go to Jobs and click on the Create button.

Click on the Microsoft 365 backup job.

On the Sources section, select what you would like to backup. Click on the Next button to proceed to the Destination section.
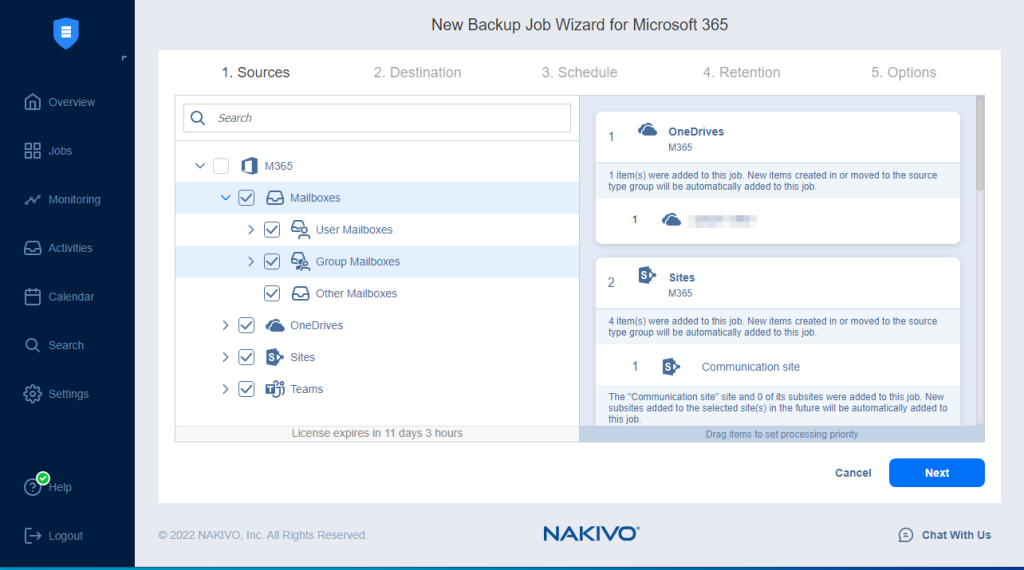
On the Destination section, select the repository you will use for the Microsoft 365 backup. Click on the Next button to proceed to the Schedule section.
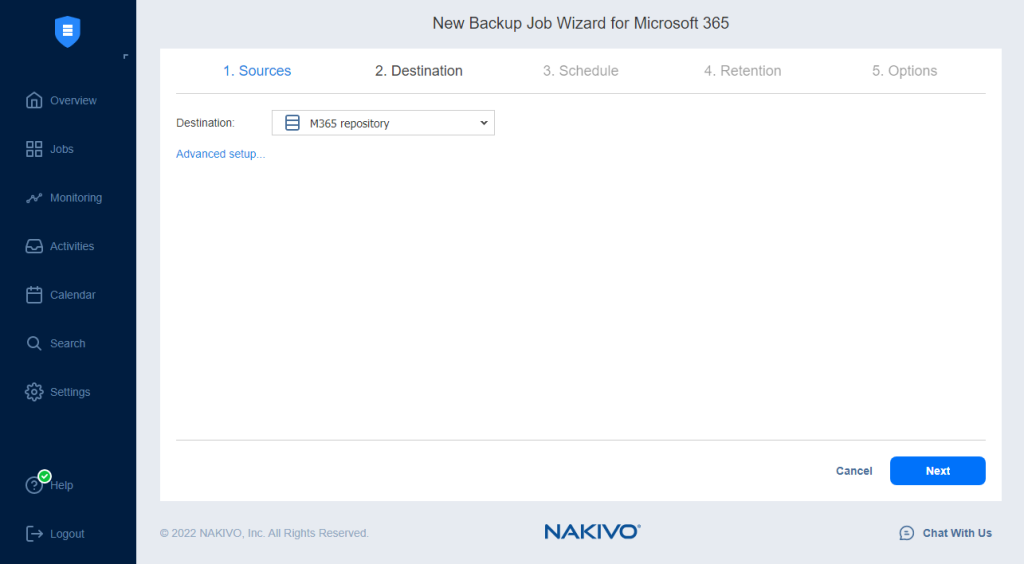
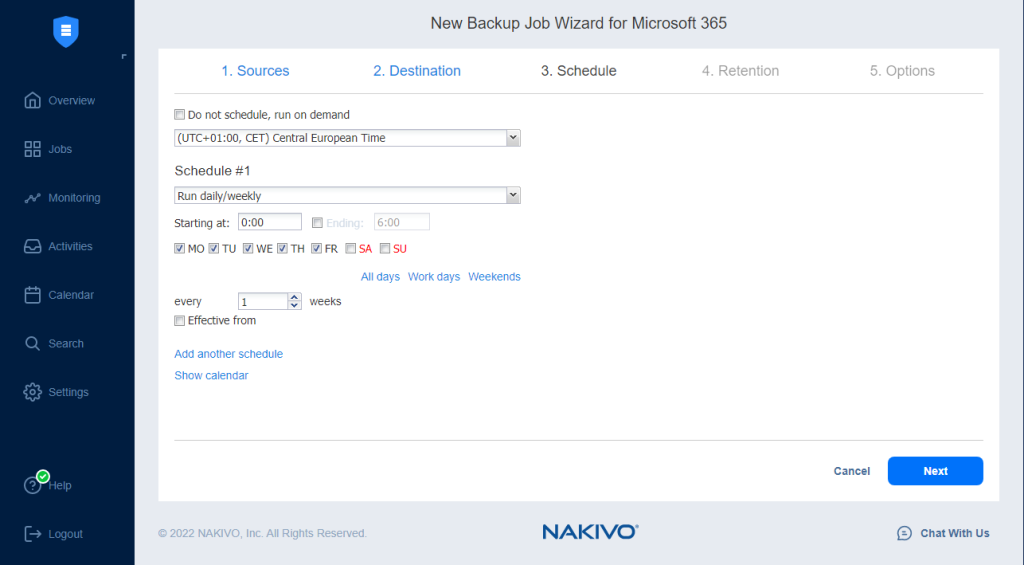
You can set up a schedule for your backup job. Here you choose when the backup is run when it starts and on which days it runs. Click on the Next button to proceed to the Retention section.
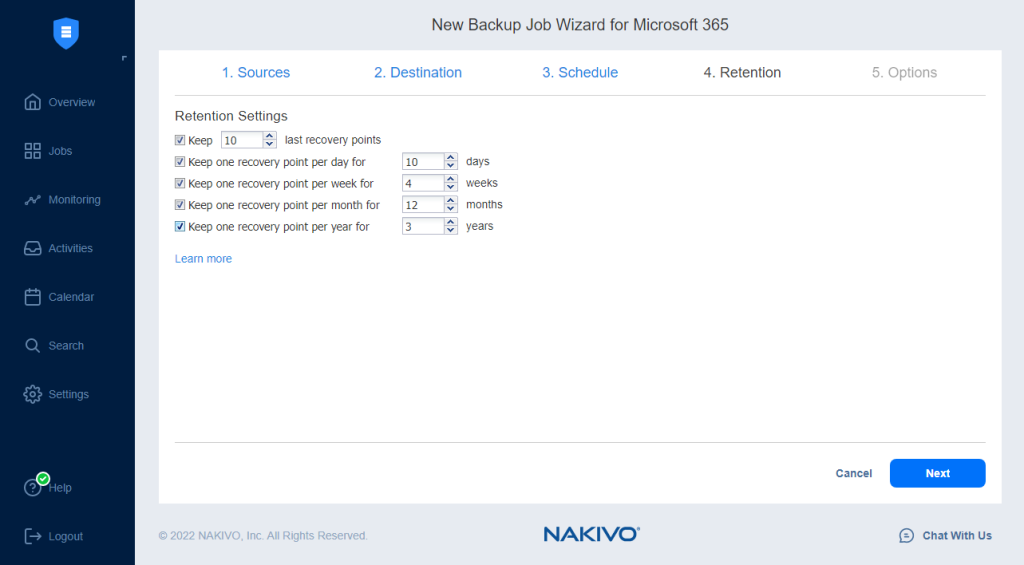
In the retention section, you can configure how many of the last recovery points are preserved. I love how simple it is to set up a GFS (Grandfather, father, son) schedule. Click on the Next button to proceed to the Options section.
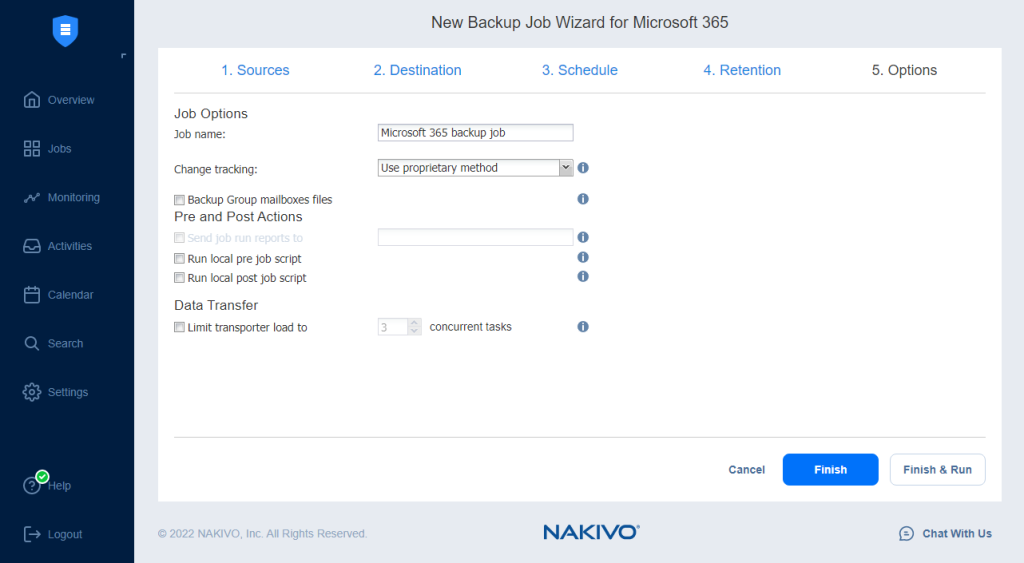
In the last step, you have to enter the Job name and select the type of change tracking method you should use the preferred native Microsoft API which yields the fastest results. Microsoft API doesn’t work for SharePoint Online sites. If you included SharePoint sites in your backup, then Nakivo switches to a proprietary method for those sites. You can click on the Finish button and let the job run when scheduled or you can click on the Finish & Run button. That way, the job is run immediately.
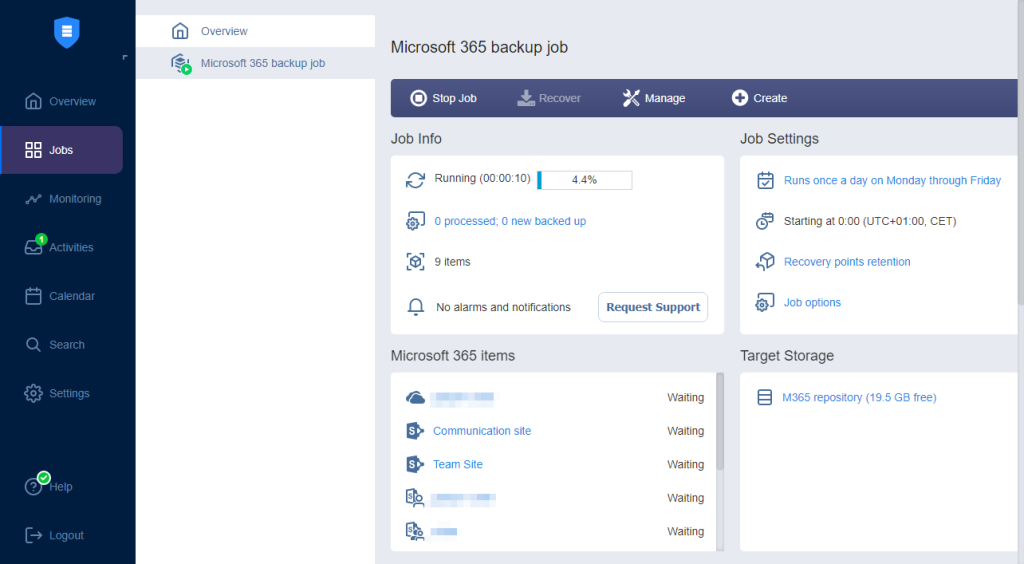
You can monitor the progress in real-time of the job.
Conclusion
Nakivo is a great backup solution and is one of the most affordable as well. Configuration is simple, you can install it on several platforms, including various NAS brands, my favorite Synology NAS works great with Nakivo. What about support? Support is integrated into the Nakivo. Should you encounter a problem, you are a click away from the help of a technician. If you are looking for Microsoft 365 backup solution, you can download a free trial and test quickly test the product.


Schreibe einen Kommentar