Nakivo Backup and Replication is a great backup solution. Nakivo started as a backup solution for virtual environments but has since evolved, now you can back up your complete IT infrastructure including Microsoft 365. Every company uses File shares to share files between employees. Marketing, Sales, HR, Finance, etc…, Files shares are present in every company. File shares are most commonly served on MS Windows or Linux servers, but with the affordability of various NAS devices like Synology and QNAP, many companies use such devices. You don’t need a Windows server license, and you can use cheap NAS hard drives and have terabytes of space, for a fraction of the price compared to having the same capacity on some brand name server with the MS Windows server cost factored in.
How to backup NAS with Nakivo Backup and Replication
Nakivo can back up regular file shares as well as NAS shares. You can run incremental backups using proprietary change tracking technology with periodic full backups on a pre-configured schedule to reduce storage space consumption. You can configure retention policies to rotate 4,000 backup recovery points on a regular basis. Custom retention settings ensure more efficient storage space consumption without retention gaps. For bulletproof backup, you can create copies of your backups and send them offsite for the best protection of your data.
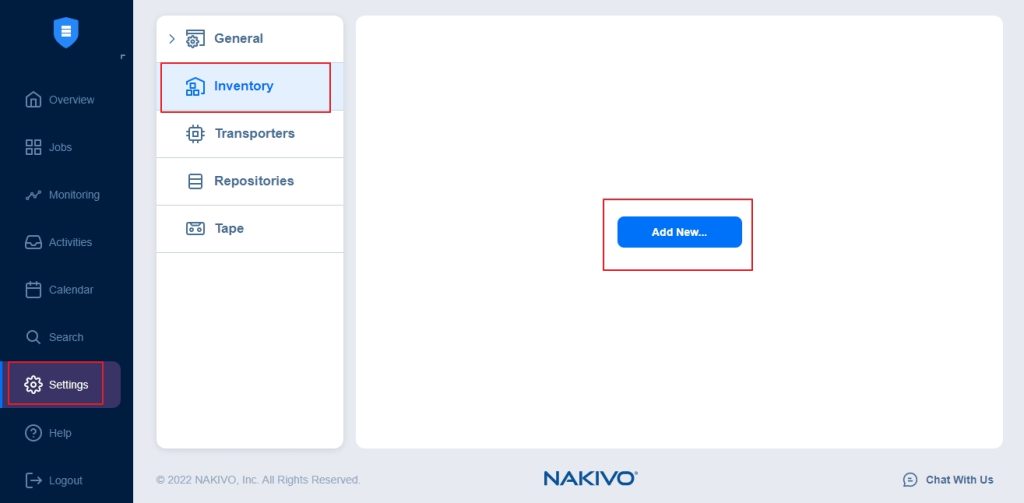
Before we can create a backup job, we have to add file share to the inventory. Click on Settings and then on Inventory. Click on the Add New… button.
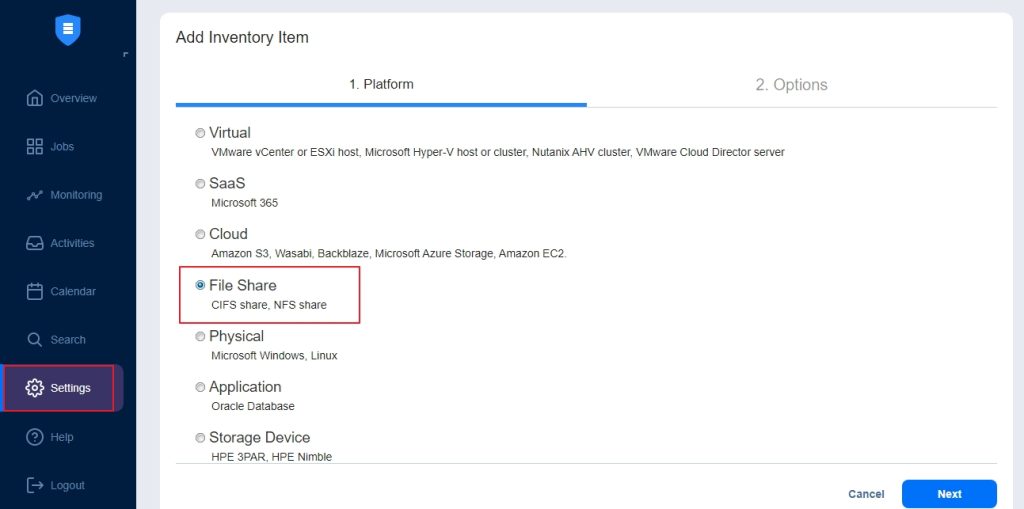
On the Platform tab, select File Share (CIFS share, NFS share). Click on the Next button to proceed to the Options tab.
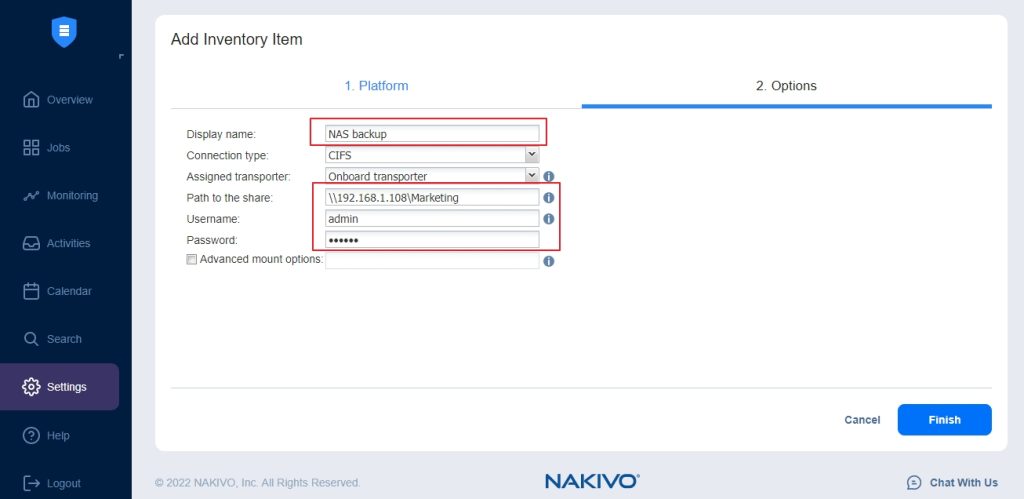
On the Options tab, enter the Display name of the backup job, add Path to the share and enter the credentials. Click on the Finish button.
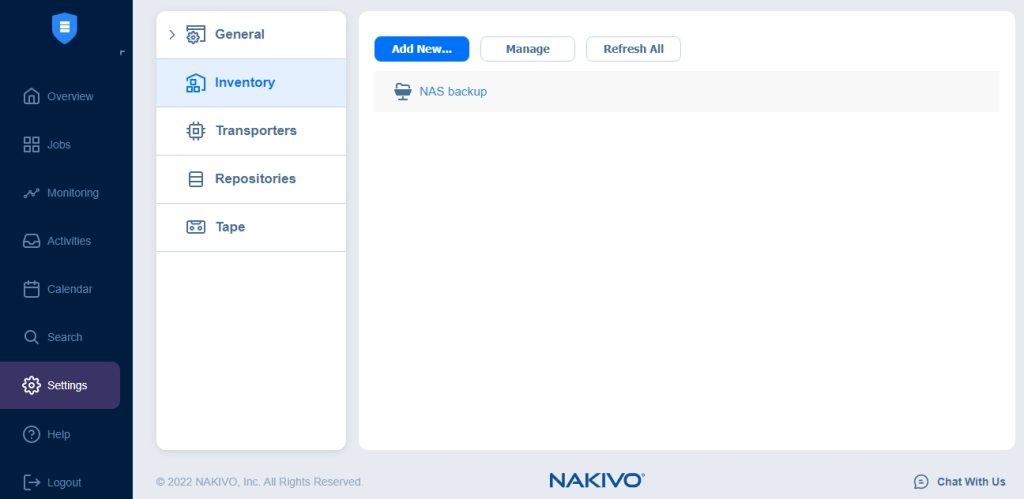
If the credentials and path were correct, you will see a new Inventory Item in the Inventory settings.
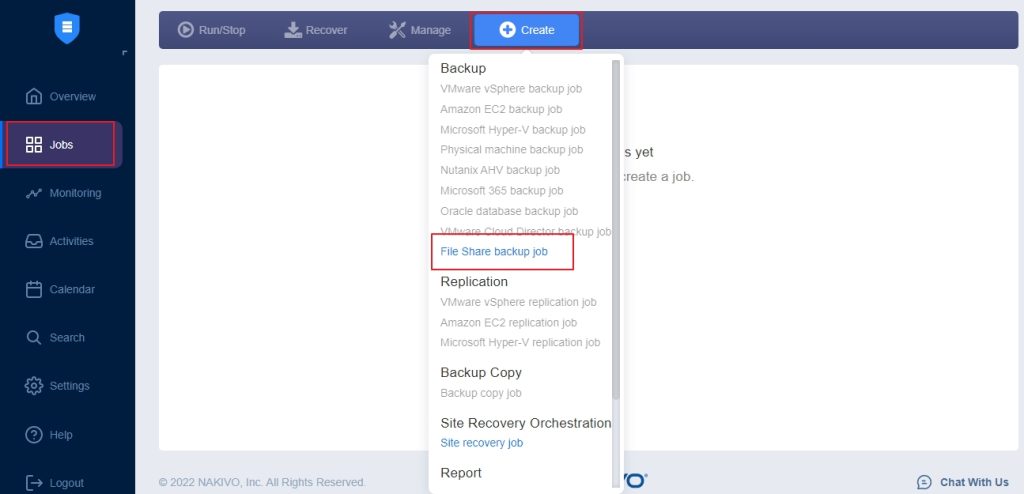
Now, a backup job can be created. Click on the Jobs and click on Create button in the menu. Click on the File Share backup job.
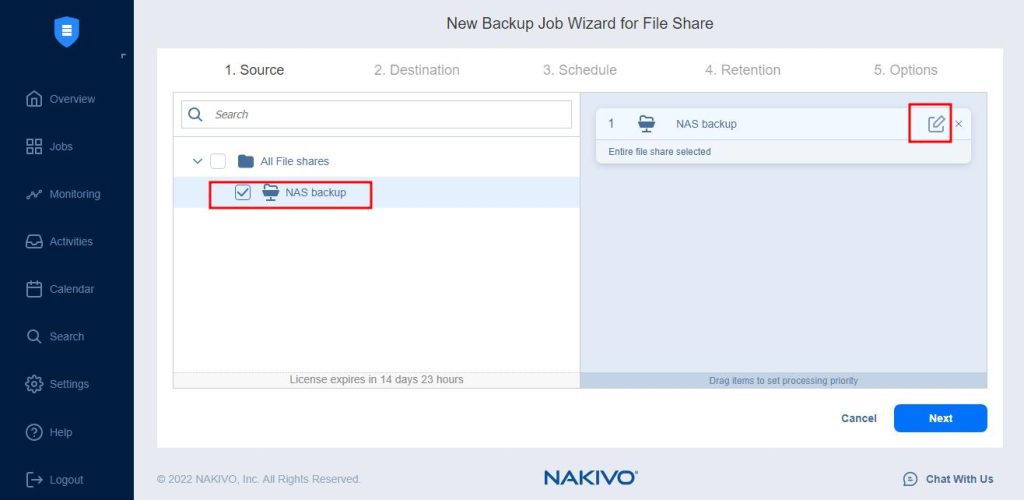
Select NAS backup inventory item that was just created. On the right side, click on the edit button.
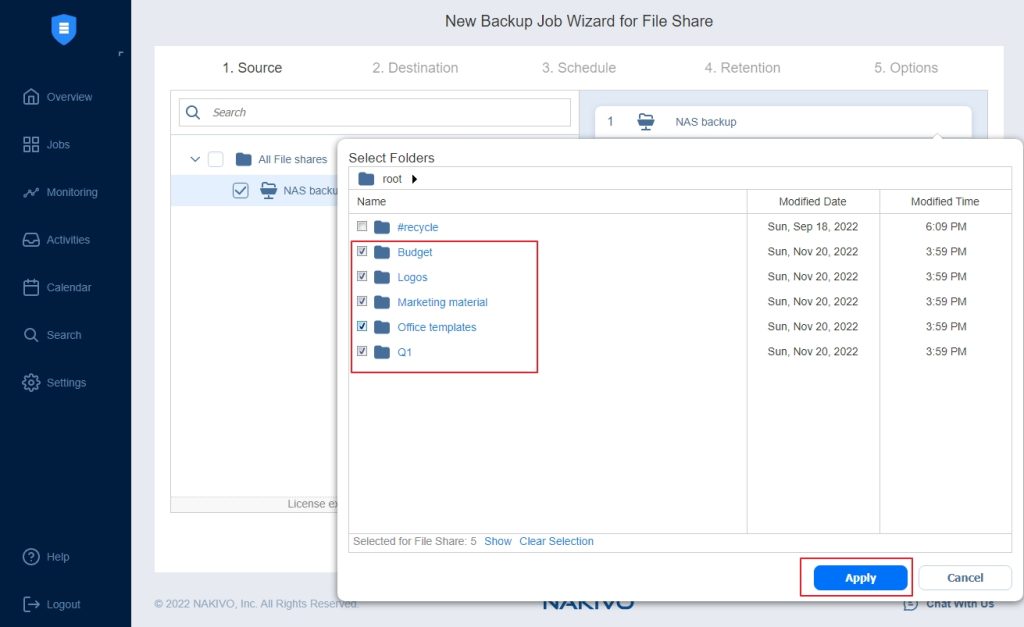
Now you can select the folders you would like to backup. After the required folders are selected, click on the Apply button and click on the Next button to proceed to the next screen.
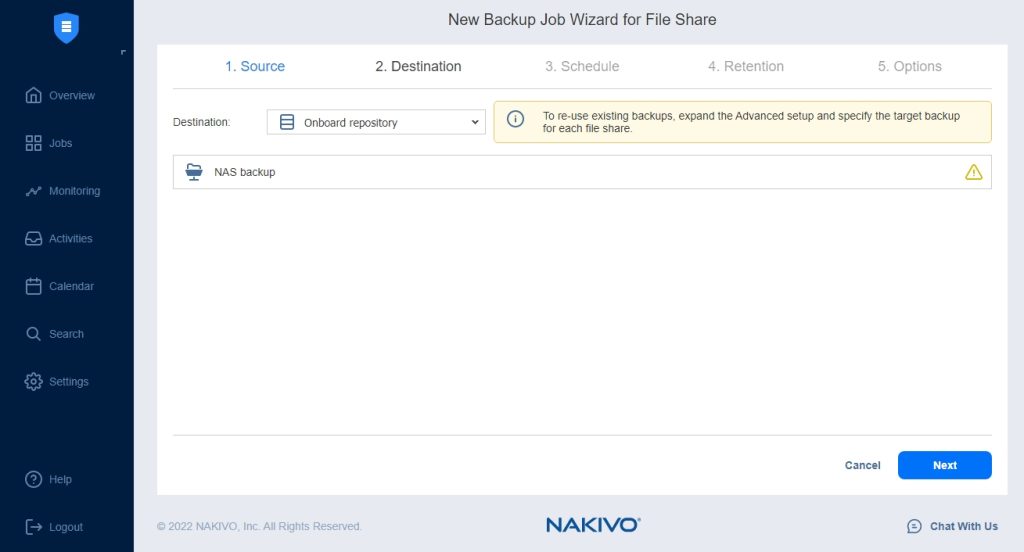
On the source tab, select a destination and click on the Next button.
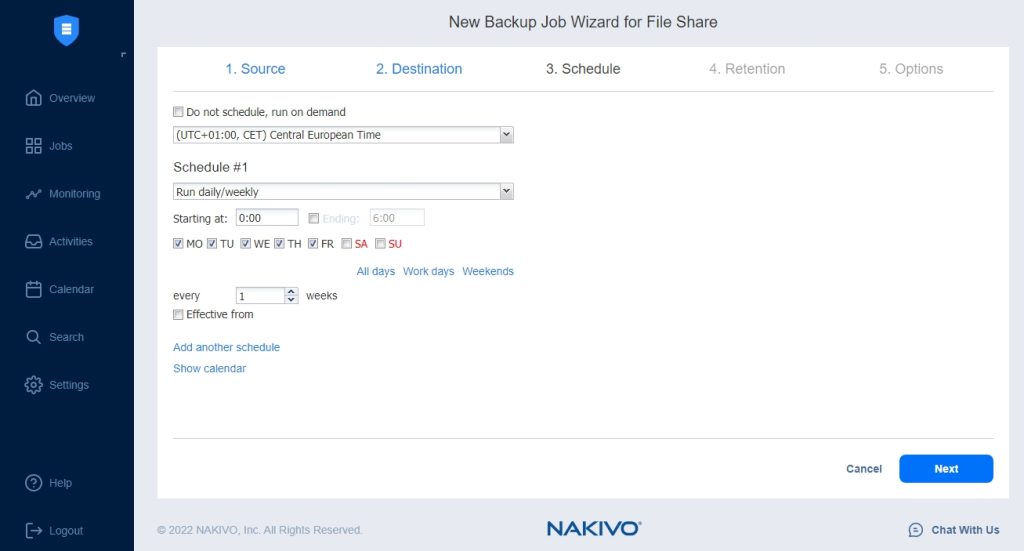
On the Schedule tab, select when the job will run and on which days it will run. You can add multiple schedules and can even use a calendar widget to make your selection easier. Once you have added your schedule, you can click on the Next button to proceed to the Retention tab.
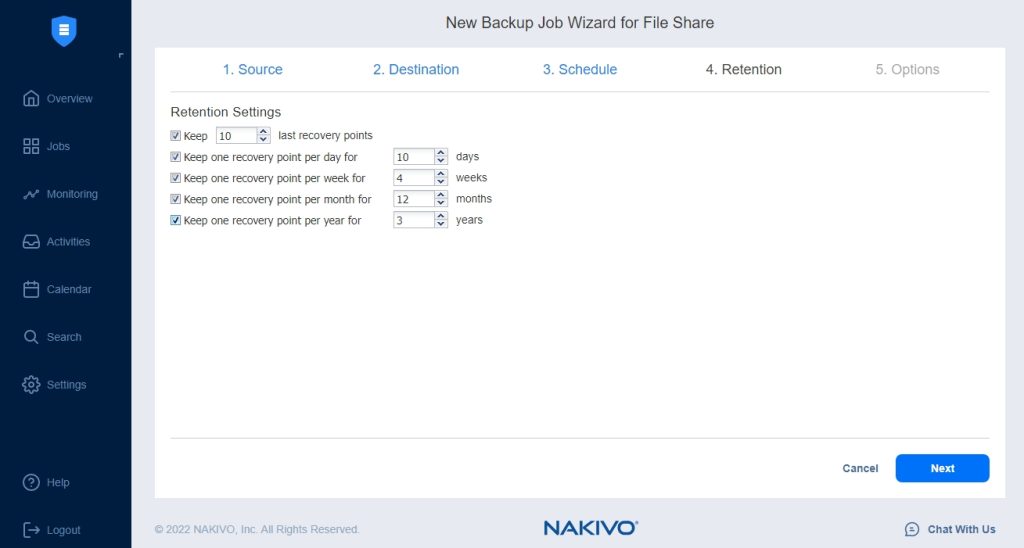
On the retention tab, you can configure retention settings. You can select how many recovery points you would like to keep. You can do that for days, weeks, months, and years. For example, a GFS (grandfather, father, son) retention would like: keep one recovery point per day for the last 7 days, keep one recovery point per week for 4 months, keep one recovery point per month for 12 months and keep one recovery point per year for last 3 years. You can adjust the settings based on your company’s requirements. Once you selected all the retention settings, click on the Next button.
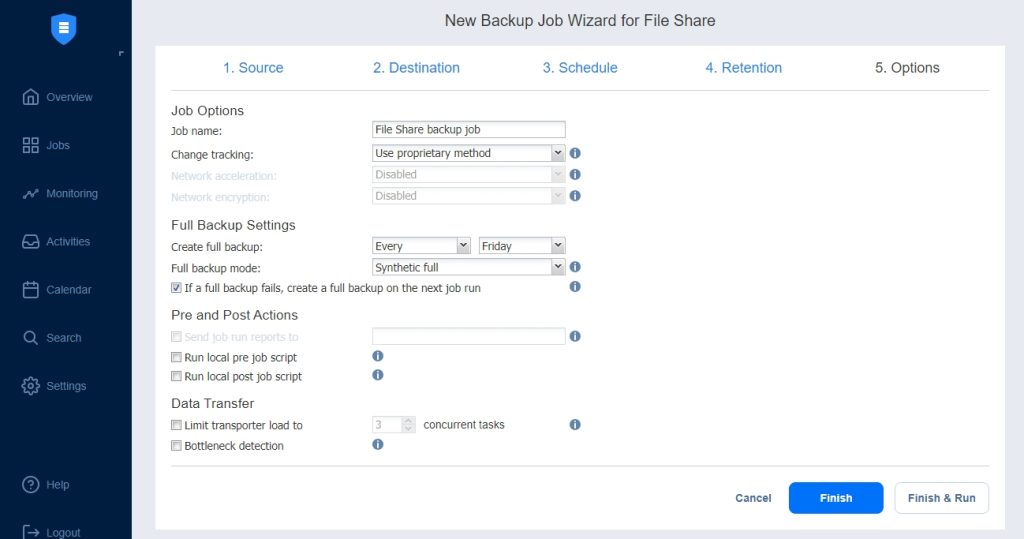
On the Options tab, you have to enter the Job name, select change tracking, set up Full Backup Settings, select Full backup mode, and select Pre- and Post-Actions. You can also limit Data Transfer and enable Bottleneck detection. Once you have selected the necessary settings, you can clik on the Finish button so that the job is run according to the settings, or you can click on the Finish & Run button to start the job immediately.
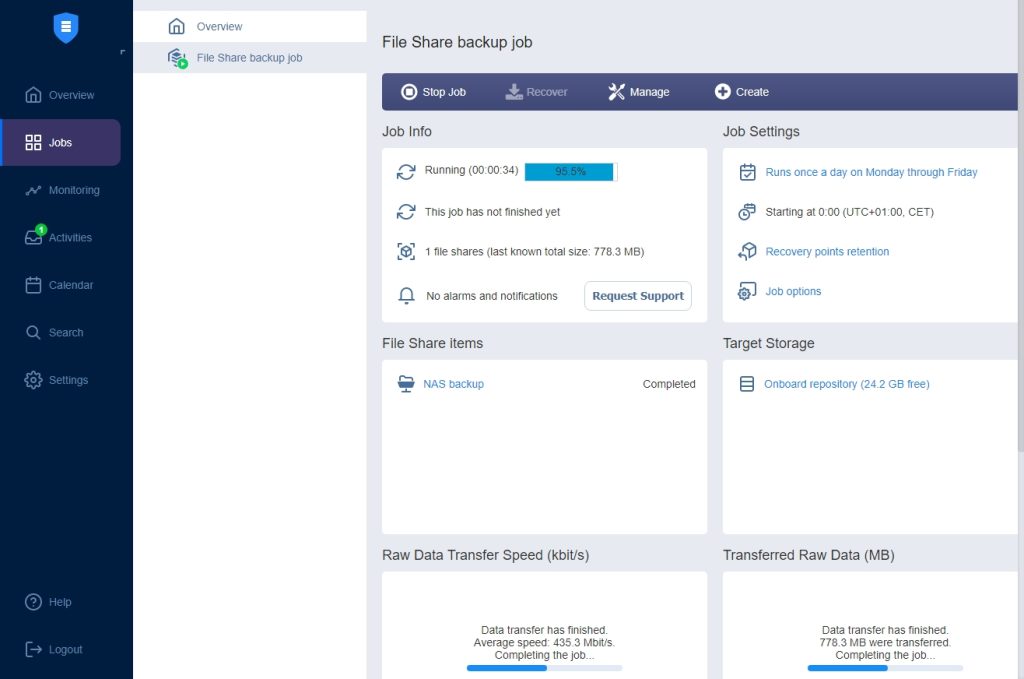
If you click on the Finish & Run button, you will go to the Jobs page and will see the status of the job being run. Here you will see how long the job is running, what is being backed up, File Share items, target repository, Raw Data Transfer Speed and Transferred Raw Data in MB. You will see on the Job info when the Job will finish.
How to perform File Share Recovery
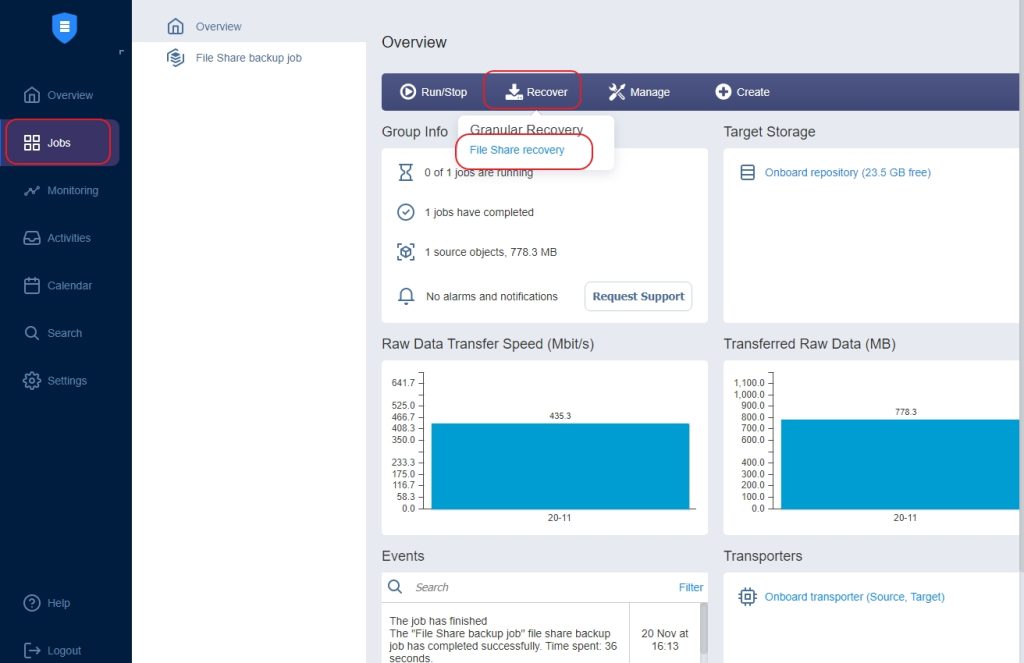
We have created a File Share backup job which was completed successfully. How to perform File Share recovery? Go to Jobs, and click on Recover in the menu. Select File Share recovery.
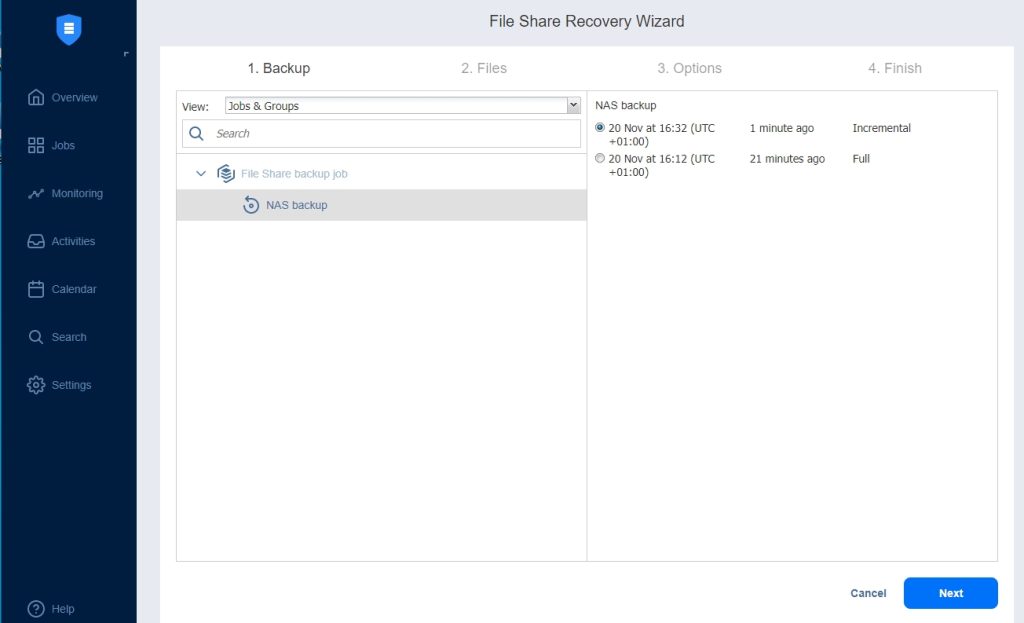
Select Backup job, in our case, it is called NAS backup, and select recovery point if you have multiple. Click on the Next button.
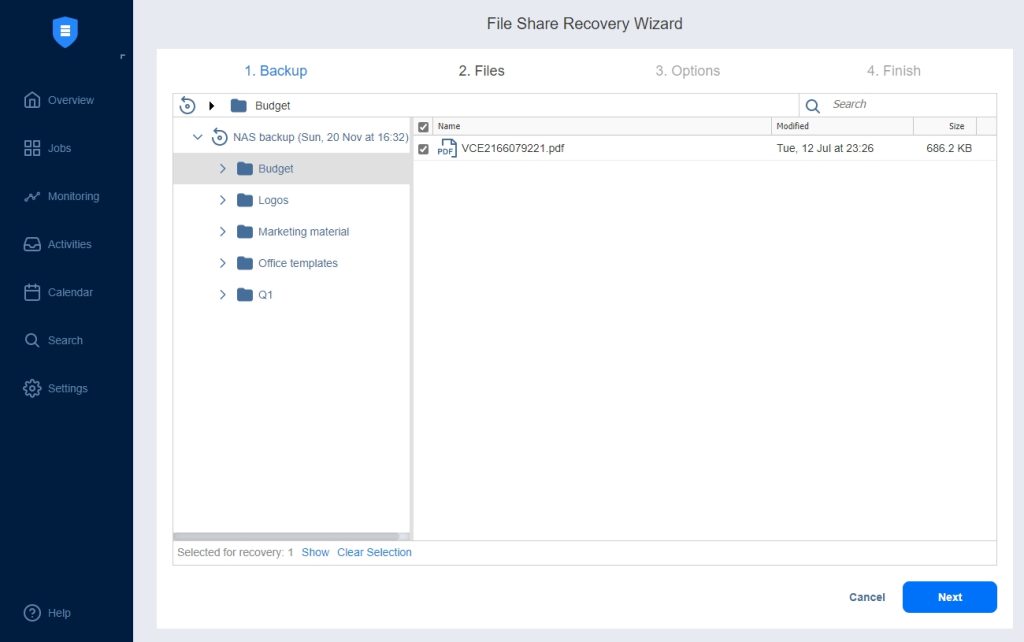
You can recover all the items, in case somebody deleted a complete share, or you can select individual item/s if the individual accidentally deleted a file. Let’s say that we have received a call from Marry who deleted the budget presentation by accident and needs our help to get the file back. We go to the folder where the file was deleted, select the file and click on the Next button.
On the Options tab, we can select Recovery type. Nakivo Backup and Replication can recover to a custom location via CIFS/NFS file share, can forward via email, and can even provide you a download of the file via the browser automatically.
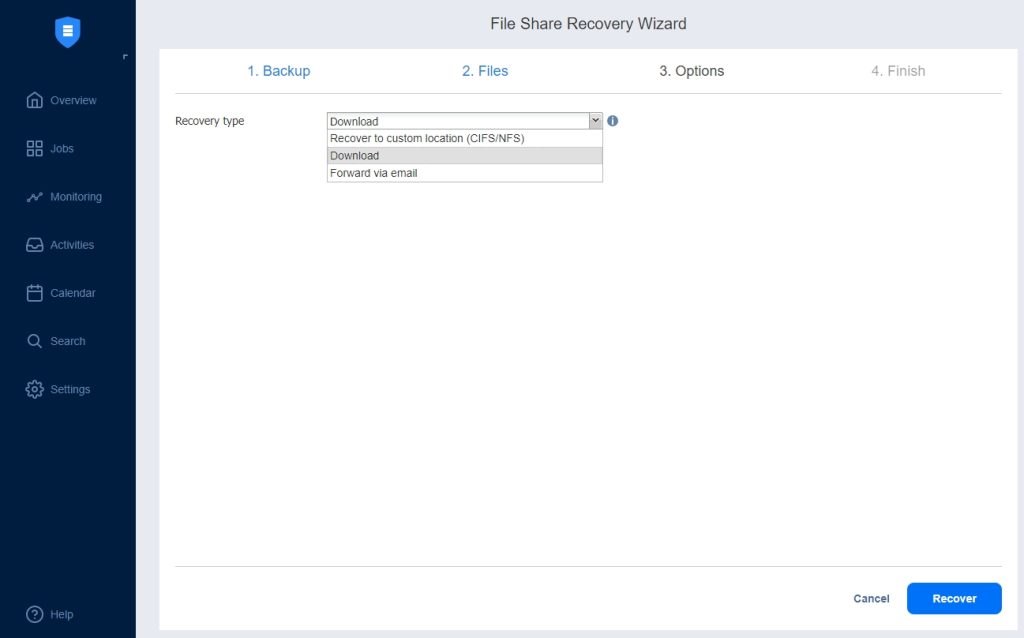
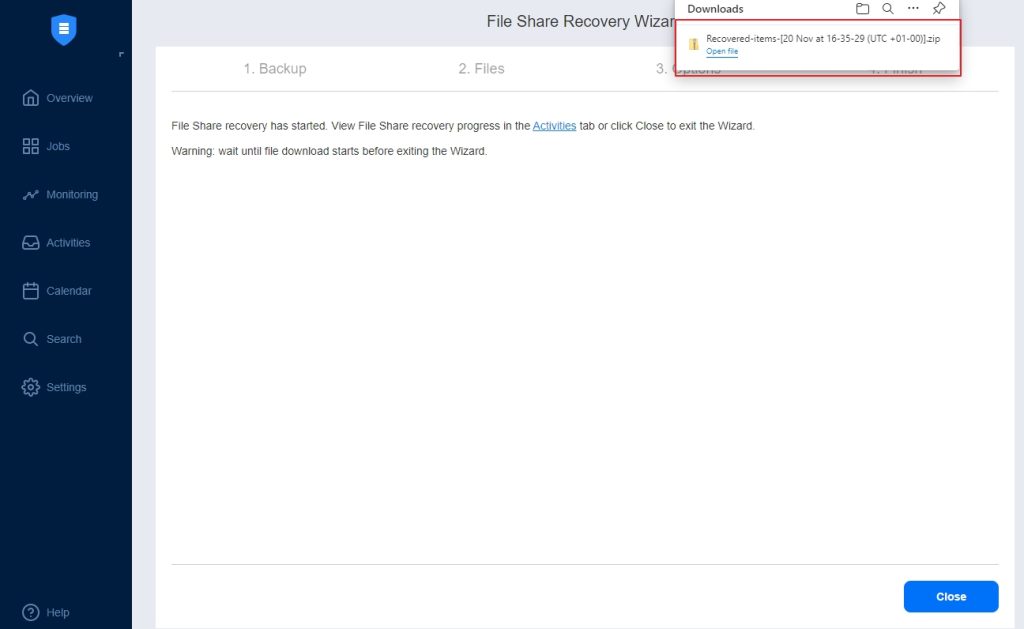
Since it is one file, I have selected Download. You can see in the image below, that the file was downloaded automatically in the browser once the restore job was completed.
Conclusion
Nakivo Backup and Replication has grown in terms of features from the first version that only supported virtual environments. Now it can back up almost everything you can think of. If you are already using Nakivo Backup and Replication, you can easily back up NAS file shares or file shares on MS Windows Servers or Linux servers. On the other hand, if you are looking for a NAS backup solution, you can easily try Nakivo Backup and Replication and perhaps try other backup options like a backup of virtual infrastructure or Microsoft 365 backup. Possibilities are endless and pricing is one of the best in the market. Did I mention support? You can contact support directly from the user interface…


Napsat komentář