Nutanix is a mature hypervisor platform. It has wide adoption, and it is quickly gaining market share. Nutanix, when it started with its vision for the next-gen hypervisor, has attracted many bright people from VMware who moved to Nutanix to execute its vision. Now, several years later, you can see the result, 14.000+ worldwide customers, and that is only a beginning.
With Nutanix, you can effortlessly leverage cloud agility with ease of use, which included security and control. It is effortless to migrate from ESXi, Hyper-V and even public AWS to AHV with Nutanix Move, for free. While Nutanix has many benefits over similar solutions, you also have to make sure that you use the right solution for the backup. Nakivo Backup & Replication has added support for Nutanix. If for example, you used Hyper-V and moved to Nutanix, you can still use Nakivo with Nutanix.
Backup Nutanix With Nakivo Backup and Replication
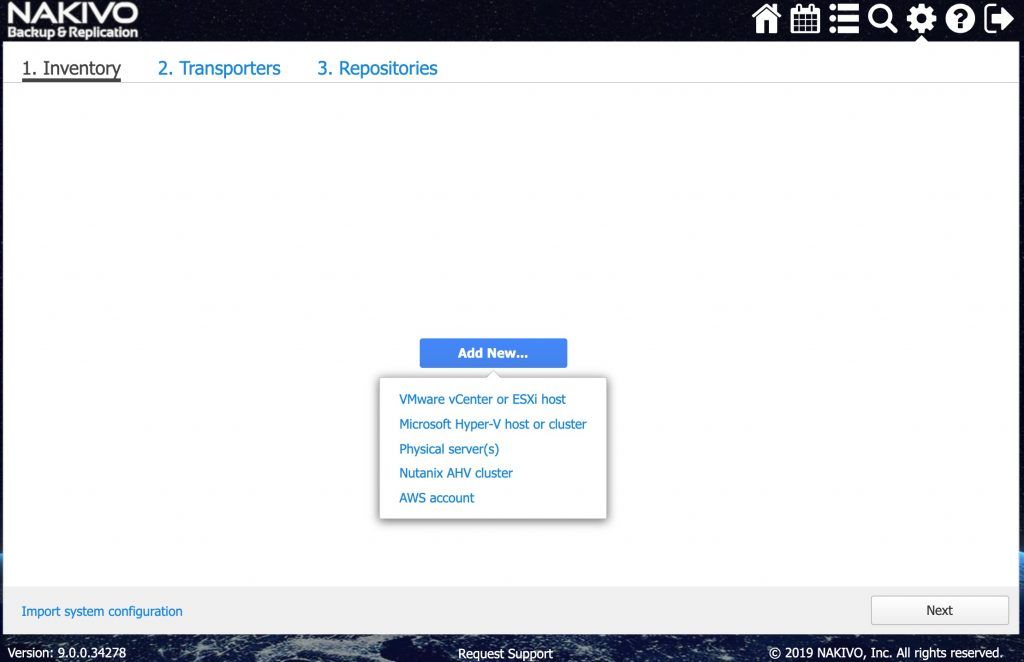
To backup Nutanix, we have to add Nutanix AVH cluster first. Click on Add New… button in the middle of the screen and click on Nutanix AVH cluster.
We have to enter the hostname or IP of the Nutanix cluster, Username, and Password. Unless you changed the cluster port, you could leave the default entry. For backing up Nutanix, we need to deploy Nutanix transporter. If Nutanix transporter is not yet deployed, you can do so before you add a Transporter to Nakivo Backup & Replication.

If credentials are correct, the Nutanix Cluster will be added to the Inventory.

In Nakivo Backup & Replication configuration, click on Transporters and Add Transporter.

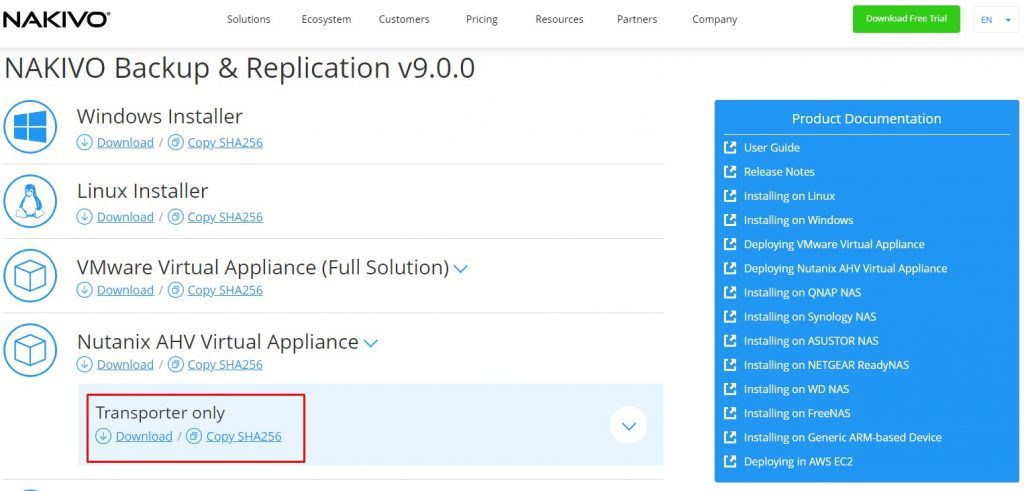
Nutanix Transporter is a Nutanix AVH Appliance, which you can download from Nakivo website. Go to the Nakivo Backup and Replication download page where you can also download the trial. Click on a Nutanix AVH Virtual Appliance and click on a Transporter only. Deploy Transporter to the Nutanux AVH.
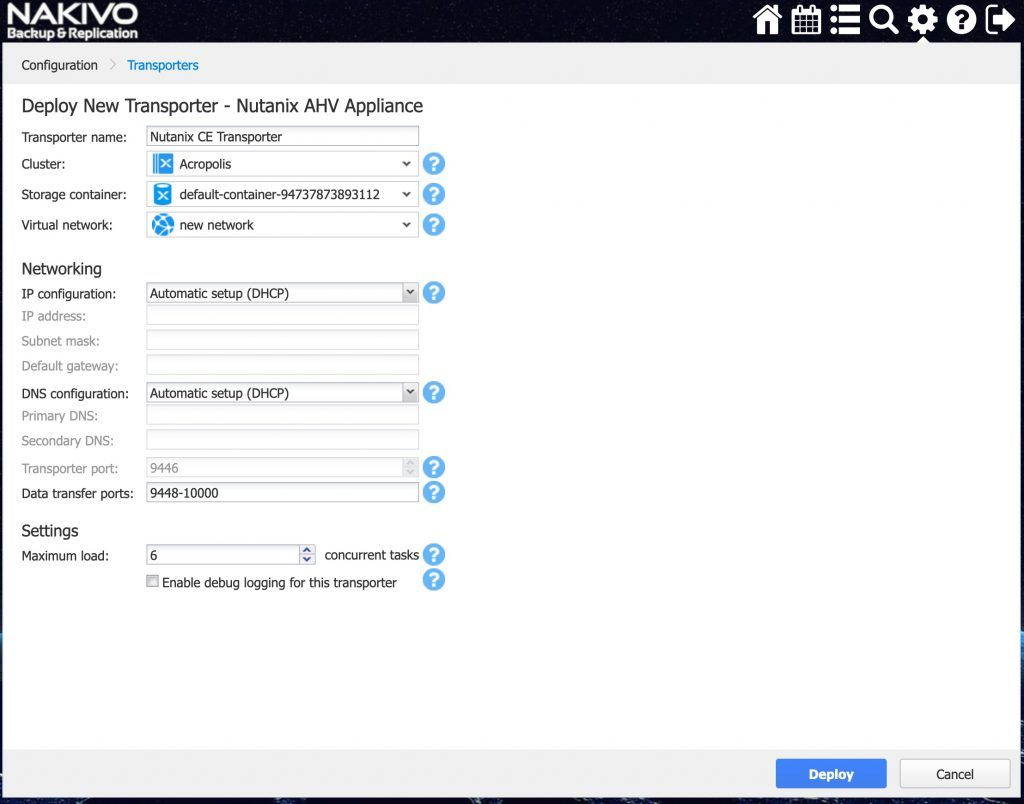
Enter the Transporter name, select Cluster, Storage container, and virtual network. In the Network section, you can configure a static address or DHCP address for IP and DNS configuration. Once you set all the settings, click on a Deploy button.
If all the settings are correct, you will see the newly deployed Nutanix Transporter in the Transporters section.

Once we add Nutanix cluster and Nutanix transporter to the Nakivo Backup & Replication, we can create our first backup job. To create a new Nutanix AVH backup job, click on a Create -> Nutanix AVH backup job.

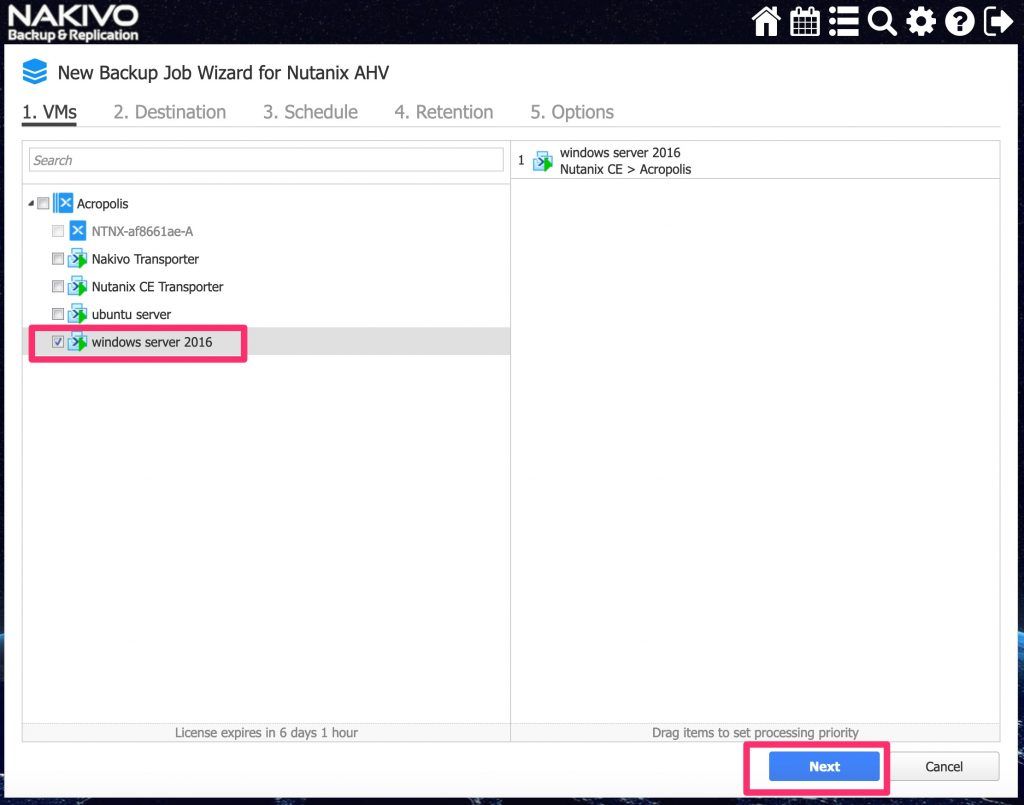
You will start a New Backup Job Wizzard for Nutanix AVH. Select virtual machines you would like to backup and click on the Next button.
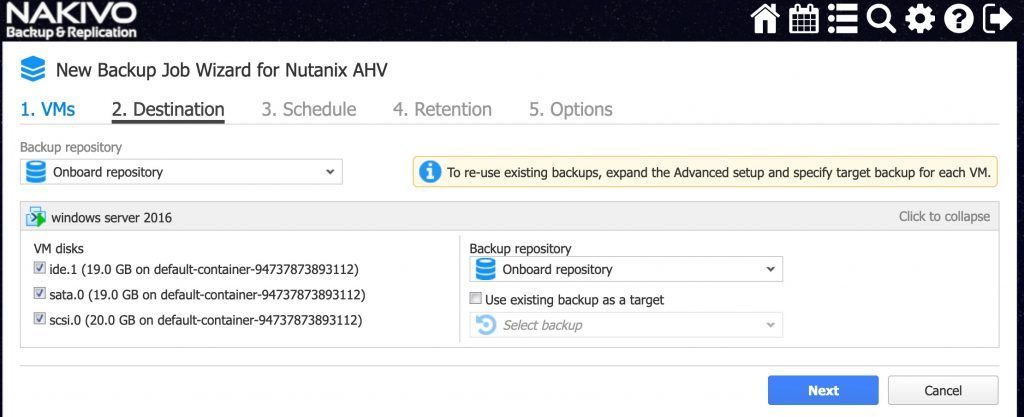
Select onboard Backup Repository, select VM disks, and Backup repository. Click on the Next button.
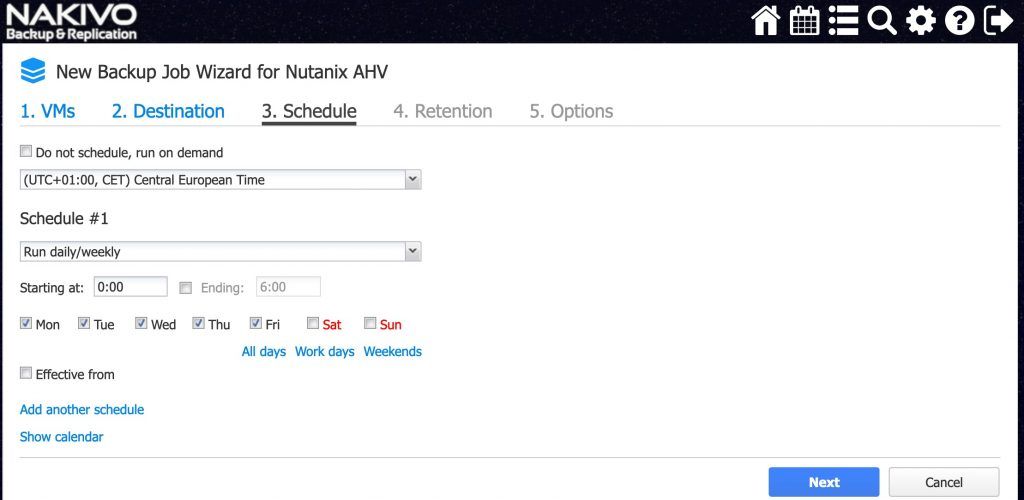
On the Schedule tab, you can create a schedule for the job; you can select days on which the job will run and the hour at which it will run. You can also click on the Do not schedule, run on demand if you want the job to be started on a per needed basis. Click on the Next button.
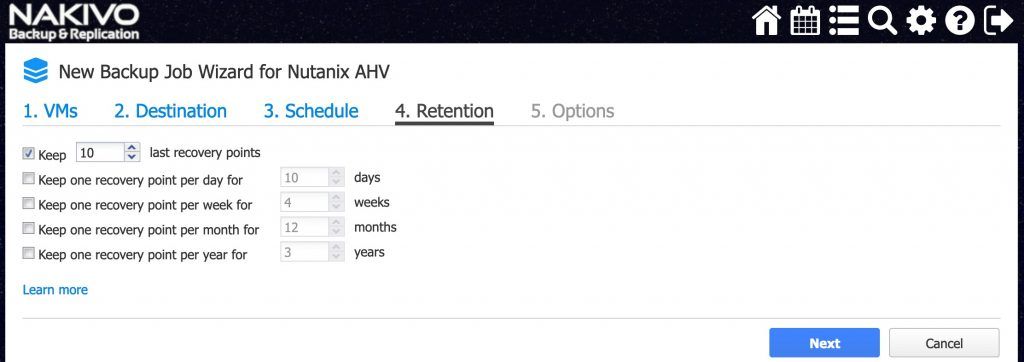
On the Retention tab, you can set up retention for the job. You can choose to keep the select number of copies. Or you can configure Grandfather, father, son type of retention. You will keep X number of days, X number of weeks, X number of months, and X number of years the backup. I love how Nakivo kept simple idea also simple to configure. Some vendors claim to support GFS retention effortlessly, but when you want to implement it, you discover that they opted for a complicated implementation. Click on the Next button to proceed to the next screen.
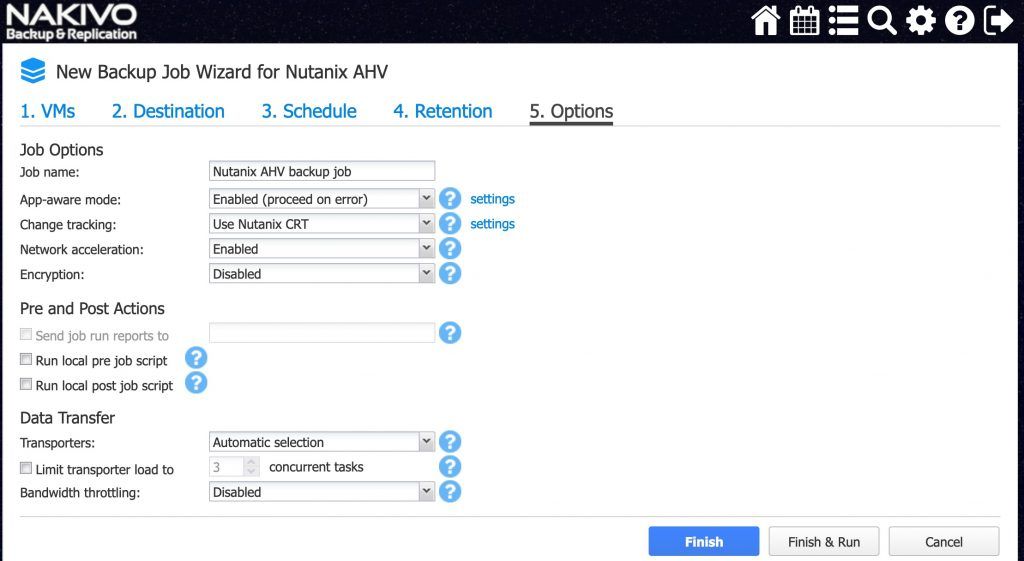
In the last step, you can name the job, set up App-aware mode, Change tracking, enable Network acceleration, and set up encryption. Besides, you can also set up Pre and Post Actions like send job reports to email recipients, run scripts before and after the job is s. You can select a transporter, limit transporter load, and enable Bandwidth throttling. Once you complete configuration, you can click on a Finish or Finish & Run button.
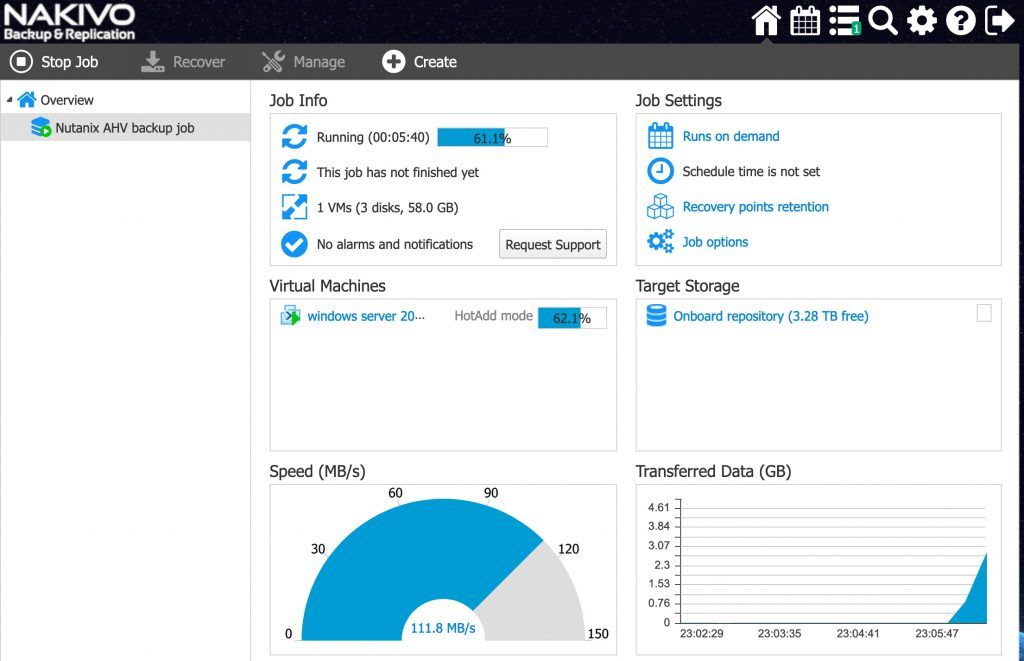
When the job is created and started, you will see job information on the Dashboard. On the Dashboard, you will see a percentage of the running job, virtual machines that are being backed up. You will also see the speed off in the MB/s for the backup job and transferred data in GB.
How to restore a VM to the Nutanix via Nakivo Backup & Replication
to restore a VM to the Nutanix platform, a procedure is as simple as the backup. Click on the Recover and select VM recovery from backup.

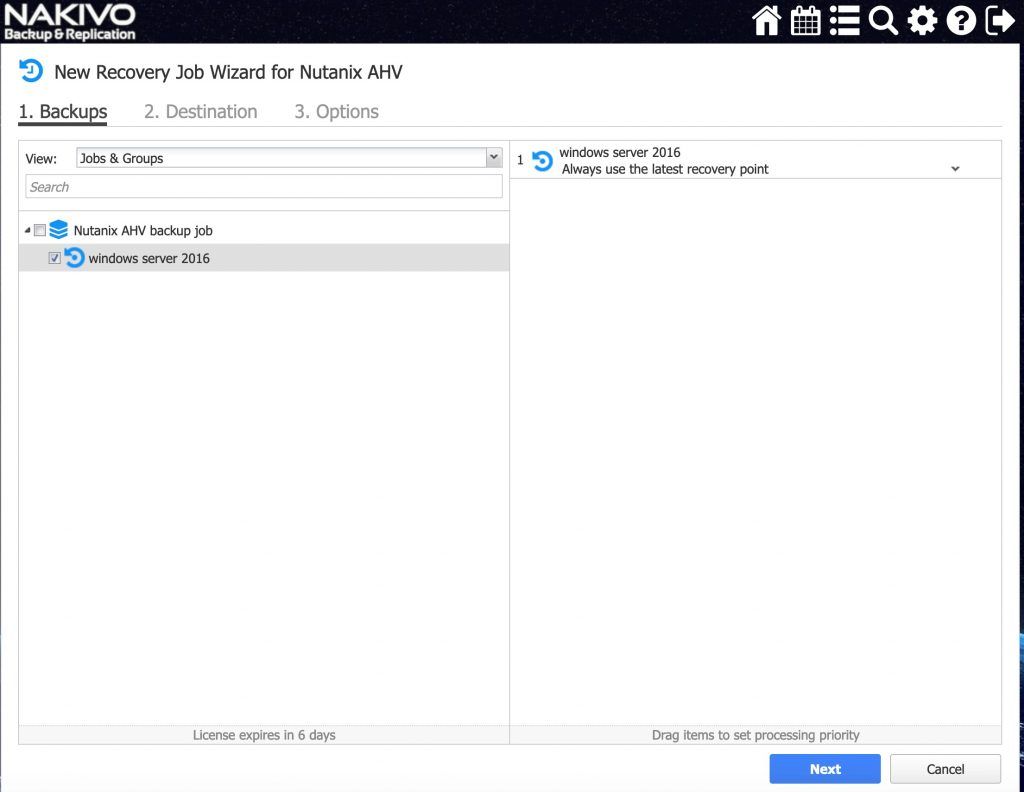
Select VM that you wish to recover. Here you can also select a recovery point.
On the Destination tab, you can select Cluster, storage container, and Network you wish to recover to.

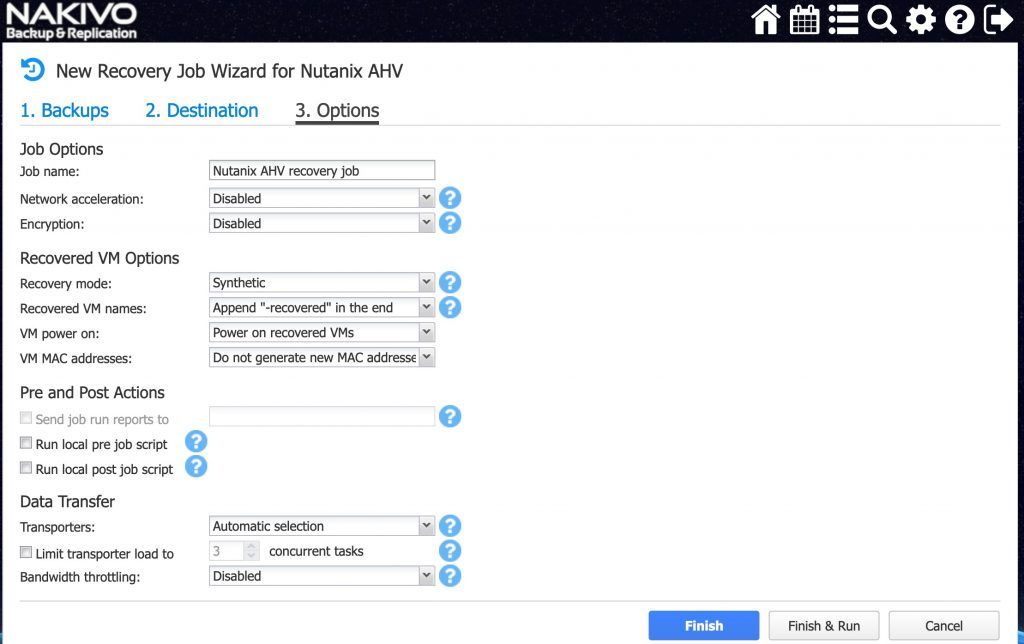
On the options tab, you can name the job, enable Network acceleration and encryption. You can also choose a recovery mode and new recovery name. You can also generate a unique MAC address so that the VM won’t conflict with the existing VM. You can complete a recovery job by clicking on the Finish or Finish & Run to start the job immediately.
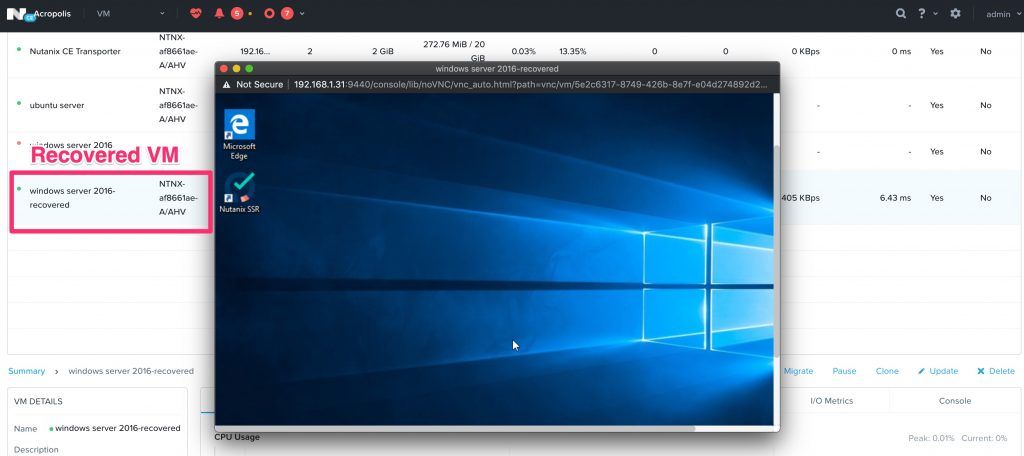
Once the job is complete, you will see a new VM with a new name.
Conclusion
Nutanix is quickly gaining tractions in the industry. Hyperconverged infrastructure is here, and Nutanix is perfect for the job. Companies like Volkswagen, JetBlue, Leonardo, Trek, and Johannesburg Stock Exchange are proof that Nutanix does something right. When you use a great hypervisor, it is only natural to use a great backup solution as well. Nakivo Backup & Replication is a perfect match for backing up your data, either locally in the cloud or both.


Napsat komentář