After Windows XP, part of Microsoft secure initiative was to disable programs and services which were not needed by default in Windows. This applies to both, Windows and Server editions. When you were using Windows XP, telnet was bundled in the installation. All you had to was to type telnet in to the command line.
In Windows 7, Windows 8, Windows 8.1 and Windows 10, telnet is not enabled by default. But good news is that it’s still present in the installation. All we have to do is to install the telnet client in Windows and you can use it after restart. When ever I remember I enable telnet after every new installation, that way I don’t have problems in the future when I need to telnet to a device. By using this quick guide, you can install Telnet in Windows 10 and Windows 7. I admit, I didn’t know how to enable Telnet in Windows after the changes as well.
Symptoms: When you type telent in a command line, you will receive a message:
‚telent‘ is not recognized as an internal or external command, operable program or batch file.
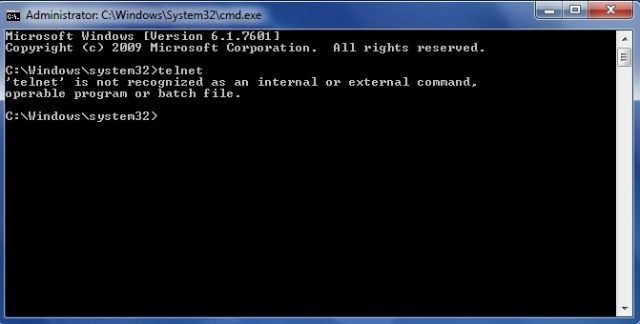
Use these steps to enable telent in Windows 10, Windows 8.1, Windows 8 or Windows 7:
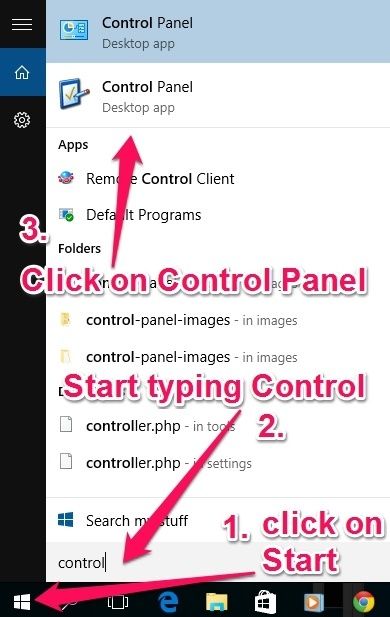
- Click on a Start button
- Start typing Control so that Control Panel desktop app will show
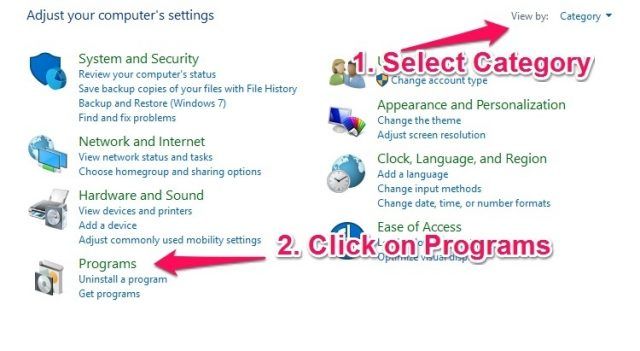
- Switch to a Category view
- Click on Programs
- Click Windows features on or off
- Select Telnet Client
- Click OK
- Restart a computer.
Telnet client will be enabled and can be used.
Tutorial with pictures:
Click on a Start button. Type Control. Windows search will find a Control Panel and will show an icon, click on the application.
When Control panel will open, check the view you are using on the top right side. If View by: is not set to a Category based already, you should switch to a Category view. Then click on Programs on the bottom left side.
Once you click on a Programs, new window will open. Click on Turn Windows Features on or off in a Programs and Features section.

New window will open called Windows Features. Here you can enable all the features that are disabled. We will enable Telent client. You have to click on a tick box in front of Telent client.
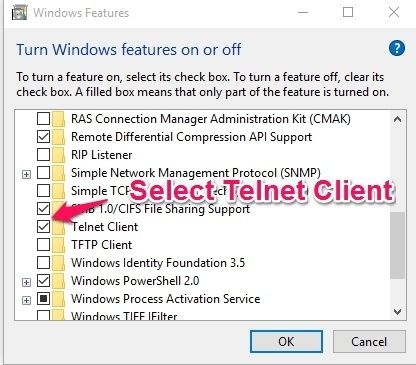
You will see a new window installing windows features, more importantly Telent client. When the operation is complete, you need to reboot your computer.

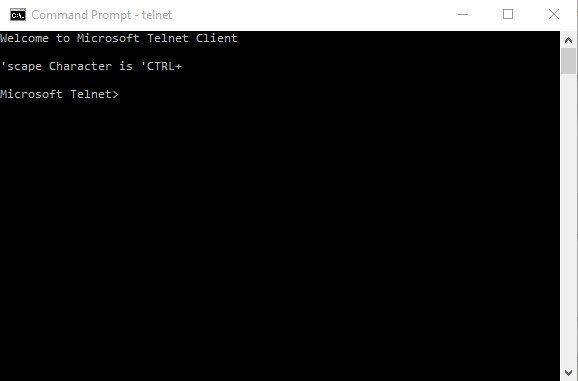
After a Windows restart, open a Command Prompt and type in telent. If you see a Welcome to Microsoft Telent Client messagee, Telnet client was properly enabled / installed.
Free Telnet alternative for Windows
While Telnet is handy, there is much it can’t do. There is a free program for Windows called Putty. Putty can connect to a Telnet, SSH, Rlogin and even a Serial port session. You can save sessions so that you don’t have to type the same information every time you connect to the same session. You can download Putty from the official website

You can also use Superputty which is a wrapper for putty that manages multiple sessions. It can do tabbed sessions, tiled sessions, and so on. It’s home page was moved to Github.
Speaking of putty, Kitty is a fork of putty which has many additional features, one of the most popular ones is that you can save session in files which you can share with your friends. In addition it supports transparency, an icon, background image, Zmodem integration and many more. You should know that it keeps feature and version parity with original version.
Commercial alternative to Telnet and Putty
I know many Network admins who swear by SecureCRT. SecureCRT has many additional features, usability and organizational improvements over Putty, like tabbed browsing, ability to save sessions along with key mappings, colors, fonts and much more….
Second popular commercial alternative to Putty is MobaXterm. I don’t know the program but from what I heard works like a charm and people love it. Then again, Telnet or Putty may work great for you.


Schreibe einen Kommentar