Nakivo supports all major NAS vendors for its product, Nakivo Backup and Replication installation. You can use the following brands for NAS installation: Asustor, Qnap, Synology, NETGEAR, Western Digital, Raspberry PI, and FreeNAS. As you can see, the list is pervasive. If you have a NAS in your arsenal or are thinking of buying one, you can quickly deploy Nakivo Backup and Replication to the NAS.
There are many benefits of using NAS for Backup Appliance. For example, better ransomware and malware protection, faster backup, cost savings as you don’t have to deploy a Windows server (if you are a windows shop. Even with Linux as a host, you can still save money as you don’t have to deploy another virtual machine or a physical server. There are backup companies that sell backup appliances. Those appliances are costly and are used in enterprises that can afford such costs. When you look at such a device, you will usually see a Supermicro server, rebranded with the backup company name. Price is calculated on the size it can backup. If you need additional TB, they can be sold, but with additional cost. Sometimes you can unlock extra space by entering a license. Those appliances are excellent and work ok. But they are darn expensive. For the average company, they cost too much.
You can have a similar experience by using Nakivo Backup and Replication on a NAS. You can use a NAS for many uses. As a network share, ISCSI drive for your servers and as a backup appliance. If you are looking for a backup appliance only, for increased security, you can lock down the NAS and use it only for the backup. That way, the backup repository is not exposed to the world and can7t be infected with the malware.
What is the benefit of FreeNAS?
Unlike Synology, QNAP, WD, etc… FreeNAS is a free and open-source network-attached storage, based on the FreeBSD and the Open ZFS filesystem. It runs on a commodity x86-64 hardware. FreeNAS supports protocols such as SMB, AFP, NFS, ISCSI, SSH, Rsync, FTP/TFTP. FreeNAS supports Windows, macOS, Unix, Linux, and various virtualization hosts, for example, XenServer, VMware, and Hyper-V.
FreeNAS is praised for the use of the ZFS filesystem. The main benefit of using the ZFS filesystem is guaranteed data integrity, Improved performance, and it is highly scalable and easy to administer. Users enjoy point in time snapshotting, compression, deduplication, encryption, and replication. FreeNAS includes several levels of redundancy including, striping, mirroring, stripped mirrors, and three levels of RaidZ.
What makes FreeNAS the ultimate NAS tool is its ability to repurpose old hardware. For example, those Hyper-V or VMware servers that just got replaced, are still very powerful, have plenty of RAM, and have good Xenon CPUs. Rather than keeping them in the stock, you can use them for a perfect backup appliance. You can also buy old servers for a meager price. SAS hard drives are more reliable than regular SATA drives. You can even combine, SAS, SATA, and SSD drives to create a super-fast backup appliance.
But if you already use FreeNAS, you can easily extend it by installing Nakivo Backup and Replication.
Install Nakvio Backup and Replication on a FreeNAS
I will assume that this is the first time you use FreeNAS and that it was just installed.
First, we have to create a pool. Go to Storage – Pools. Click on an Add button.
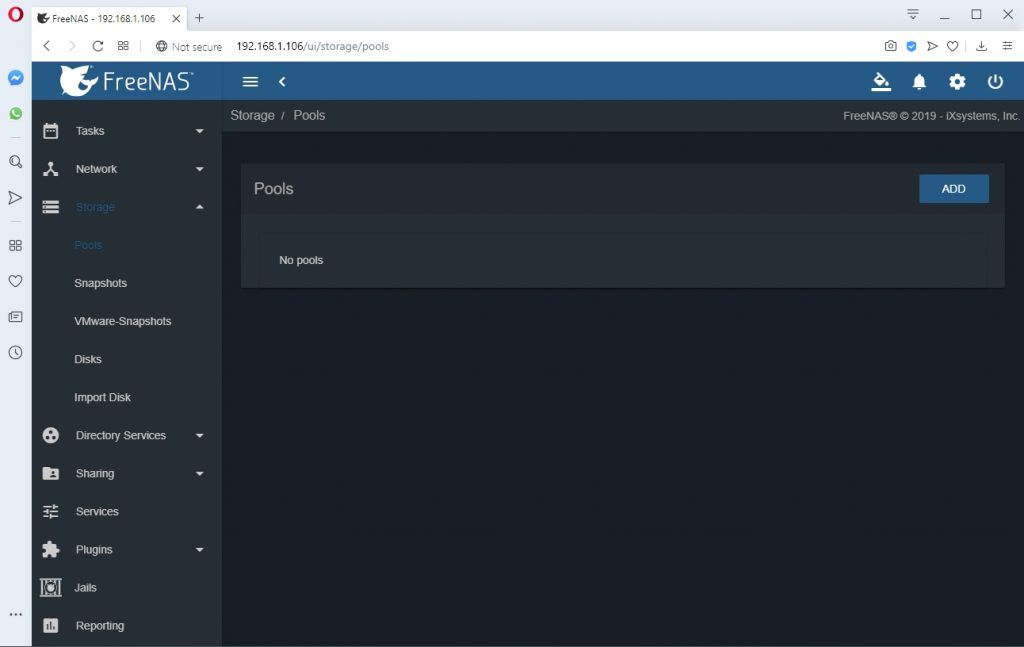
Add hard drives to the pool. Once the Pool is created, we can proceed with the installation. To confirm that the pool is created you will see the following screen:
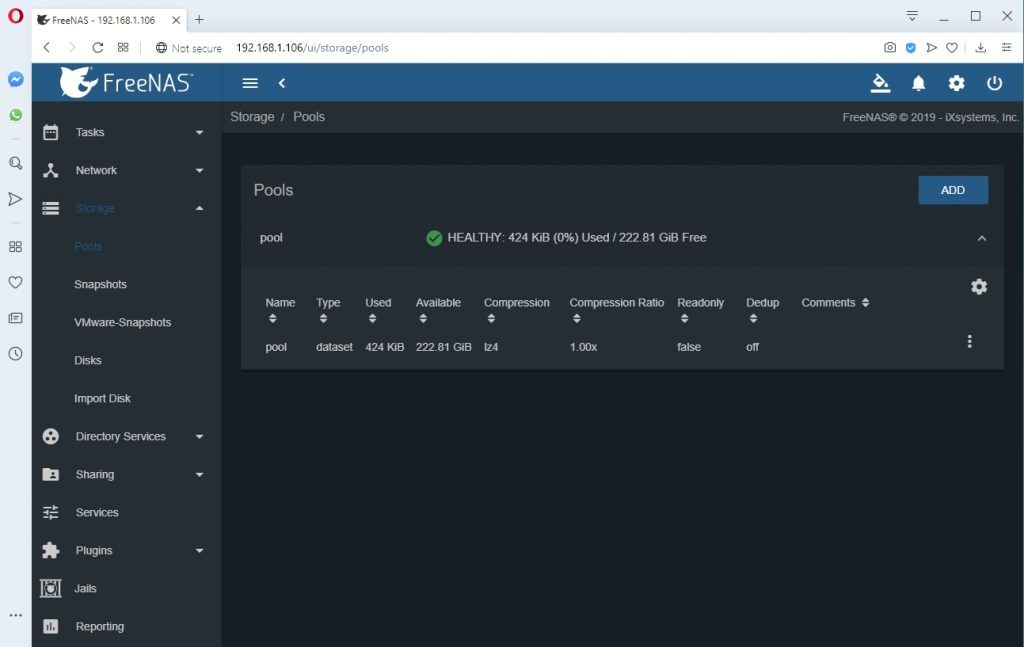
In order to install Nakvio Backup & Replication on a FreeNAS, we have to connect via SSH to the FreeNAS. We have to enable SSH first.
Go to Services, enable SSH. You can also allow Start automatically until you get it right.
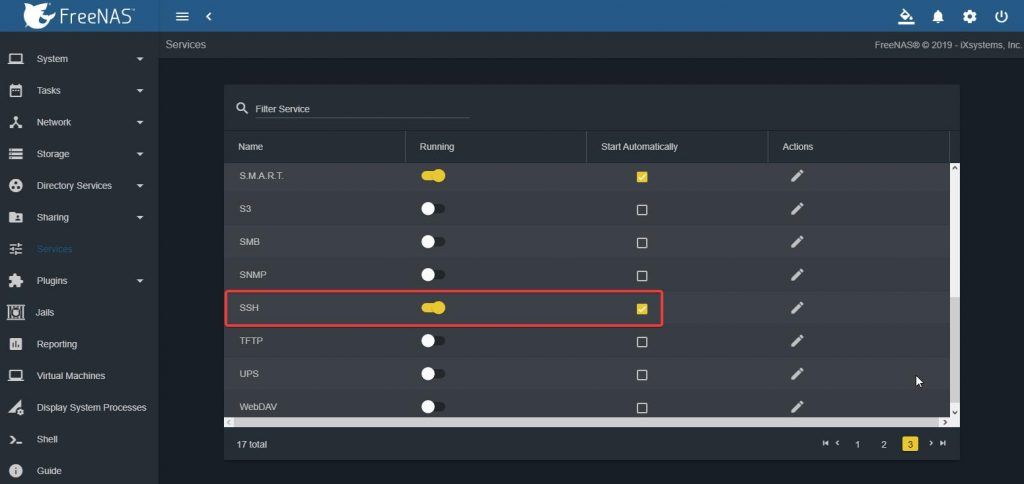
Also, to be able to log in as root, click on the Actions, next to Start automatically tick box. A new option will open. Here click on the Login as root with a password.

Now you can log in via SSH. If you are on a Windows PC, you can use Putty to connect via SSH.
When you log in, type: cd /tmp
Once you are in the tmp folder, execute the following command:
wget https://github.com/NAKIVO/iocage-plugin-nbr/raw/master/nbr.json
this will download Nakivo Installation script
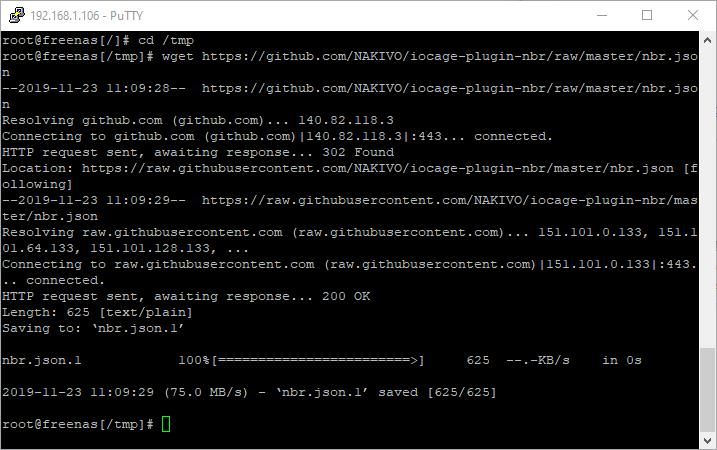
When the script is downloaded, execute the following command:
iocage fetch -P -n nbr.json vnet=“off“ ip4=“inherit“ ip4_addr=“re0|x.x.x.x/24″
Substitute re0 with the name of your adapter and substitute x.x.x.x/24 with a new IP address and mask, which will be used for Nakivo Backup and Replication Jail (think of Jail as a virtual appliance). Do not use the same IP that you dedicated to FreeNAS.
I think the easiest way to obtain interface name is if you go to Interfaces, there you will see interface name:

The script will execute and install Nakivo Backup and Replication.
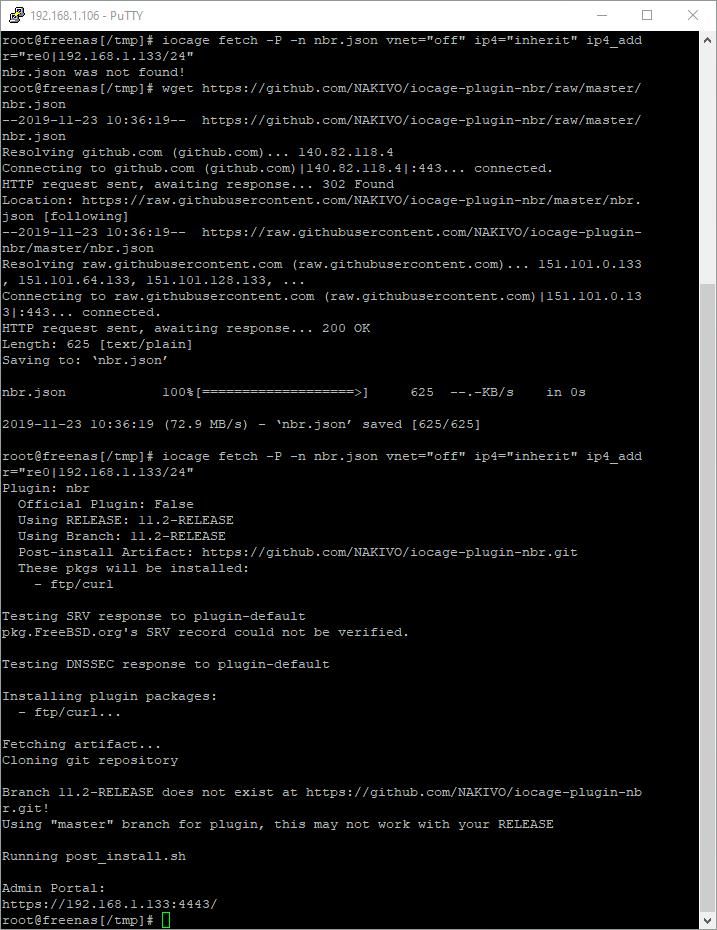
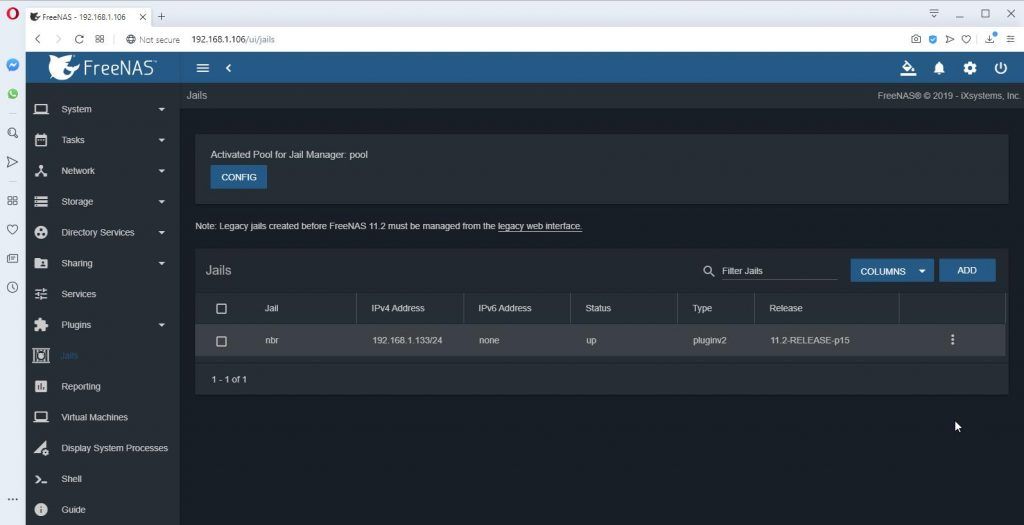
Now the Jail was created. You can open the browser and enter the IP that is listed at the end of the installation. In my case, that is https://192.168.1.133:4443/. You can see the Jail that was created by going to the Jails.
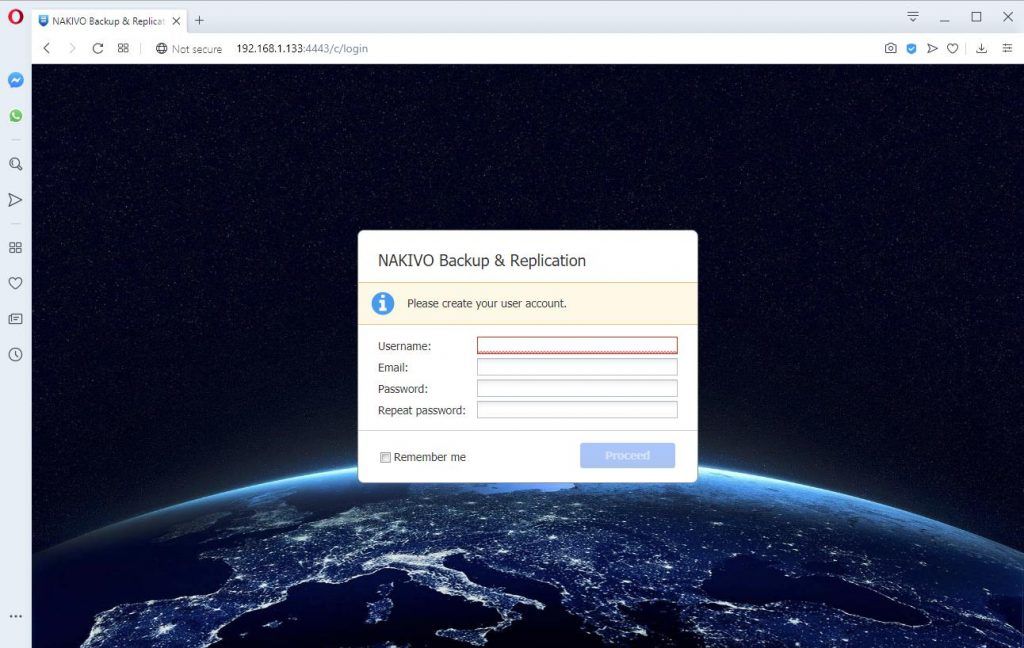
When you enter the newly created Jail, voila, Nakivo is ready.
Conclusion
FreeNAS is a great open-source NAS system. It is used in enterprises and many homes. It can be extended with plugins and Jails. You can use cheap components or expensive servers. You can also repurpose old equipment. It is an excellent solution for backup. Either as a backup appliance or backup repository. If you are using an old server with lots of RAM, you can even enable deduplication. But if your system is low on memory, you can use Nakivo, and it’s built-in global deduplication for great results. Are you a FreeNAS user? Test Nakivo for 30 days and let me know what you think.


Napsat komentář