Nakivo was launched with exclusive VMware support. In fact, VMware was the only supported hypervisor for a while. Fast forward to the present and Nakivo supports Hyper-V and Amazon AWS in addition to VMware. If some features were missing from initial Hyper-V support, you should know, like my friend Boris, that Hyper-V support is now on the same level as VMware. Backup is important because if something goes wrong with your infrastructure, backup is the second line of defense. You can be back and running in no time or you could be doomed if the backup cant be used to restore the data.
Problem with backup is that when you configure all the settings it’s easy to think that it will work 100% all the time. Especially after the initial test, if data was restored for the first time, surely it can be restored whenever we need it. But unfortunately, in the IT field, everyone knows about Murphy’s law. Epigram that is typically stated as: „Anything that can go wrong will go wrong“. One way to ensure that backup can be restored when we need to is to test the backup. That way we can be sure about data recoverability.
Unfortunately, due to time constraints, especially with IT teams that small in number, backup is rarely tested. One way to solve the time problem is to automate tasks that can be automated. One such task is backup verification.
Hyper-V backup verification with Nakivo
Nakivo has one great feature which can help IT Administrators with backup verification on the Hyper-V platform. It is called Screenshot verification. The technology behind Screenshot verification works like this:
- Backup is started
- After the successful backup, VM is started in a secure container
- After a while, a screenshot of the VM is created and sent to the Backup administrator
If VM had issues and cannot boot, for example, you can easily see that on the screenshot. Then you can quickly act and resolve the problem before the next backup window.
In order to configure Screenshot verification when creating a backup job follow the procedure below.
On the VMs tab, select servers you would like to backup. Click the Next button.
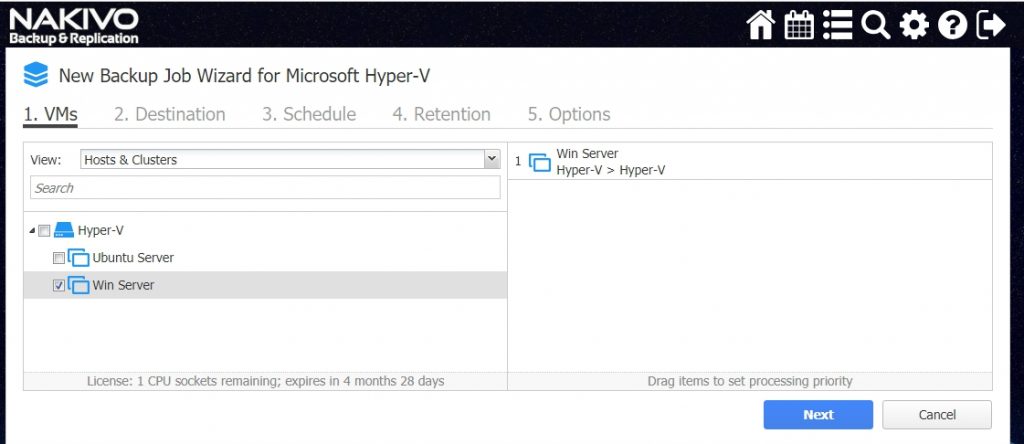
On the Destination tab, select Backup repository. Click button Next.
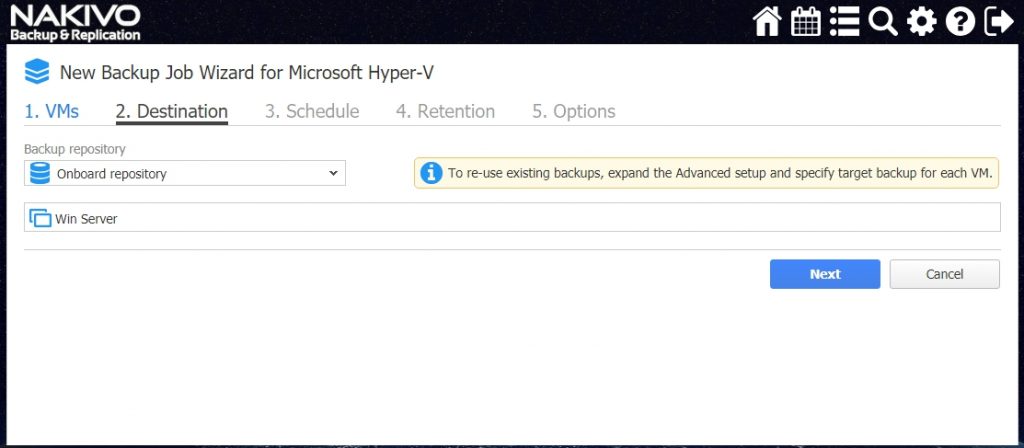
On the Schedule tab, set up a schedule for the backup job. You can run the job on demand like a test job for example or you can set up a more complex schedule. You can set up multiple backup schedules for the job if required. When you set your schedule, click on the button Next to proceed to the next tab.
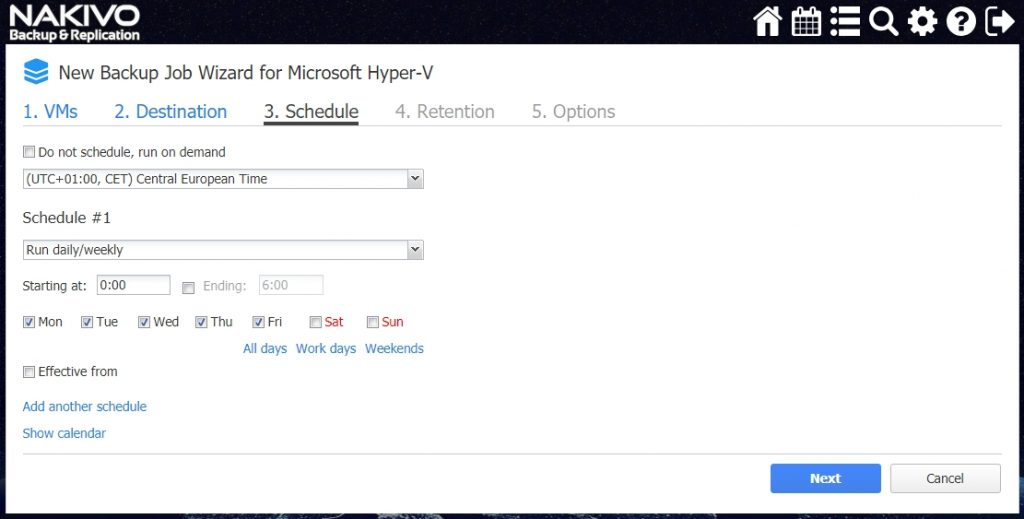
On the Retention tab, you can set up retention for the job. You can keep the custom number of last recovery points. You can also set up a more classical GFS (Grandfather, Father, Son)rotation type approach to the rotation, where you also keep one recovery point per day, one recovery point per week, one recovery point per month and one recovery point per year. Click Next to proceed to the next tab.
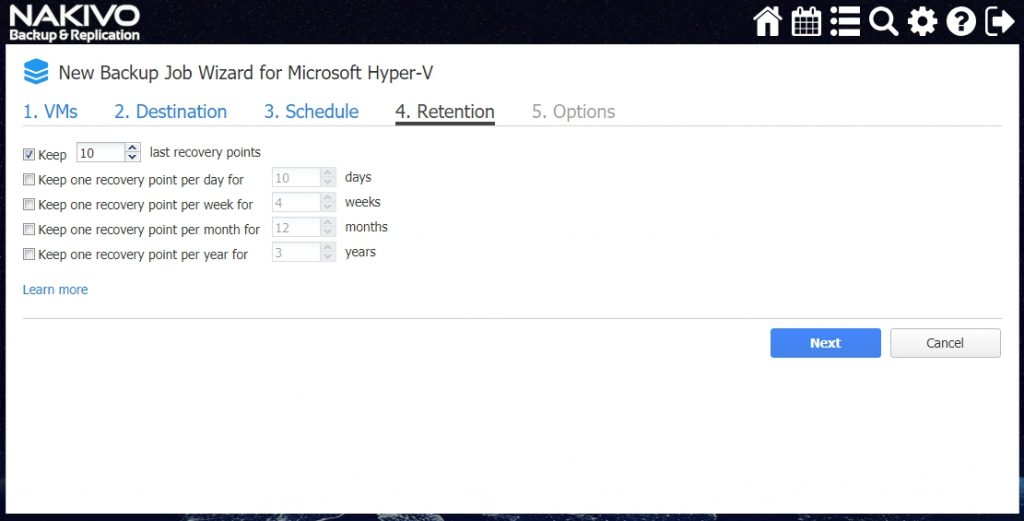
On the Options tab, you can set several options. We are interested in the Screenshot verification option. When you enable that option, you can select a container where the VM will boot, number of VM that will be verified simultaneously, Recovery time objective in minutes and Screenshot delay in seconds. When you have configured all the options, click on Finish & Run to start the backup.
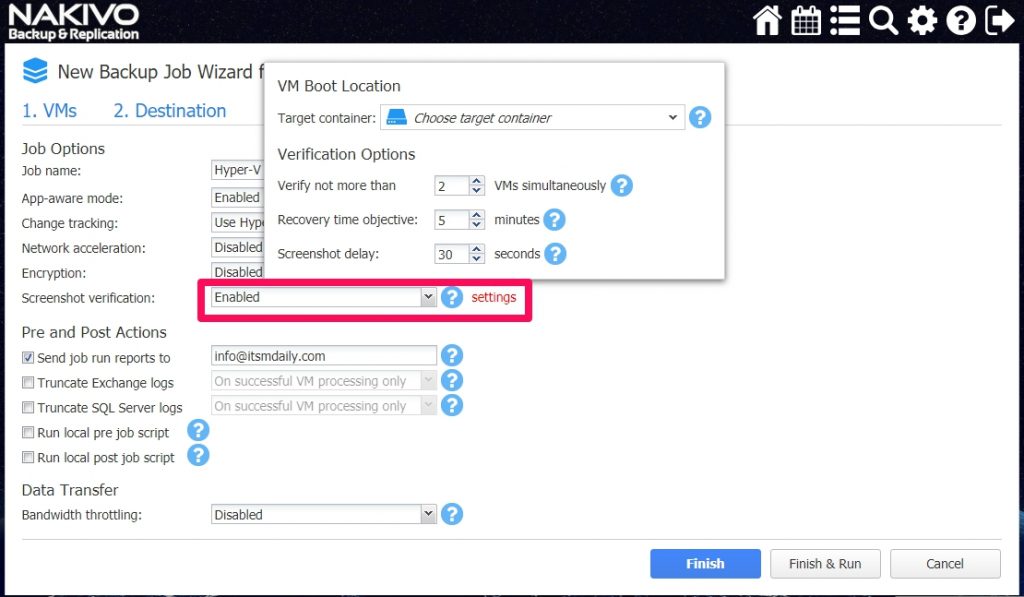
Screenshot verification on Hyper-V in action
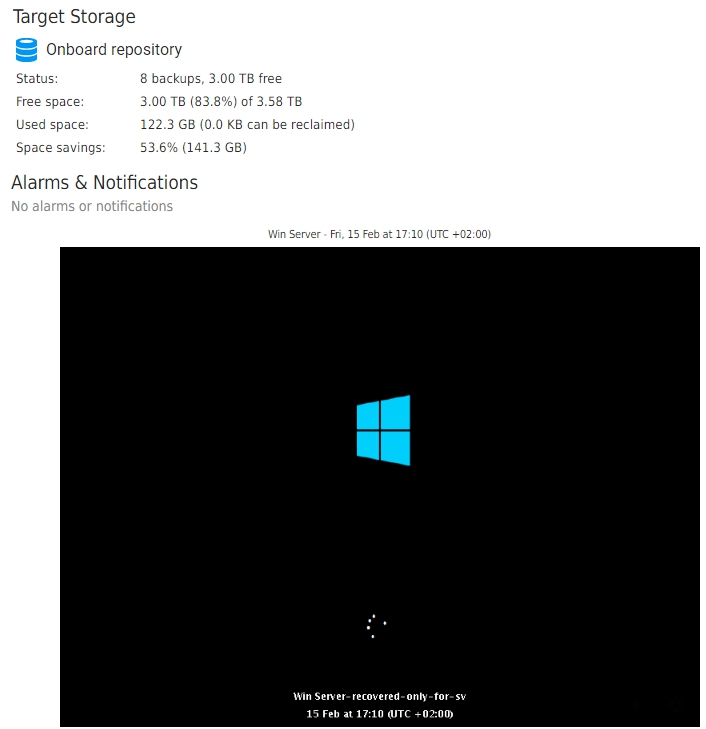
Once the backup is completed, Nakivo will start its magic. It will boot the server and create a screenshot. In the backup confirmation email, you will receive the screenshot of the server. Sometimes you have to adjust the settings a little bit. For example, if your server takes a long time to boot, you may receive a screenshot with the boot screen, while you are interested in the login screen.
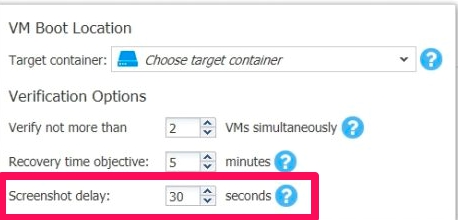
When you would like to adjust delay settings, just change the Screenshot delay value and screenshot you receive in the email will have the correct information.
You can see that the Screenshot has a picture of the login screen.
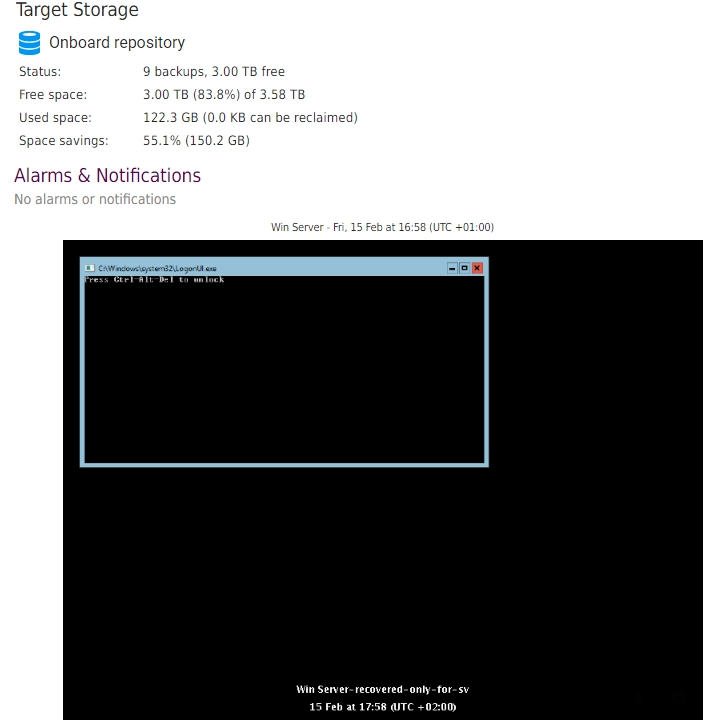
Now you are sure that the backup can be used for recovery.
Conclusion
By using a modern backup solution like Nakivo Backup and Replication, you can save time managing backup and focus on other tasks. When you set up screenshot verification for the backup jobs, Nakivo will automate backup recovery verification. That way if you will look at the backup email report, you will get the info when there is an issue with the backup. You will have more time and you will know when backup required your attention.


Schreibe einen Kommentar