I am sitting at my desk looking at the big pile of computers that arrived yesterday. I am still amazed by the size of the computers. Dell Optiplex is the computer model. One of the guys is unpacking them and placing them on the working table we have in our room. The smell of new computers gives me a special feeling, and I am always excited when we start a computer refresh.
Computer refresh project consists of two parts. Acquisition of hardware and software deployment. The first part is easy. You select a computer, get the best price, and the approval for the purchase. The approval may get complicated at times, but in general, the process is rather easy.
Now, software deployment, this one is a bit more complex. Because deploying Windows OS and Software ecosystem to a 100+ computers takes time and you need the right solution to reduce the deployment time. What is the right solution?
Specops Deploy review
About the software. There are many solutions on the market for software deployment. Solutions range from very cheap and hardly useful to expensive and vastly complicated.
While I was looking for a good deployment solution for our computers, I stumbled across a product called Specops Deploy.
Specops Deploy is a product that reduces your deployment time and at the same time enables you to cover a complete computer deployment and app management life cycle. It follows the way of Microsoft, yet provides an easy to use interface, and Group Policy management which allows you to easily navigate through the settings and review configuration.
What I am looking for is something that can be easily configured and most importantly follows Microsoft best practices. Ideally, I would manage all the settings in a way that can make configuration simple.
What makes Specops so good?
Let’s take a look at the process of creating an image and how the system works. In the past, we used a single computer, installed all the drivers, and cloned it via Ghost or a similar application. That image was useful only for that type of PC. Currently, the best practice for creating an image is to install Windows in a virtual environment, without any drivers. We don’t even install Hyper-V or VMware tools. We want the image to be as clean as possible. We install the common programs used across all departments, and Windows updates so we can reduce the time it takes for a new computer to be ready. And that is about it.
What about the drivers and other applications? Well, here is where the magic happens. Drivers are installed at the time of the image deployment. By separating drivers from the image, we can use one image and deploy the same image to several types of computers. In addition, we can update the drivers to the latest version without affecting the image. As for applications, those can be installed based on the user requirements.
Up and running
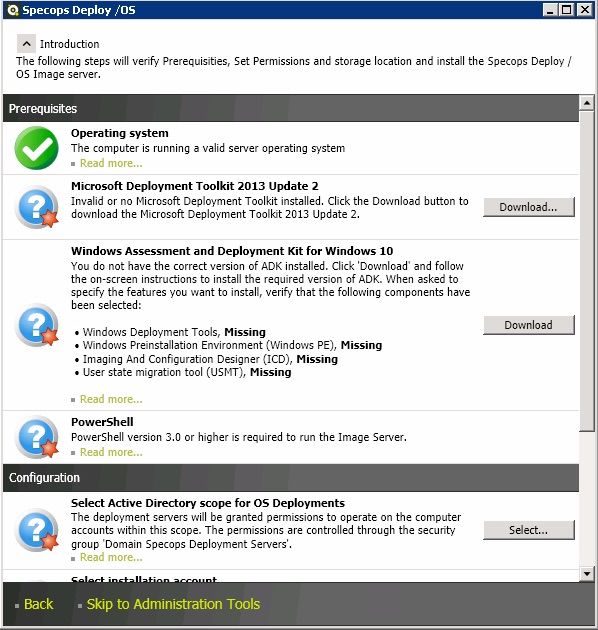
Installation is pretty straightforward. When you start the installer, a window with the prerequisites for the installation will be displayed. You have to meet the following prerequisites:
You should be running a server operating system, you have to be a local Administrator, you have to select service account which will access the database, you have to select a SQL server instance and then install the database. Once those tasks are completed you can install the application.
Since Specops is following Microsoft deployment practices it relies on several tools which you have to download before you can start the setup process. The required tools are:
- Microsoft Deployment Toolkit 2013 update 2
- Windows Assessment and Deployment Kit for Windows 10
- PowerShell 3 or higher
It’s good that the download links are provided inside the installation window so that you don’t lose time searching for the setup download links. In addition, you will also need the following tools to be able to use a full potential of the app.
- Microsoft SQL Server (you can use SQL Server 2008 Express)
- .NET 3.5 SP1 or later
- Windows Server 2008 R2, Windows Server 2008, or Windows Server 2003 R2
- Group Policy Management Console (GPMC)—for Server 2008, you can add GPMC from Server Manager.
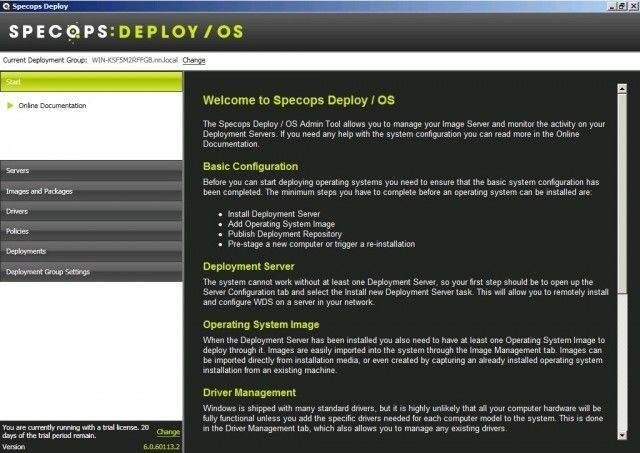
When you open Specops Deploy, you will feel at home. On the left side, you will see a navigation menu which will guide you through the entire deployment process. You will also find a welcome screen which will quickly explain what needs to be done.
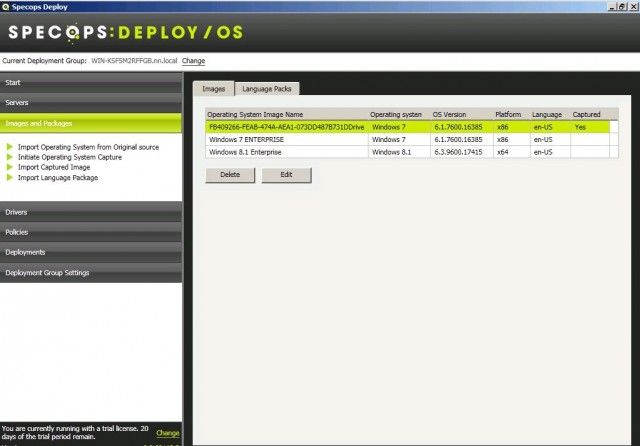
Now that we have Specops Deploy installed, we are ready to import the operating system. Different tools have different ways to capture the OS. I was surprised that Specops provides several ways to import the operating systems. You can import the operating system from the source (installation files), capture the image, or import a captured image.
Companies dealing with business units across the globe will be happy to know that you can import language packs and set up multilingual environments easily – even with one base image, since languages can be processed in the deployment process.
Do you remember the best practice for setting up an image we discussed previously? We said that it’s best to set up the time in the virtual machine. When we are finished with the details and when we are ready to capture the image, it’s a good practice to create a snapshot before the capture. Just in case we want to go back and change something.
When you are ready to capture the image, you can do so easily by running an Operating System Capture wizard. In order to initiate a successful capture you have to turn on a Remote Registry service on the image. Otherwise you will run in to the Valid Task Sequence error.
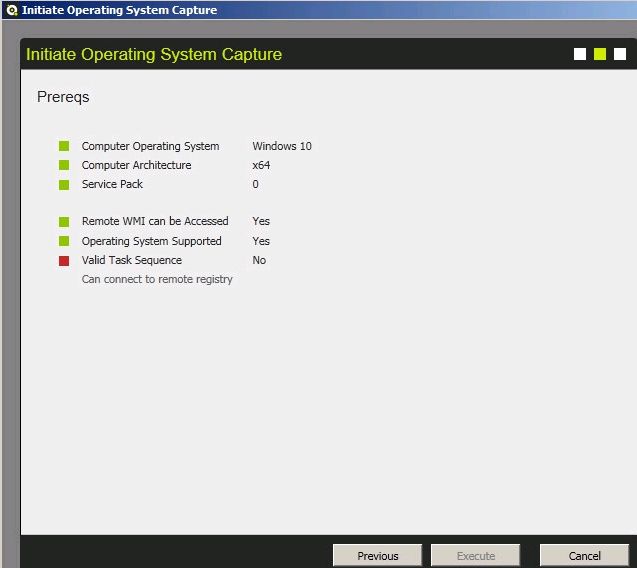
Just run services.msc and start Remote Registry service. Specops has more information about this topic including great information on how to set up a golden image (great read) on their blog.
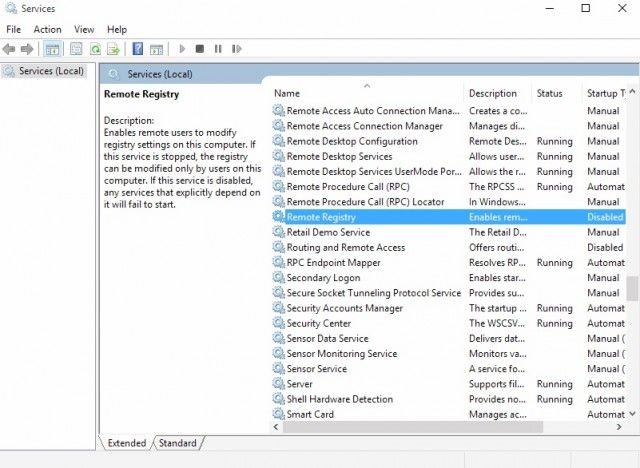
Once that is done, you can capture the image.
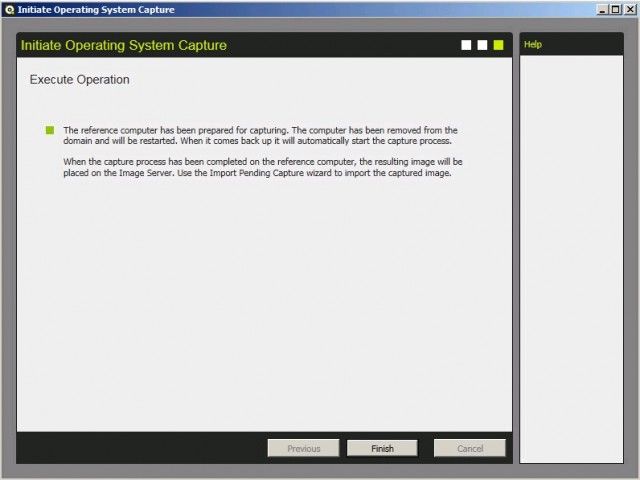
When the capture process is started, computer is removed from a domain and generalize sequence is initiated. This is a standard practice when creating Windows Images. Remember when we mentioned that you should create a snapshot? A snapshot comes in handy if you discover that there is something missing in the image.
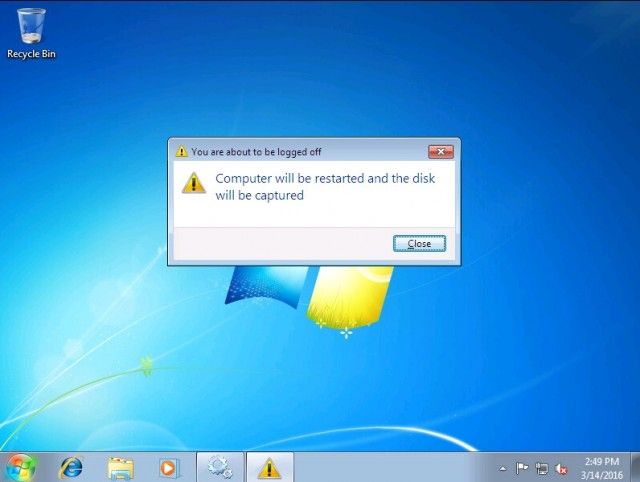
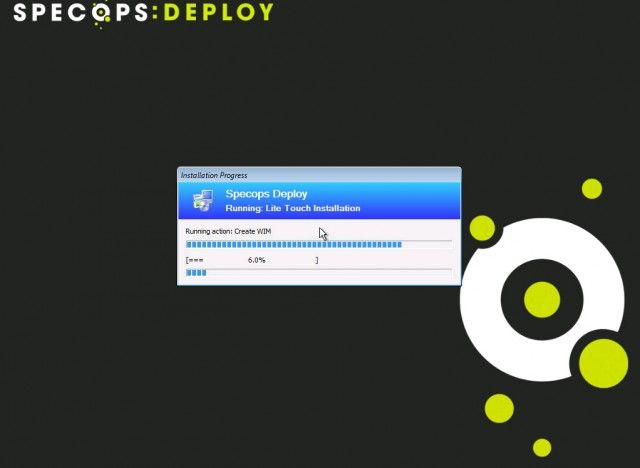
Once a computer is restarted, capture process begins.
Since you may be deploying images to different computers, you can also prepare drivers for all the computers. Having drivers separated from the image has many benefits. For one, you save a lot of time as you don’t have to update the image every time you want to update drivers. You will even save space as you won’t need to keep different images for different type of computers. Furthermore, you can update the driver repository whenever new drivers get released.
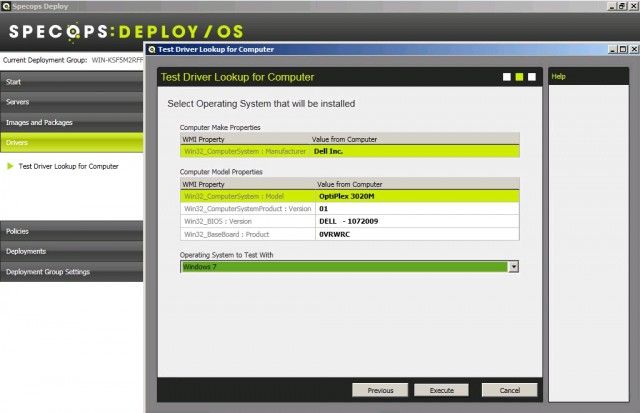
To make dealing with drivers easier, there is a Test Driver Lookup for Computer feature. As drivers have to match those of the computers listed in the repository, you can quickly verify that drivers of the brand and model matched your computers, which you will use for deployment.
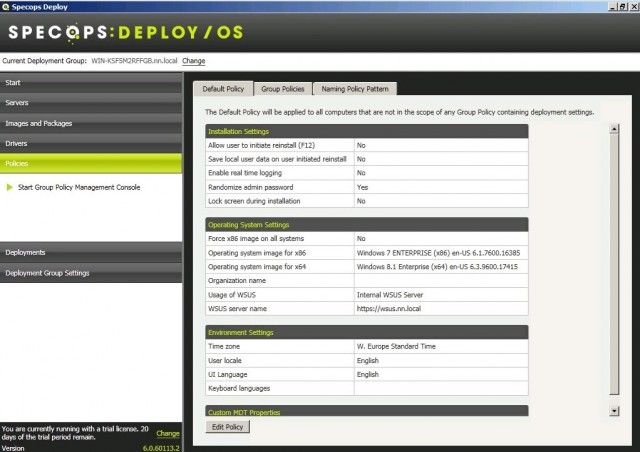
Next in the process is a policy which you configure to suit your needs. Here you can set automatic naming policy for computers you will deploy. In addition, you can control various OS and language settings. You can also add WSUS server to the policy so that when the computer goes live, it connects to WSUS to download latest patches and updates. You have the ability to access Group Policy Management Console and add settings in GP directly from the Specops GUI. Some of the settings that you control here are admin password, Time Zone, keyboard settings and Language settings.
The easiest way to deploy image to computers is to use PXE boot. You would need to use computers MAC address or computer GUID. You just connect computers to the network and the complete procedure is automatically done. But don’t fear. If you don’t have an option to use PXE boot. You can create USB keys which you can use to boot computers and start automatic deployment.
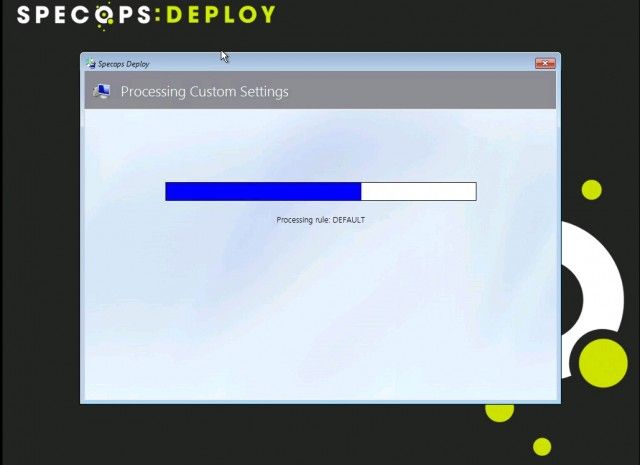
When deployment is started a computer is booted to a Windows PE environment and deployment process is started automatically.
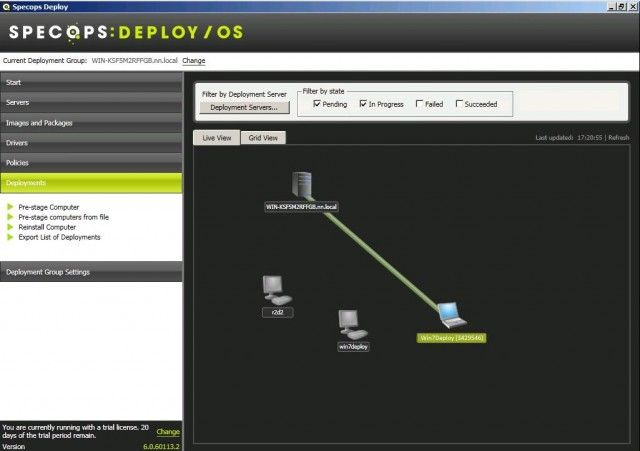
You can monitor deployment on the Deployments tab where you can see live feedback of computer deployment. This feature is really impressive as you can see in real time what is happening with your deployment.
Now that we have deployed Microsoft Windows image to computers, we have to discuss deployment of applications. Sure, you can create several images. Each image could have different set of applications installed. But again, this could complicate things a bit. Ideally, we would want to automate as much as possible.
Can OS deployment get better?
When deploying an operating system you have to use either PXE boot or a USB key to boot the computer. That works great when you have a batch of new computers, but what about existing computers? And what happens to users data? Will you send technicians to remote locations to backup data before they start OS installation? Luckily, Specops has solved this problem.
Let’s take a look at two scenarios: Scenario 1 – User leaves the company. The user had admin rights and installed a lot of cruft. What we want to do is to reinstall computer with our standard image.
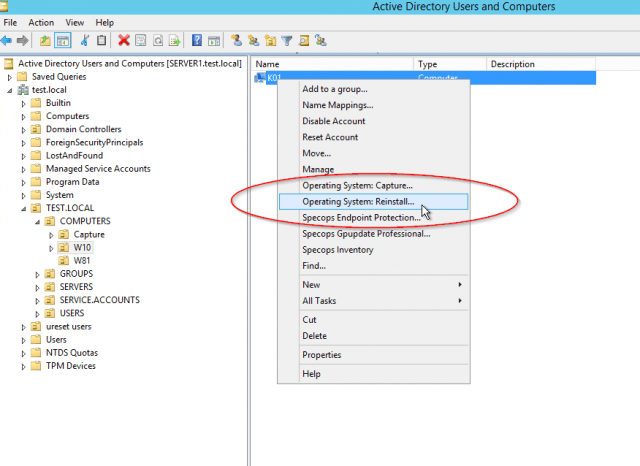
In case you may need the user data in the future, you can still choose to preserve it.
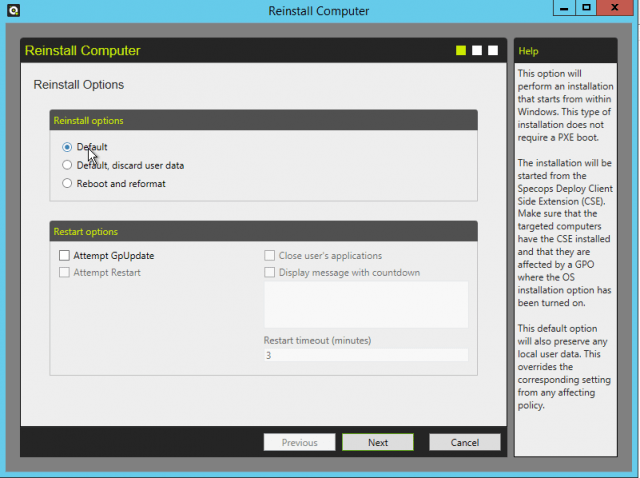
Scenario 2 – Standard OS for the company is Windows 7. They would like to upgrade computers to Windows 10.
In the first scenario, we don’t need the user data but we would need to start the deployment process without technician’s intervention (PXE or USB boot). In the second scenario, we need the user data as we are upgrading the OS, the same user would still use the same computer and the same data. What Specops does is pretty awesome. They use USMT (User state migration tool) to save the data, upgrade or reinstall operating system and restore the data. all without technician’s intervention. Imagine how many hours you could save. In both cases, you can start OS deployment by using Group Policy. How awesome is that?
Specops Deploy App
Specops has a solution called Deploy App.
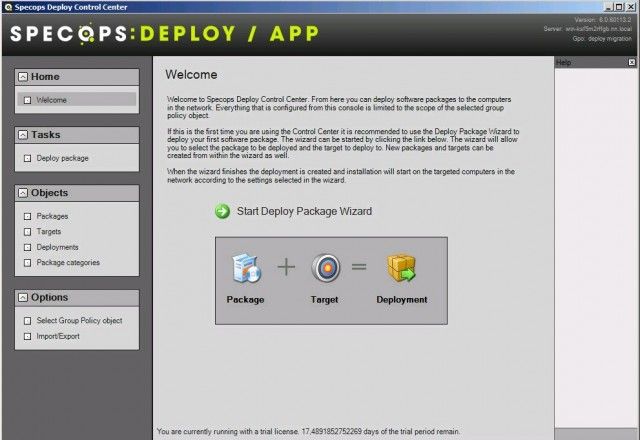
What we can do is create different packages for applications and define where they will get deployed.
The benefit is that once you create a package, for example Adobe Reader, you can easily create an updated package. For example when new version gets released, you would create an updated package and upgrade application on computers where you have deployed it.
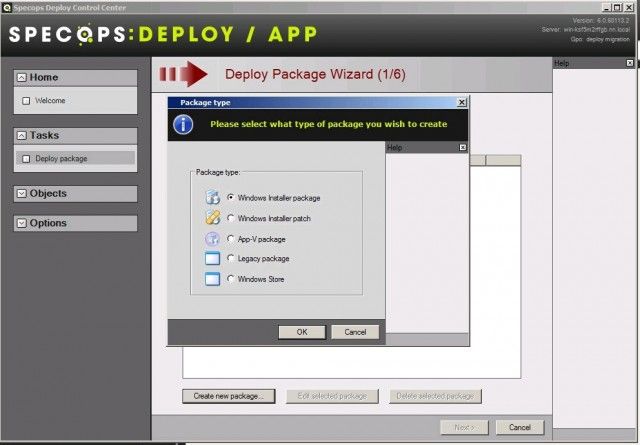
The process for creating packages is simple. You should have a shared folder where you create folders for each application, and in a couple of steps, the package is ready to be deployed.
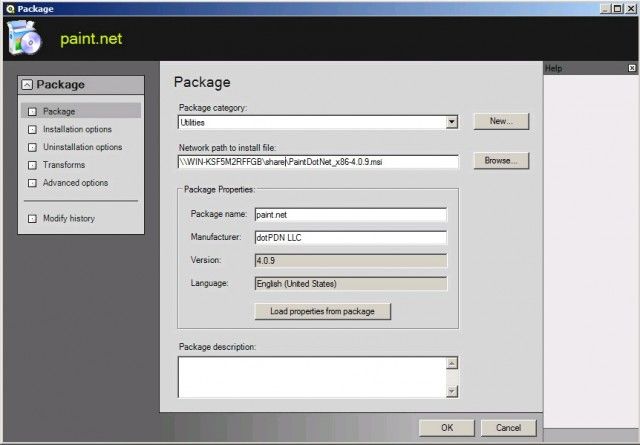
Once you create the packages, app deployment and app management becomes very easy.
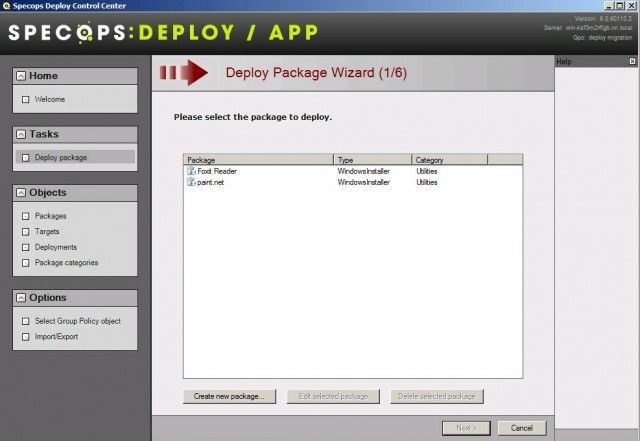
You have almost unlimited targeting options. The most common ways for deployment are targeting membership criteria like Organizational units, computer names, Sites or IP address range. But where Specops really shines is when you can select other criteria for targeting like Languages, Environment variables, Registry settings, Computer model, BIOS version, HDD free space, CPU, Memory size, Operating systems, Windows installer installations, files and even custom WMI query. You really have unlimited options and can deploy applications based on your criteria.
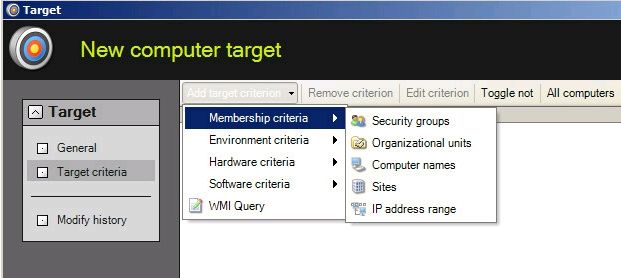
When you configure group policies and when you create packages which you can deploy to the computers, you will have neatly organized the deployment environment. You will be able to review all the settings that get applied and the best part is that you can customize your deployment with OU’s which have custom settings to match your requirements. For example, each OU has a different language and keyboard settings.

App deployment on steroids
I would like to share an experiment we did recently. We discovered that having MS Office on every computer costs a lot of money. We decided to start a special project where we would replace Microsoft Outlook with a 3rd party email client with Exchange support and replace MS Word, MS Excel, and MS PowerPoint with alternatives. To do that, technicians needed to uninstall programs, wait for the uninstallation process, and start alternative programs installation. Just think about the time it takes for one computer to complete process. Insane. I think it’s better to automate software uninstallation and installation.

With Specops, the only limit is your imagination. You can use the process for software upgrades. For example, uninstall Adobe reader 9 and install the latest version.
Or you can uninstall MS Outlook and install an alternative.
App deployment reporting
I am always excited when I start a deployment. But when you deploy an app, there is also a percentage of unsuccessful deployments. In most cases computers are offline or computers are not in use anymore.
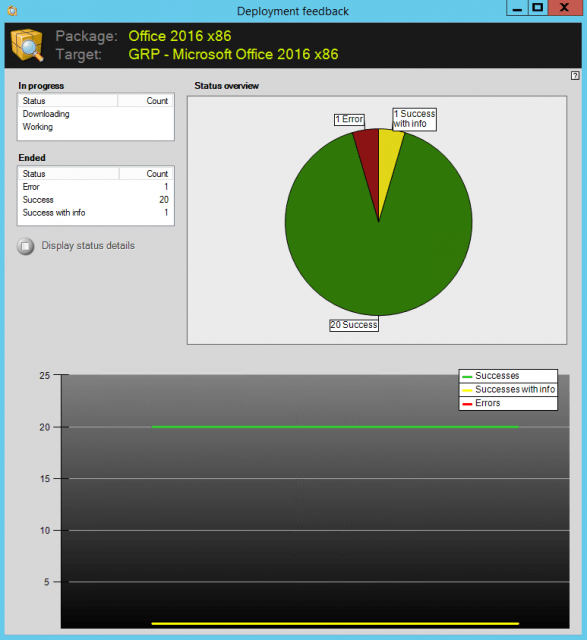
To tackle this problem, you can review application installation success. In real time. You will see the status Success, Success with info or errors. You will also see which applications are being downloaded and which applications are being installed.
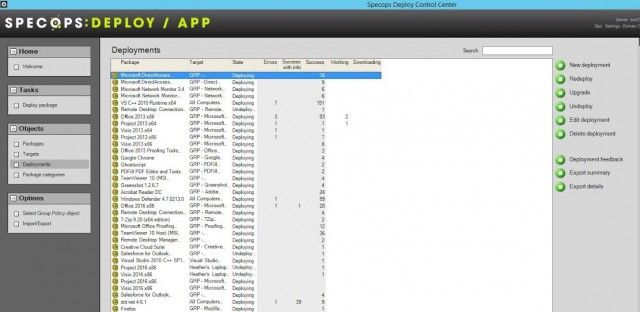
You can also review per application deployment feedback which will present a nice graph with success/error and info status. You will see a real status of deployment.
Specops Deploy Endpoint Protection
Now that you’ve learned how to deploy operating systems and applications easily with Specops, there is a third feature that makes life even easier for Sysadmins. If you are using Microsoft Endpoint protection you can manage it with Specops.
With the use of Group Policy you can manage Endpoint Protection settings for the clients installed on your client devices. You can schedule scans, enable real time protection, exclude file types, exclude files and locations and the list goes on. How cool is that?
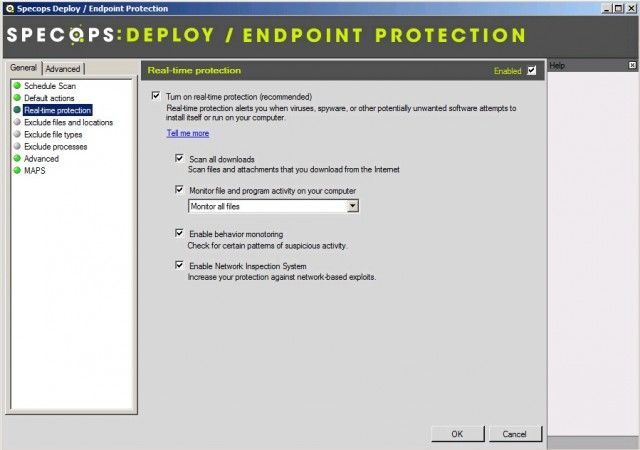
In addition, with Specops reporting, you can create reports of the data which is contained in the Specops Deploy / Endpoint Protection feedback database.
Conclusion
Specops Deploy has three components. Deploy OS is a perfect match for companies looking to automate deployment as much as possible and create a deployment environment that is easy to manage at the same time. Group policy settings gives you a granular control over settings and what I like the most about this solution is that you have a complete change log of the settings you applied and applications list you have set for deployment. With Deploy App, you can automate application deployment and management, meaning that you can take care of the application updates as well. With the third module Deploy Endpoint protection, you can manage Microsoft Endpoint Anti-Virus and set policies. You can also run reports.
Compare the Specops way to the old way where you had to have a list of modifications, settings, and application settings you applied to the image. The old way of doing deployment caused many headaches as I could easily forget about a setting and had to start again. The most important thing about Specops is that you can automate everything. In the past technicians had to manually perform computer backup before the computer was upgraded to the latest Windows version. You can and should automate this task. Also, automating application installation/upgrade/replacement is easy. Welcome to the future. I highly recommend Specops Deploy. You can download a trial version and give it a go. I think you will like it.


Schreibe einen Kommentar