I have only recently found out about Vembu, a company that has a portfolio of an extensive range of backup products. Apparently, Vembu has a long history of Backup products. Interested in the offerings, I immediately installed what they call Vembu Backup and Recovery Suite. Vembu offers a complete offering for backup and disaster recovery. They, support VMware, Hyper-V, Physical Servers, and Workstations. In addition, the product has support for many applications like Exchange, SharePoint, SQL, Office 365, and Google Apps suite. The product even has support for the cloud in addition to on-site and off-site. One of the best aspects of the Vembu BDR suite is the web interface. It’s simple, logical, and intuitive. I kid you not.
Vembu Backup & Disaster recovery suite review
Vembu Backup & Disaster Recovery is available in two editions: Paid and Free edition. You can test a fully functioning version with a no-limit trial mode for 30 days. When you start the installation, a familiar window will pop up notifying you that installation is about to begin. Installation can’t be simpler. It’s a set of several windows where you click the Next button.
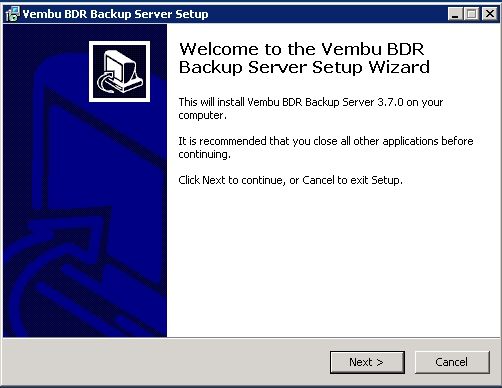
You have to select the installation location and storage repository. You can also choose ports for backup and for GUI.
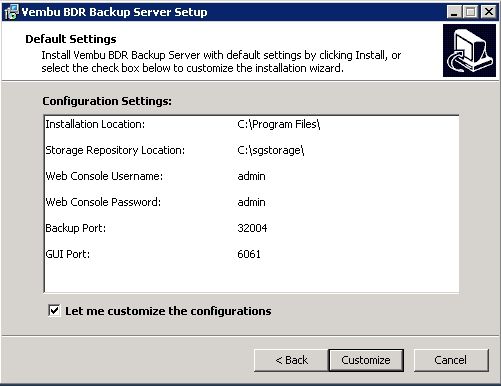
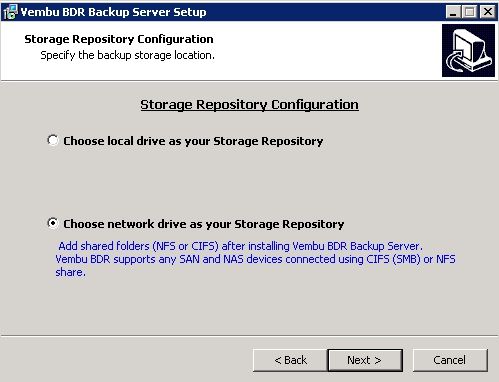
You can choose a storage repository on a local drive, or you can choose a network drive. For a network-based repository, you can use CIFS or NFS protocols.
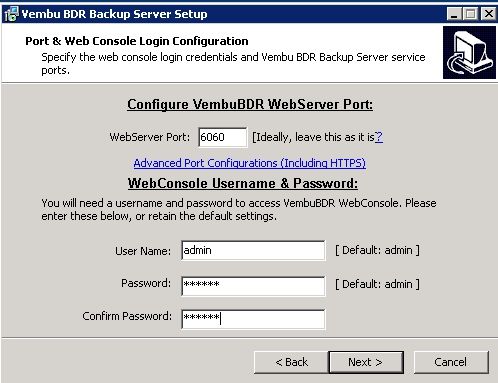
You can select a web server port and you can also set up a custom username and a personalized password.
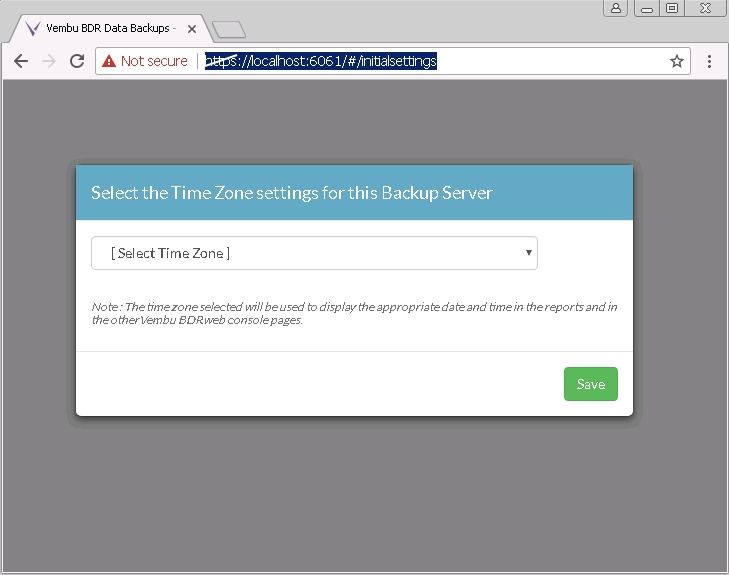
When you complete the initial configuration, you can log into the Vembu web interface.
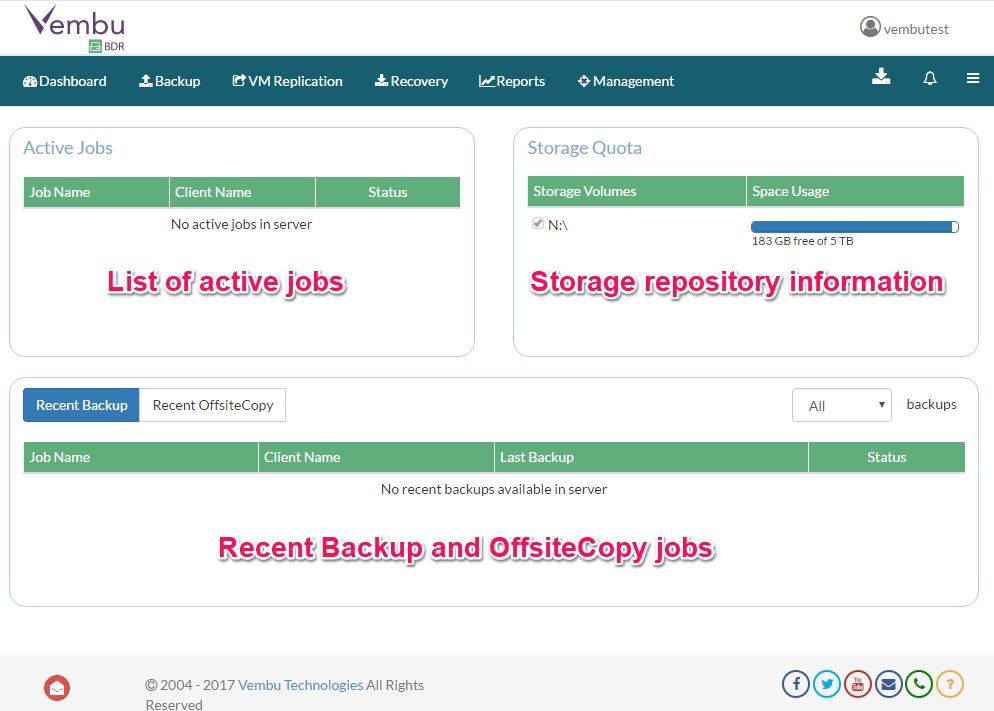
Vembu has crafted one of the best-looking interfaces. And I don’t mean all flashy look. It’s well thought out, and amazingly simple to use. A color combination is easy on the eyes. All the information is visible and is not hidden under a submenu of submenu like with some products. Also, the menu is clean and has all the important options reachable with one or two clicks. For example, would you like to set up a backup job? No problem, click on Backup and Backup VMware (or Hyper-V if you have one instead). The same applies to replication. Even recovery is done with 2 mouse clicks – click on Recovery and select a backup job you would like to recover.
On the Dashboard, you will see three areas. The first area is called Active jobs, here you will see all the jobs that are active and their status. On the storage Quota area, you will see storage volumes and space usage. The third area which also takes up the most space is called the Recent Backup / Recent OffsiteCopy area where all jobs are listed.
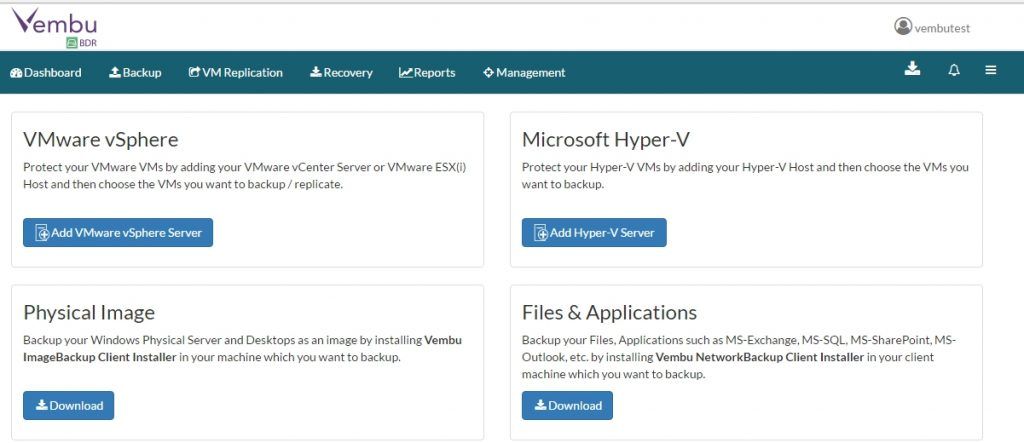
When you add a server, you must select a type first. You can back up VMware vSphere or Microsoft Hyper-V. What is interesting is that Vembu also supports Physical servers which is a welcome addition. You can back up both Physical servers and Desktops. To backup files and applications (MS Exchange, MS SQL, MS SharePoint, MS Outlook, etc…) you have to install a Files & Applications installer. There are still companies that use ancient solutions for backup. At the same time, a lot of Virtual infrastructure backup solutions don’t support backing up physical servers. When companies are doing switch to a new backup product, they may prefer to use a solution that can back up all of their infrastructures so they can replace the old backup solution with a new, better, and modern backup solution for all their needs.
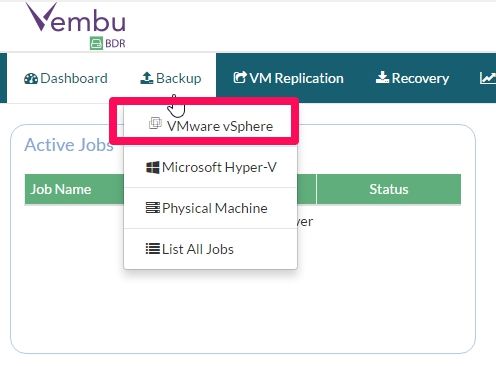
There is a particularly good user experience across Vembu backup. To set up your first backup job, you click on a Backup in the menu and click on the type of infrastructure you have in your organization. I have selected VMware vSphere. You can easily have multiple virtual infrastructure types.
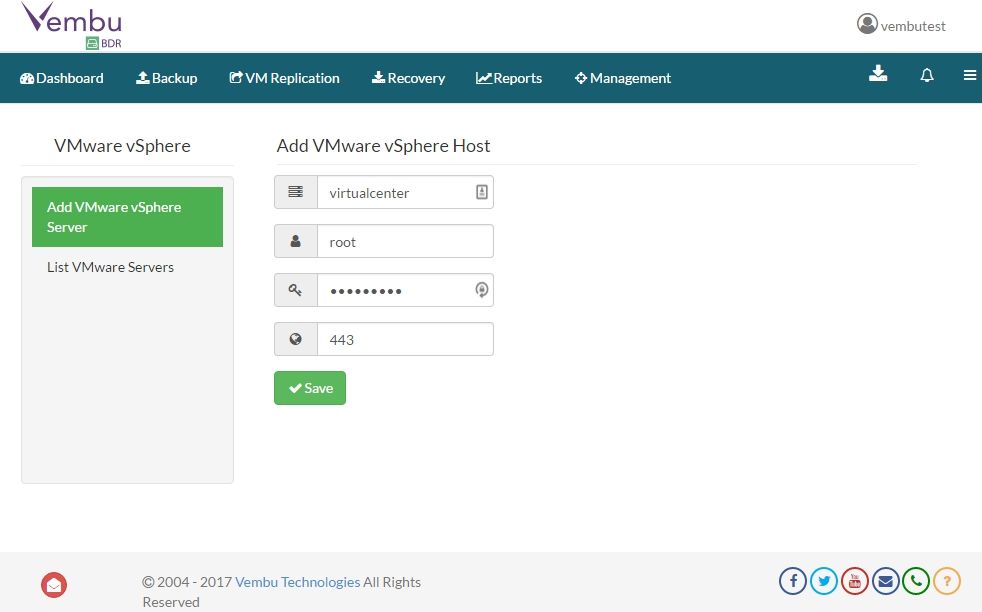
First, you need to enter your vSphere host information.
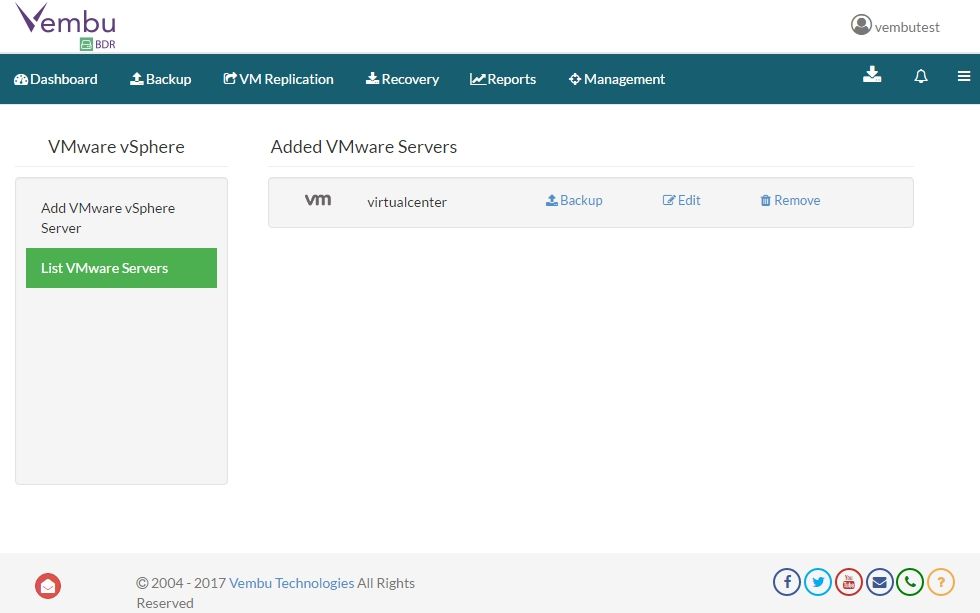
Once you save, you will see your servers listed.
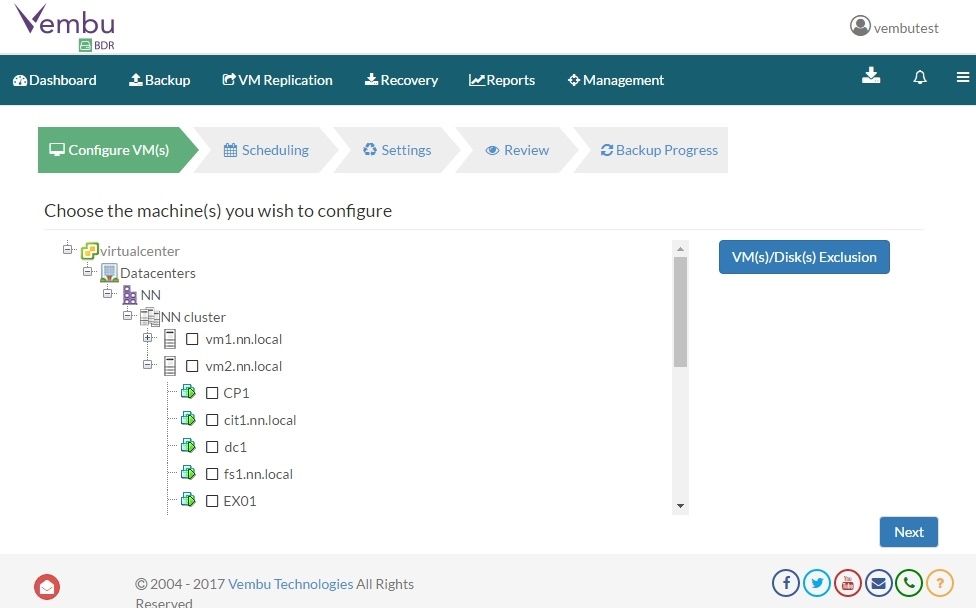
To create a backup job, you can click on the Backup icon so you can start the creation of a backup job. You will see your VMware or Hyper-V infrastructure which you can expand easily. You select the servers you would like to back up. Click on the next button.
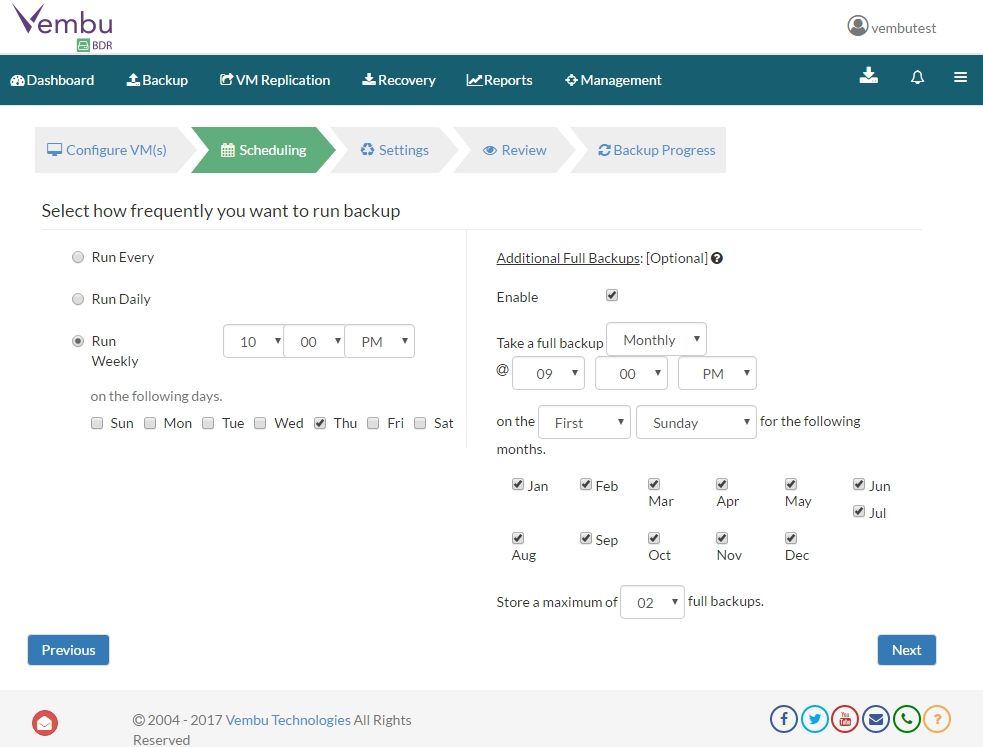
Once you have selected virtual machines you can also set up the frequency for the job. You can set up daily, weekly, Monthly, or a complete custom date.
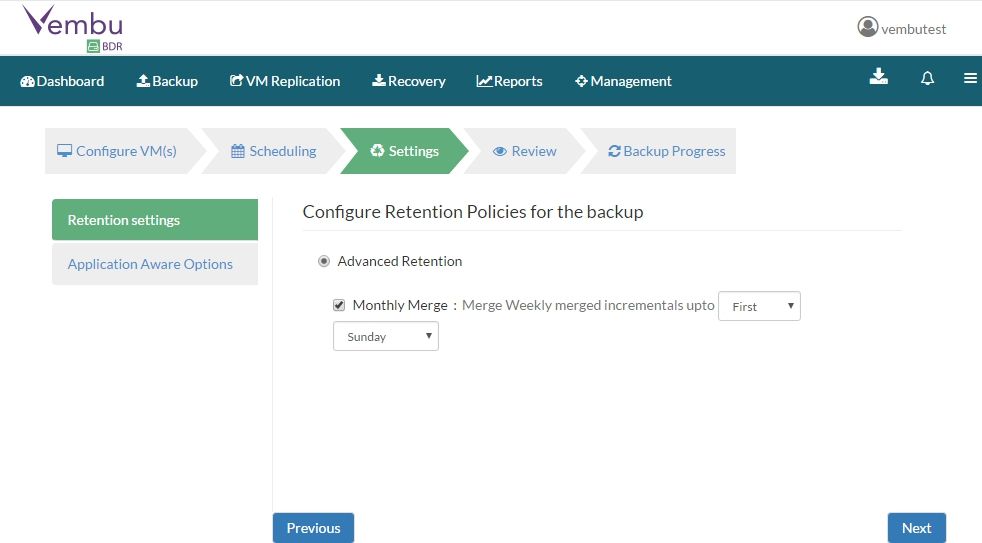
You can also set up a retention for the job.
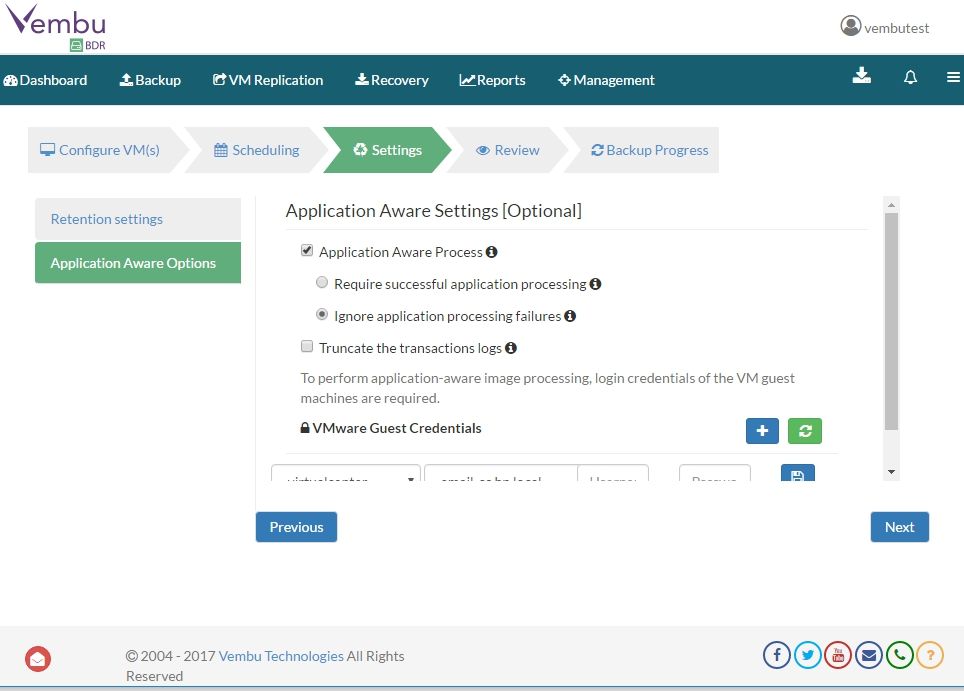
You can enable Application Aware Settings. This is an option setting. For example, if you want to restore MS Exchange items
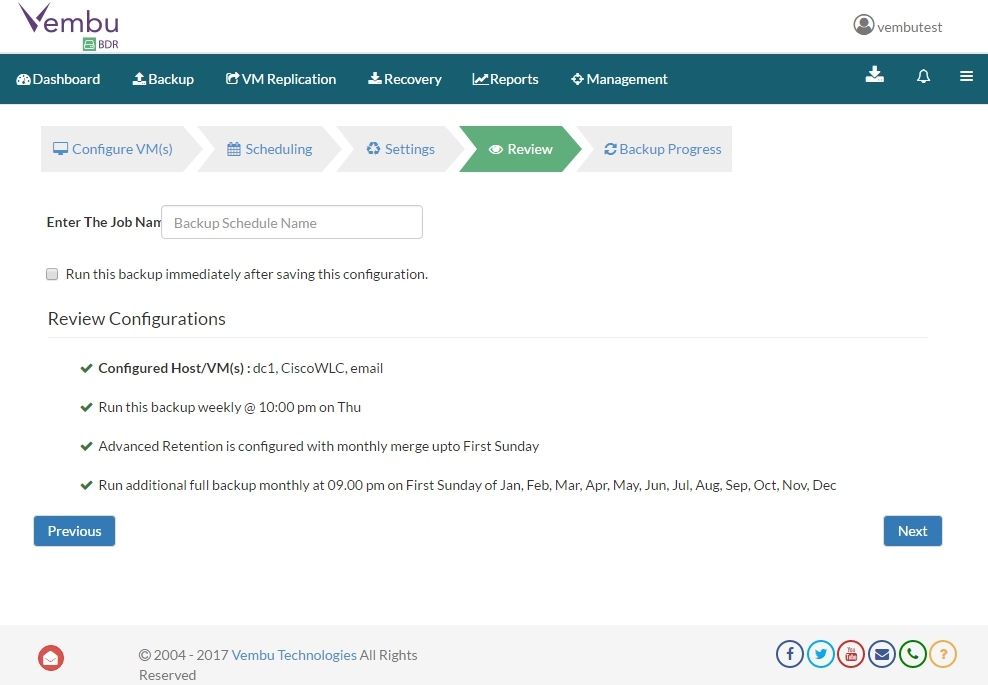
Once you have selected all the settings you have to name the job. You can also do a final check to confirm the selection of VMs and the settings which are applied.
A list of Backup jobs will show you all the jobs you have created. In addition, you will also see if a job is running. You can suspend/resume the job. You can also start the job manually. In addition, you can view the reports for a job.

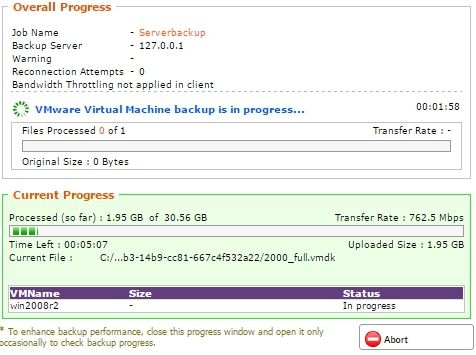
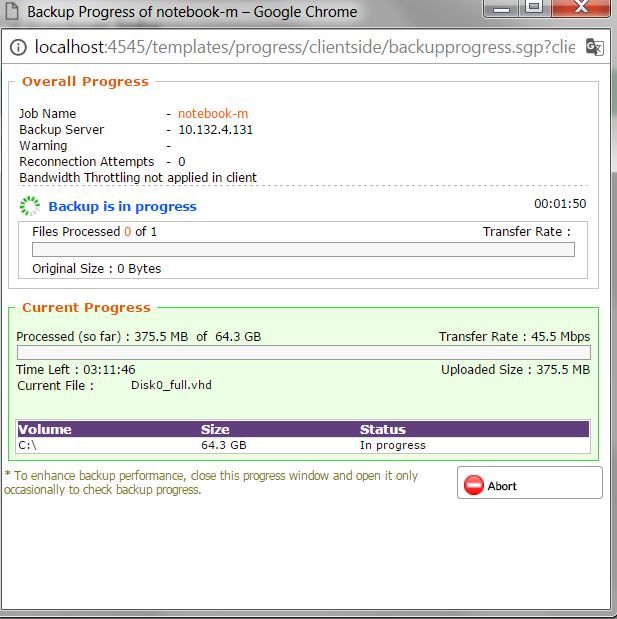
If you click on a job status, a new window will open showing you the job status. You will see the Status, Current progress including the transfer rate and uploaded size. You can also abort the job if required.
Replication OMG
Vembu has put a lot of thought into the features of this product and Replication is no exception. Replication is accessible from the menu and a procedure to set up is as simple as and has some excellent features. First step beings with VM selection. To proceed with job creation, click on the Next button.
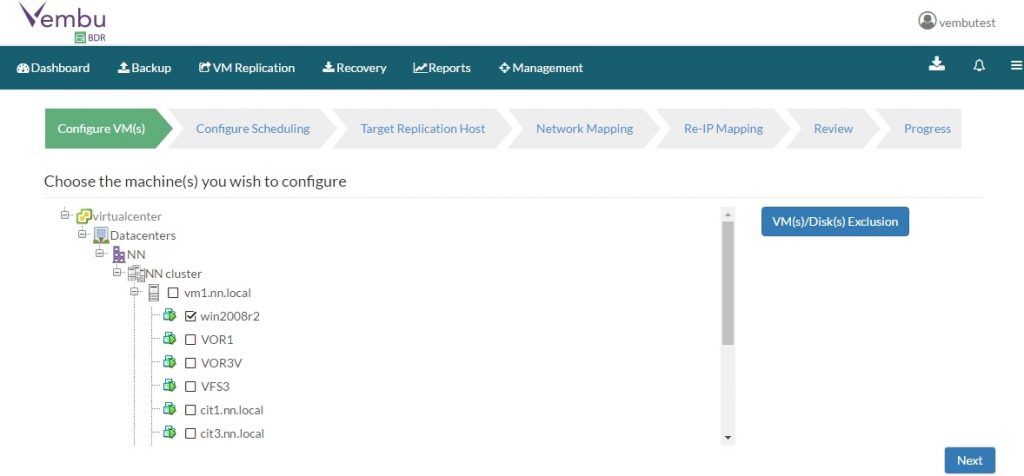
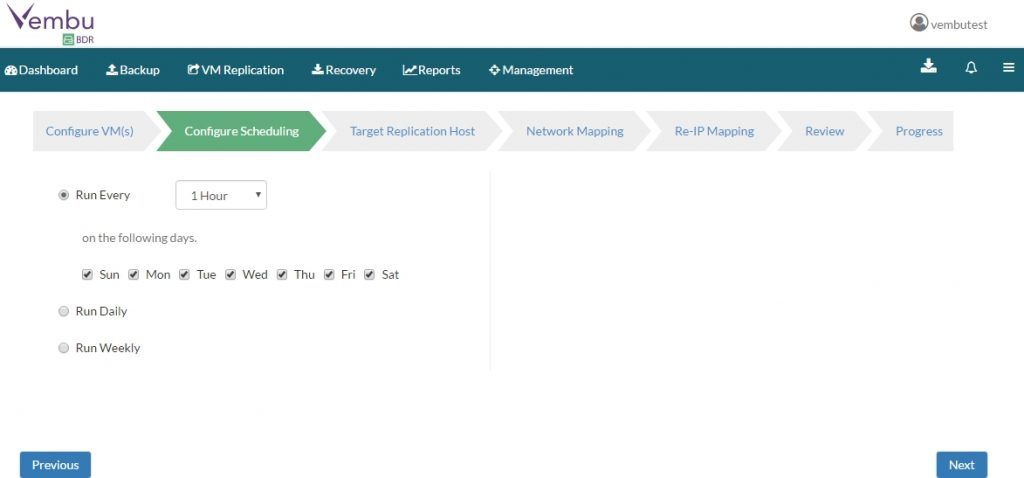
The next step is to configure a schedule – when replication will run. You can set up replication to run from every 15 minutes to every 12 hours. Just think about it for a moment, having only 15 minutes difference between the original and the replica is amazing. Even more, when you don’t need a set of expensive storage, as replication is done with the software. You can also set that replication is running daily or weekly for the servers that are not as important.
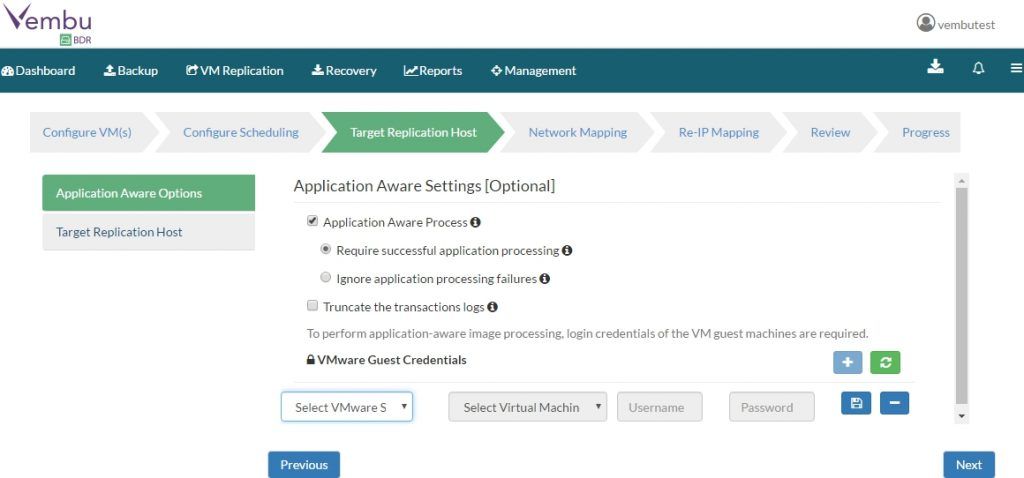
The next step is to configure Application Aware Options. This means that the application which is important to us is aware that a backup is being run and we don’t lose any data in the process when the snapshot is created. Here, we can set that we require successful application processing or that we ignore successful processing. We can also set it to truncate the transaction logs. VMware Guest Credentials are necessary for application awareness to take place.
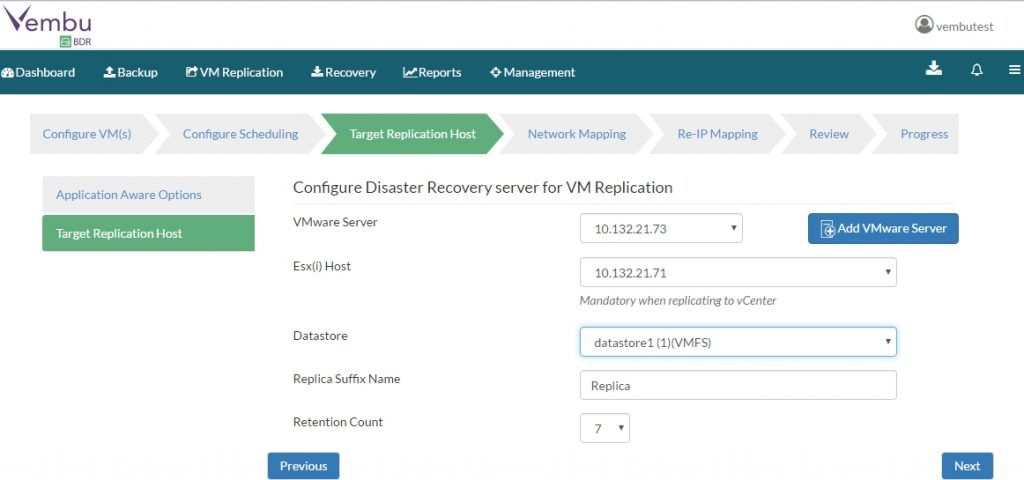
In the next step, we add a replica VMware center. If we use vCenter, we also have added the ESXi host. We select the data store and Replica suffix name. We can also set a replica retention count.
On the Network Mapping screen, you Configure networks for the main site and network for the target Network.
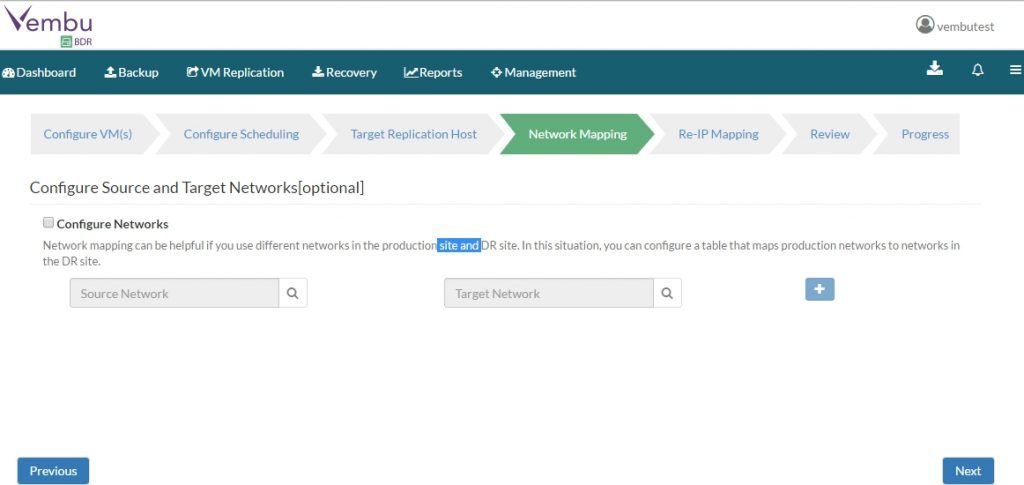
Network mapping is awesome. Let me tell you why. For example, when you have a second, remote location, there is a different IP range than on the primary location. If you restore a server at the remote location the server won’t be available when it’s booted. The reason is the following setting. Servers usually have manually set IPs. Even if you run a DHCP server on a remote location, it won’t help. While there are expensive solutions to solve the problem of Layer 2 networking, Vembu has a simple fix for this problem.
All you have to do is to configure Source and Target networking. Here you define Source Networks and Target networks. That way, a server, when restored to the secondary location, will get an IP from that location. Once it has a new IP it is accessible to all remote locations.
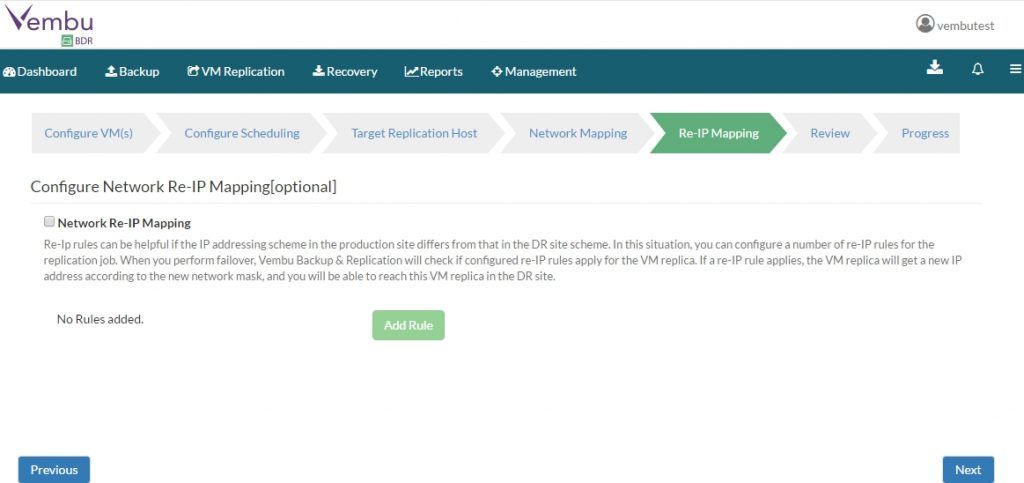
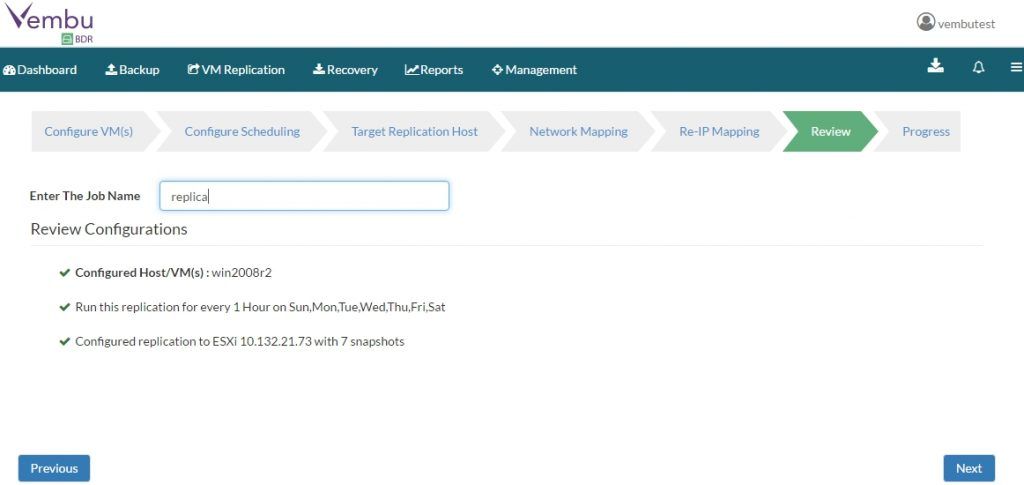
The last step in the Replication set up is to Review configuration. Once we have confirmed and entered the job name, we can start replication.
Vembu BDR Restore
When you want to restore your data, you have several options with Vembu.
- Quickly VM recovery is used when you use Hyper-V or KVM.
- Live Recovery to ESX(i) Server is used when you want to restore to VMware
- File Level Recovery is used when you want to recover files from the backup
- Disk level recovery is used when you want to restore disks to target VMs
- The download is used when you want to download the backup image to the local computer. You can select from many formats.
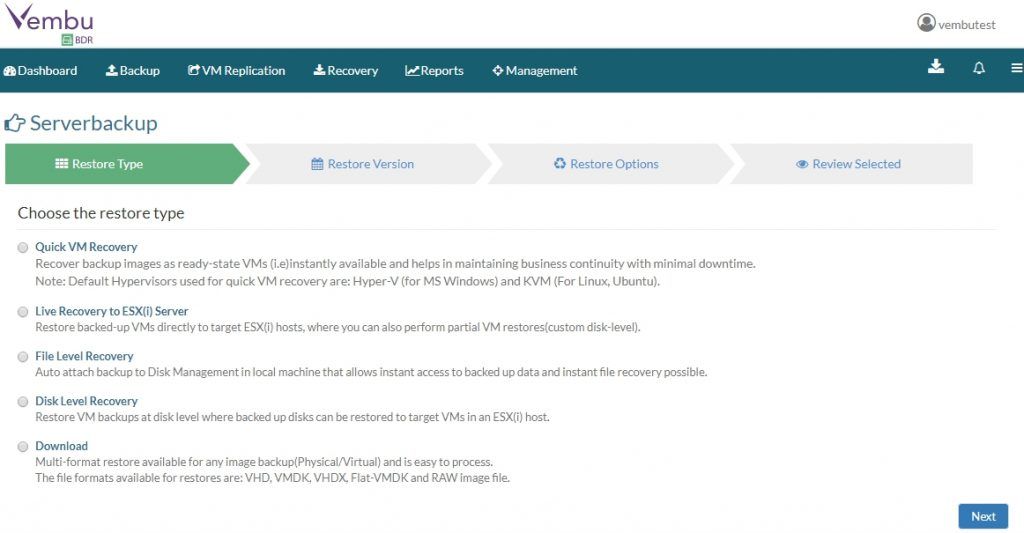
I would like to run the image directly from the backup. The next step is to select a restored version.
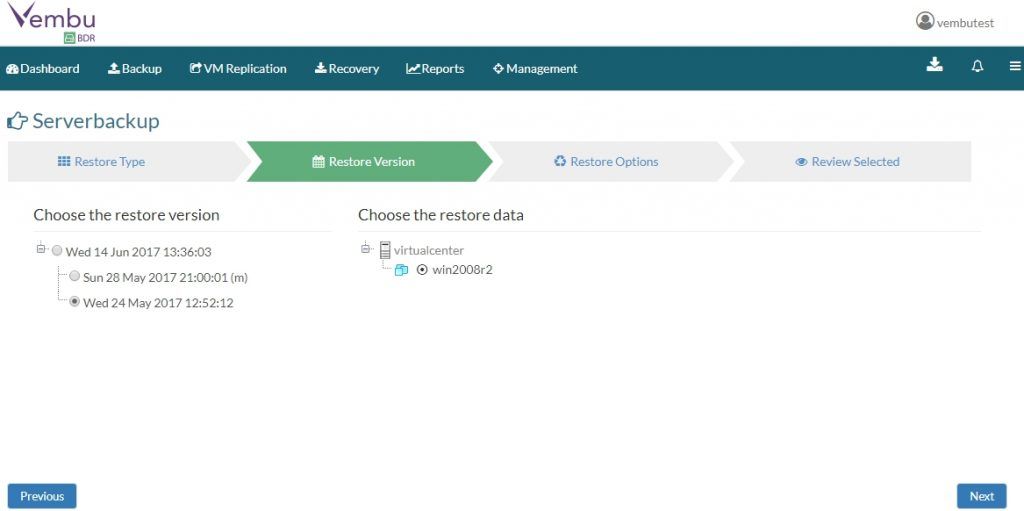
If your main server fails, like the exchange or database server you need to recover it as soon as possible. One of the options for such cases is the ability to boot directly to the backup image. What Vembu does is quite simple. It mounts your backup as an NFS drive. Once that is completed, you can run your backup directly. Let me show you how simple is that. First, you select Where you want to restore your server and complete the procedure.
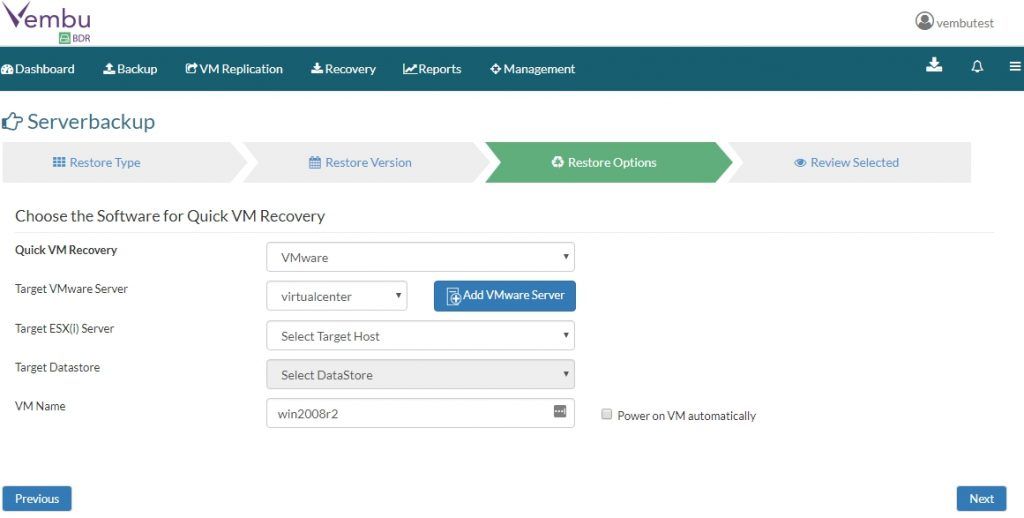
In the Recovery section, you will see that the process was initiated.

Vembu will mount an NFS repository with your backup. As you can see, Vembu has several image types in the backup. That means that you can have instant recovery for VMware and Hyper-V from one backup. How awesome is that?
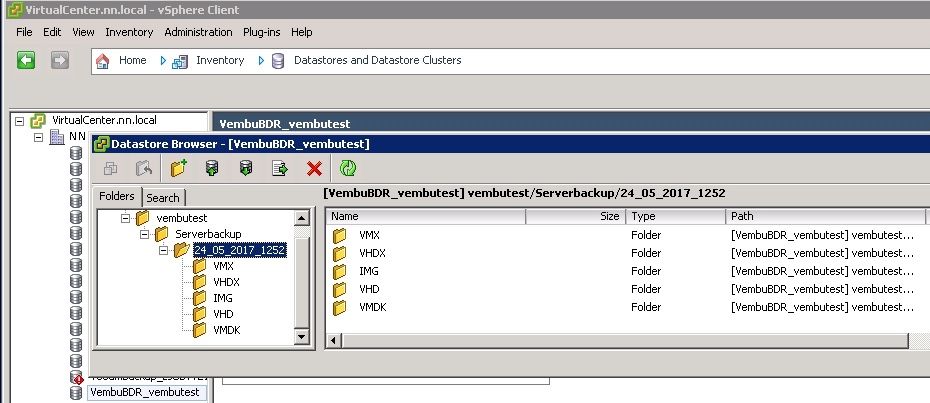
When you look at the list of virtual servers, you will see the attached server from the backup. You can start and run it directly from the backup.

One of the reasons why is this possible is also Vembu HIVE. Vembu HIVE is a special file system developed by Vembu. It does all the magic like deduplication, version control, error correction, and encryption.
Vembu ImageBackup & Excellent Physical Server Backup Software
When you are about to change your existing backup software, it’s important to choose software that can cover your entire infrastructure.
I know that currently, some people believe that all the servers are virtual. But there are still many companies that run applications on physical servers as well. Some fear licensing costs, some fear performance penalties, then some don’t have the budget… Whatever the reason, there are still many physical servers in this world that require a solid backup. In addition, I am quite sure, that you also have a lot of personal computers and laptops to protect. I learned my lesson when a high-ranking manager lost his data due to an SSD drive failure on his laptop. Data was so important to him and to the company that a director approved a cost of $1800 for SSD recovery service.
About the SSD recovery experience, I would really like to share my story, because I felt like a fool, and I could have prevented the problem in the first place. When I brought a drive to the service, they told me that there is a starting fee, even though they may not recover all data. Fine. After the initial review which took them a couple of days, they assured me that the data is intact and that it can be recovered. Oh, the joy. I immediately called the manager who was affected. I explained what I learned. He was happy. He asked when he can expect his data several times. After a week, guys in the service told me that it may not be possible to recover data due to a chip failure… But you said data can be recovered I almost cried on the phone. Yes, but only now the problem is visible… We don’t know if we can recover the data…. I didn’t have the power to notify the manager about the possible complication. I felt bad.
I felt bad for additional 10 days. For all this time I didn’t know if the data will be recovered or not. When I called the service, they said that they are still working on it. It was 20 days in total. They called me and explained that the process was extremely difficult and that they managed to recover data. Whew. Awesome feeling. I picked up a disk drive with restored files. When I tried to copy the data to the manager’s computer, I couldn’t as there were bad sectors on the drive. I lost another day to pick a second copy. Finally, with the second drive, I was able to copy his data back to the manager’s laptop. He was incredibly happy. And so was I. But I will never forget the feeling. A mixture of being angry and desperation. Without the power to do something. Just waiting. That’s why we have set up a laptop and personal computer backup policy. This should not have happened if we had a backup in place for at least managers‘ computers.
When you are evaluating a backup product, it’s so much easier to know that you can use the same software for a complete infrastructure – virtual server, physical servers, and personal computers.
To protect personal computers and physical servers, Vembu has add-ons, called Network Backup and Image Backup.
Vembu Network Backup
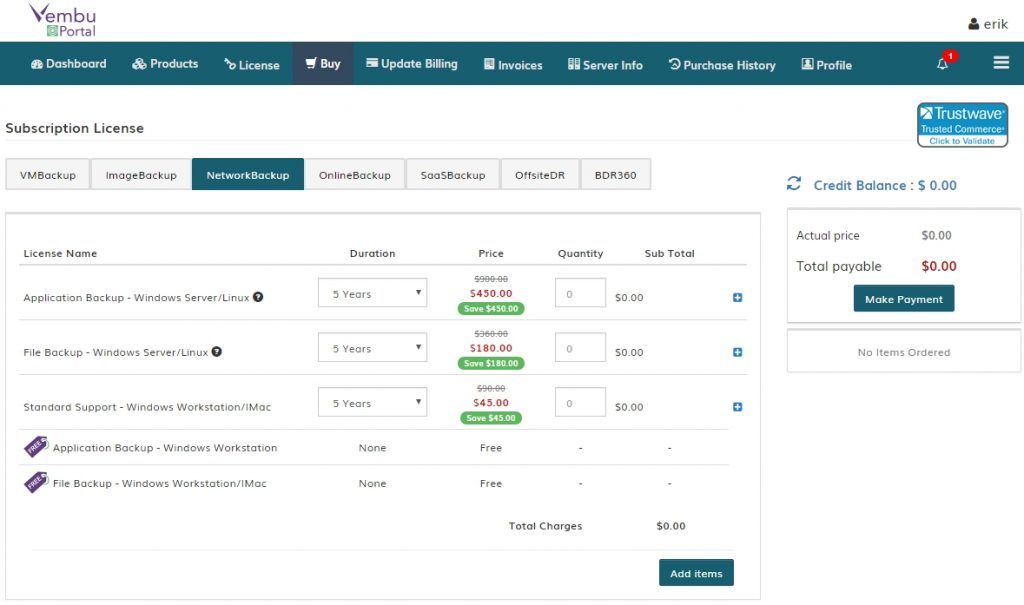
Vembu Network Backup is a file-based backup for MAC, Windows, and Linux-based operating systems. It can be used to backup files on the file server, or it can be used to backup applications like SQL Server, Exchange Server, MS SharePoint, Active Directory, Registry, and Active state. In addition, Vembu Network Backup can be used to back up Windows PCs. It has support for MS Outlook data out of the box. What is amazing about this product is that it is FREE for Personal computers (even workstations connected to the domain). It also integrates with the main storage repository meaning that we can unify our backup.
It will impress you with the same clean interface and the same easy-to-use controls as the VM backup interface. Let’s look at how to create a simple backup job on a laptop. First, you must install the agent, installation is remarkably simple and takes just a couple of next-button clicks. Once installed, we click on a Backup and create a new backup job. We select a folder.
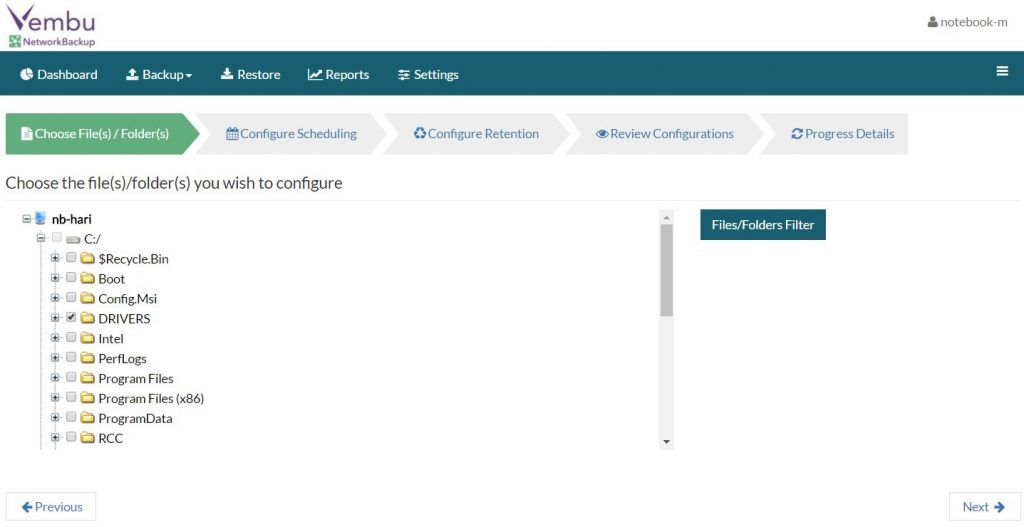
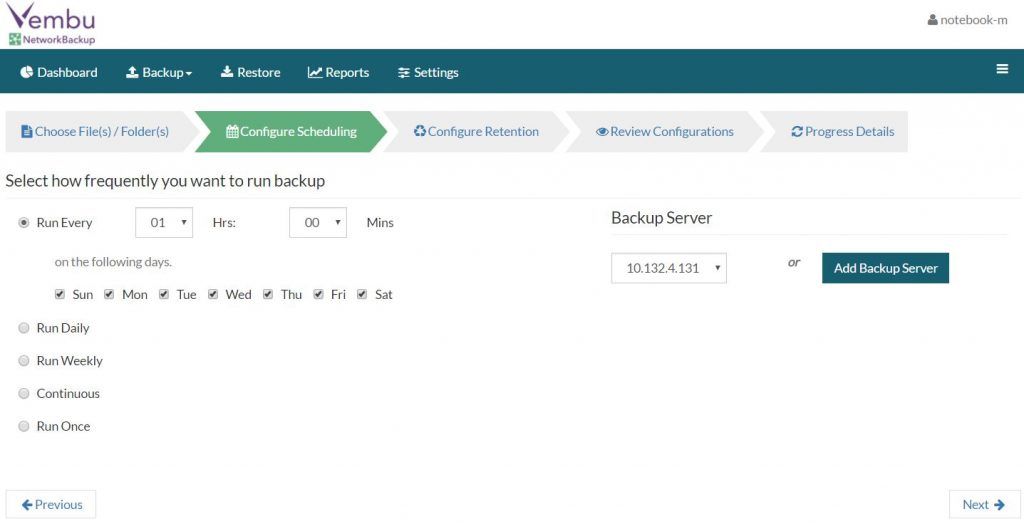
We have to configure Scheduling and a Backup server.
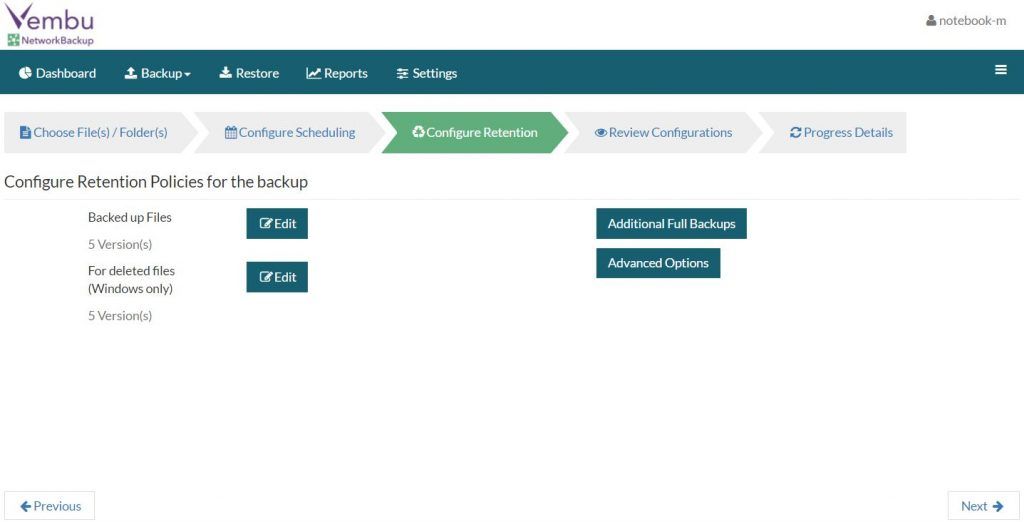
We can configure a retention as well so that it will keep X number of versions. We can configure that for Changes in the file or deleted files.
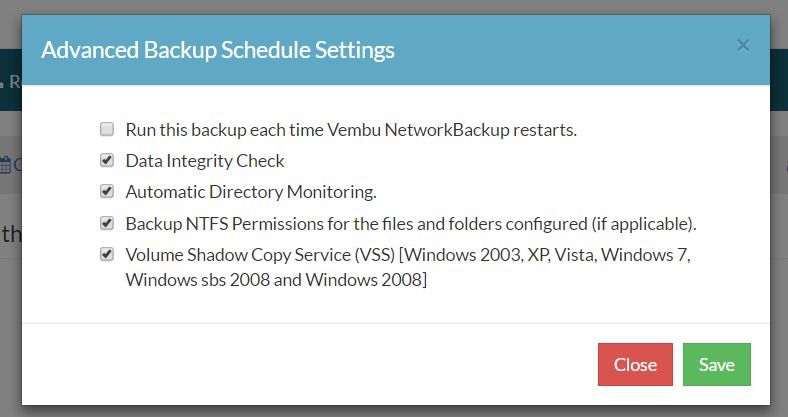
We can also configure for the backup: data integrity checks, Automatic directory monitoring, NTFS permissions backup, VSS Backup. We can also choose to run the backup every time Network Backup restarts.
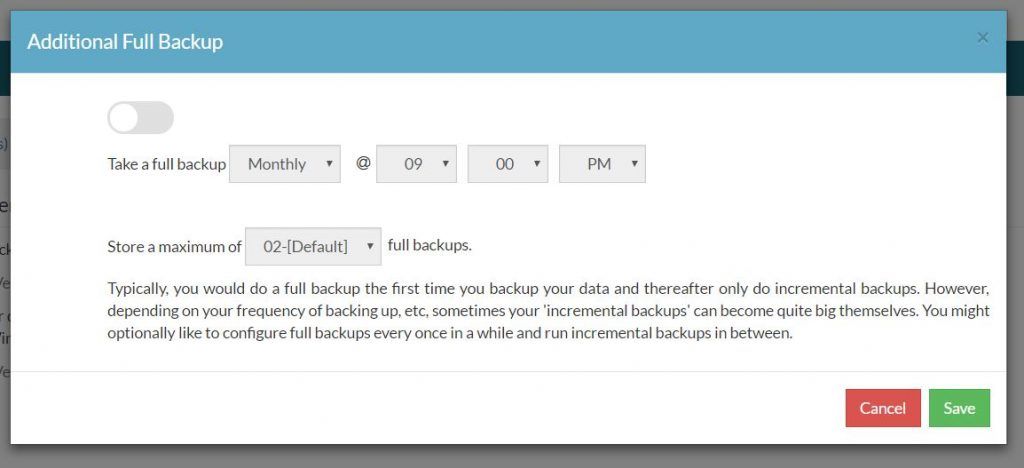
If required we can also schedule additional Full Backup and we can also set up backupš retention.
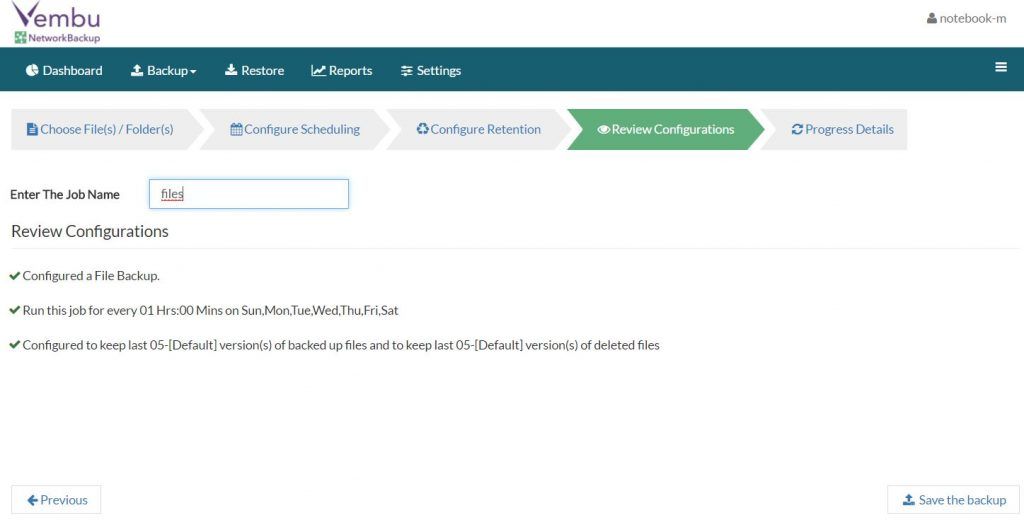
The last step involves naming the backup and running the job. The whole process is very simple.
Vembu ImageBackup
Vembu ImageBackup can be used to create images of Physical computers and Physical servers. What is the benefit of Image-based backup and why would you use one? One word – Awesomeness.
Let me explain. If you remember the old way of doing things… Like really old way… You had a backup of files on the server. If a server failed, you had to reinstall the server or a computer first. If you lost the drivers CD that complicates the situation a bit. More for the server than for the PCs. To solve this problem, Vembu uses the same technology and creates VM Images. That means that you can run an image of your physical server or computer directly on your virtual infrastructure. How cool is that?
Now imagine the following scenario, (this actually happened to me). Oracle server which was a physical server failed in the morning right before the store opened the door. I received a call at 9:00 in the morning. ERP is not working. At 9:15 I received a call from our CFO asking me why the store is not operational. After I explained that I am investigating, he called me back at 9:30 why the store does not trade and if I need an assistant to make the recovery process faster. It was a very unpleasant experience. More so, because that store was far away and in another country. The whole restoration process lasted 2 hours. If I had Vembu, I could do things.
If I had Vembu, I could do things differently. If you have the virtual infrastructure, you just run the VM from the backup. In 10 minutes, you are operational. If you have to restore back to the physical server, well, you boot to the Recovery CD and restore the image from the backup. It can be dissimilar hardware too. Vembu can handle that. In that case, the recovery could take a little bit longer as all the data has to be copied back from the backup repository.
I also had an experience when a director’s computer stopped working unexpectedly. That was in 2004. He was so mad when I told him how long we need to get him back on track. With Vembu, which would be a lot easier. Now about the process. The whole experience is pretty much the same as previous products.
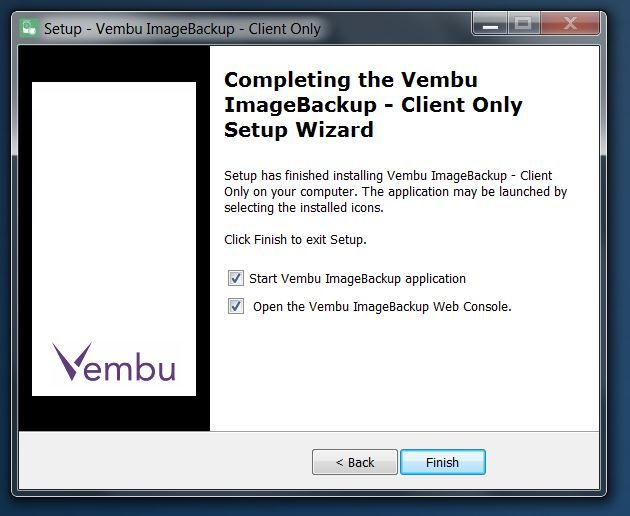
You will Finish the installation by pressing Next several times.
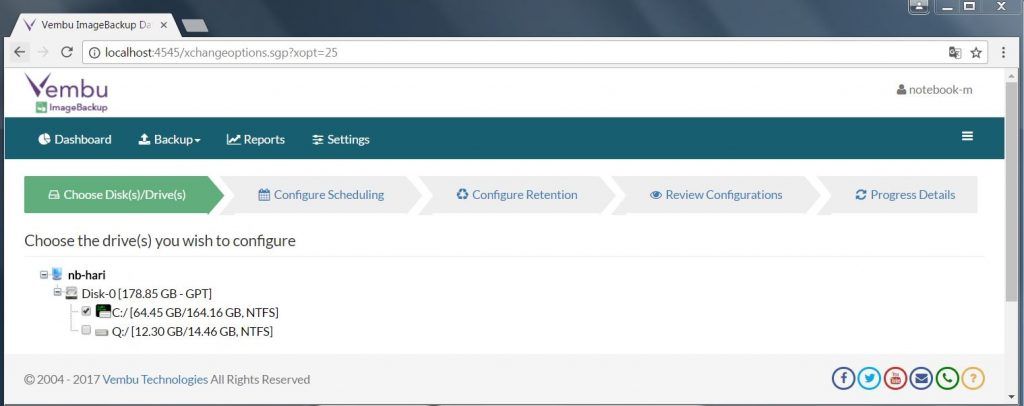
You select a drive or multiple drives.
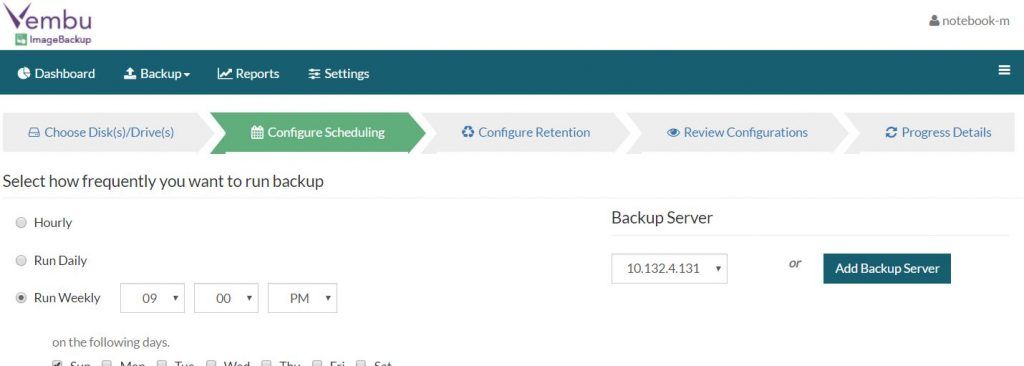
You have to configure scheduling and select a Backup server.
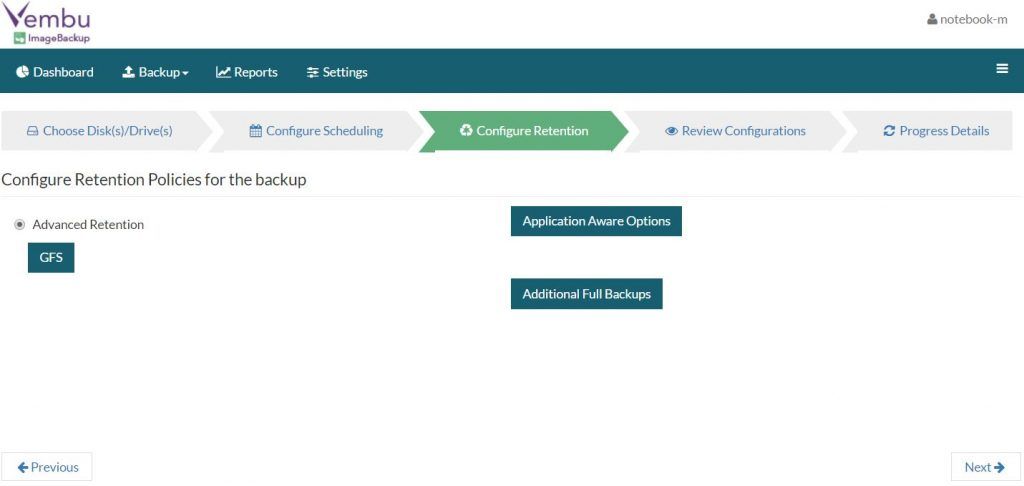
You configure Advanced retention, Application-Aware Options, and Additional Full Backups.
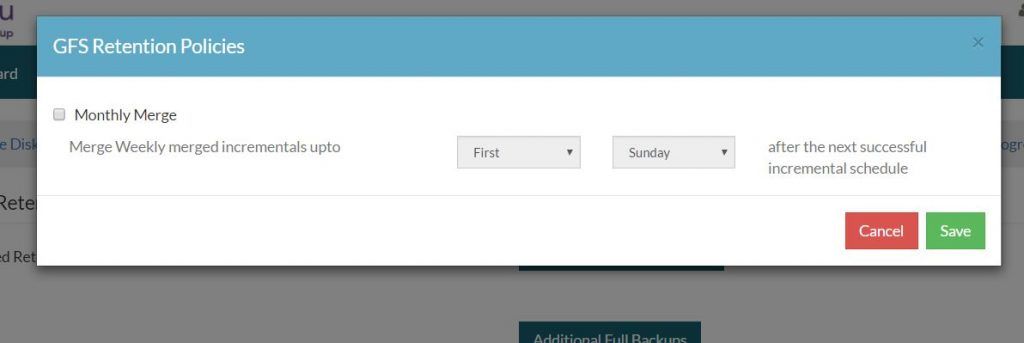
Since this is an image-based backup, we can select a Monthly Merge of incremental images.
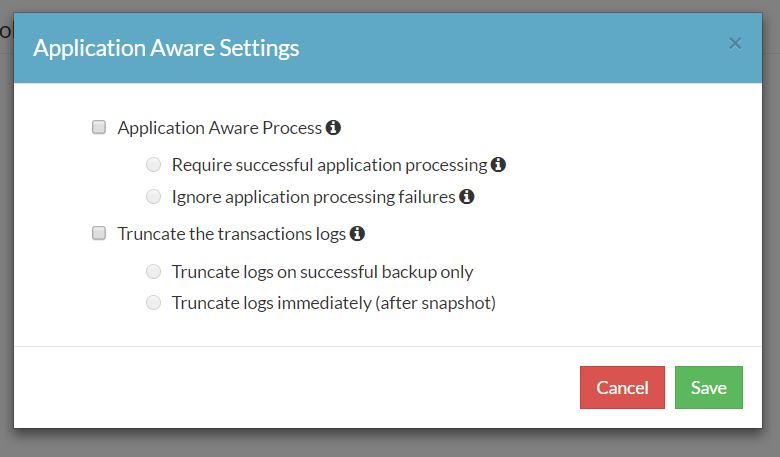
Here, we can also configure Application Aware settings and have the ability to Truncate the transaction logs.
We have to name the backup and start the job.
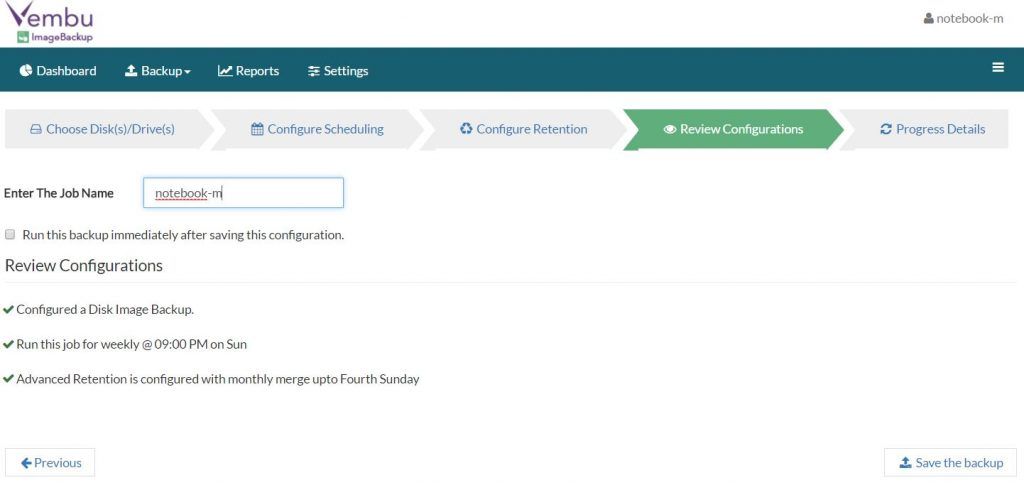
As you can see, we can set up an image-based backup in just a couple of clicks.
Vembu web portal
Once you start using Vembu Backup, you have to register on the Portal where you activate your license.
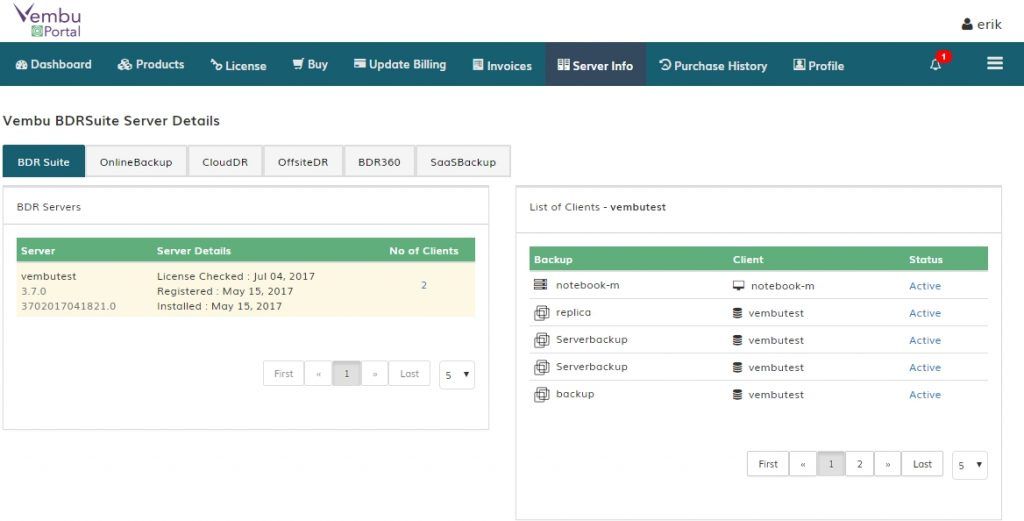
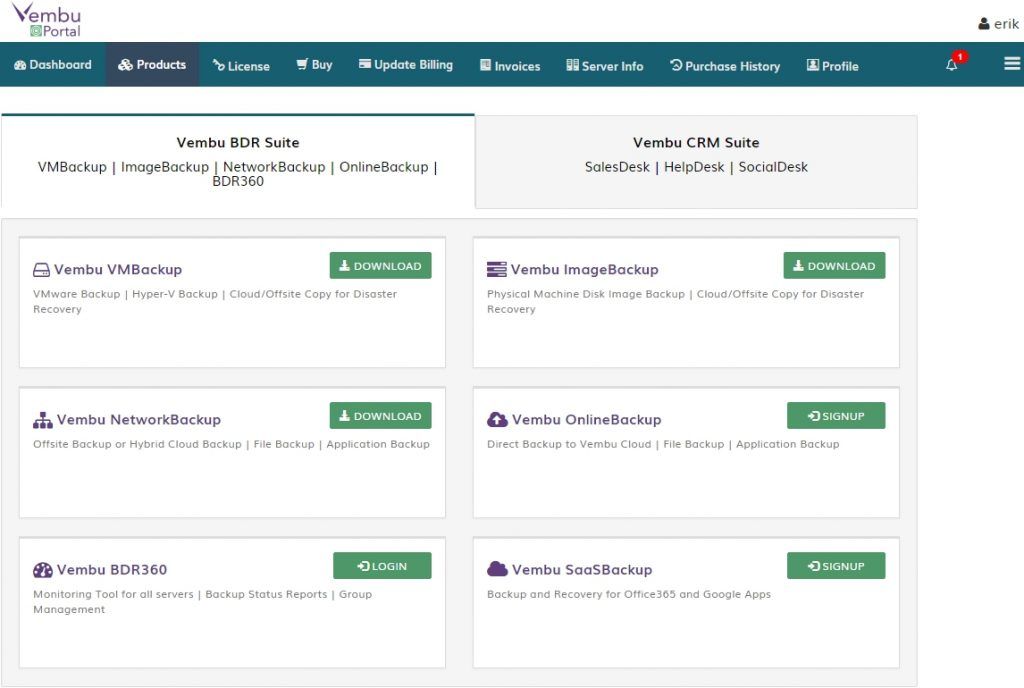
You can also review a list of the clients and backup jobs, you can upgrade your experience with add-ons, manage invoices, activate Vembu Cloud, and download installations for their services.
Do you remember when I mentioned that Backup for PC computers is free?
Pricing and Conclusion
I am overly excited about BDRSuite.
When I was explaining all the good things about Vembu backup to a friend, he asked me a question: But how does its pricing compare to Veeam? I never thought about that, he did as he is a Veeam user. I checked the pricing for both, and this is what I found:
Both companies offer subscription-based licensing. Vembu BDR only has 2 versions – FREE and a regular version.
Veeam, on the other hand, has 3 versions. Standard, Enterprise, and Enterprise PLUS. The standard is too limited for effective usage. Enterprise has most features that are handy. Enterprise Plus adds WAN replication to the features list but if you don’t have remote locations this feature may not be that useful.
Cost per socket per year:
| Vembu BDR | Veeam Standard | Veeam Enterprise | Veeam Enterprise Plus |
| $360 per year | $466 per year | $867 per year | $1,375 per year |
As you can see, Veeam is more than two times more expensive compared to Vembu, if you need WAN acceleration, Vembu is almost four times cheaper compared to Veeam.
If you have 6 sockets or fewer, you will get an additional 50% discount with VEMBU due to the small business discounts. Pretty amazing deal don’t you think? If you are looking for a new Backup vendor, you can try Vembu with 30 days unlimited features trial. It’s amazingly easy to test and quick to install, trust me.


Schreibe einen Kommentar