Throughout my IT career, I met a lot of interesting people, some were IT colleagues from the same department and some I met at various IT conferences. I like to nourish those connections. It is good for new business opportunities, and I especially love brainstorming. We meet for a beer or two and man, it’s great. We discuss everything from IT equipment, new software we use, problems we face, and horrendous bugs we must fix. A question I often ask is if they still use Microsoft Exchange. There are still some who swear by MS Exchange, but most have migrated or are in the process. Security is much better with Microsoft 365, and you are free from the hassle of constant patching, upgrading, and finding workarounds for 0-day flaws. But what I was not expecting is how still, so many IT professionals don’t understand that a. backup for Microsoft is essential to have and b. backup configuration is not complicated.
Having said that, I have tested the latest Vembu Backup for Microsoft 365. I must admit that configuration is much simpler than I originally thought. Some backup vendors require manual configuration but with Vembu all that manual labor is automated, and it will take only a couple of steps. And the configuration process can be completed in a couple of minutes.
Vembu Backup for Microsoft 365 configuration
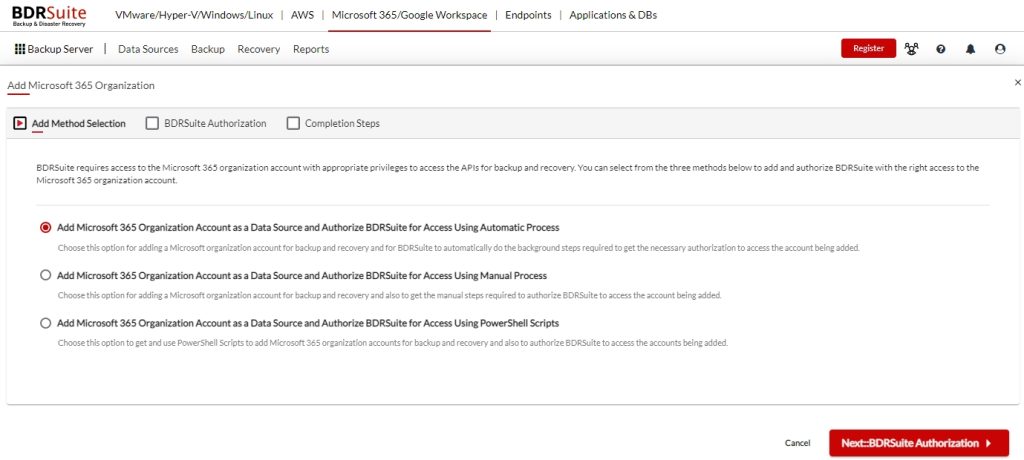
If you don’t use Vembu BDR, then you first must install the server. The process is: download the package, run the installation program, click next, next, next, and login into the web interface. The user interface is easy to understand and navigate. First, you have to add a storage repository so that you have a dedicated space for the backups. You can use local storage on the server, SAN/NAS, or shared folders. Once you have configured the storage repository, you have to add a data source. You can do that by clicking on Microsoft 365/Google Workspace in the many. Click on Add Microsoft 365 Organization

You have three options:
- You can Add Microsoft 365 Organization Account as a Data Source by using the Automatic Process. This procedure is the fastest and does not require any fiddling with the Azure settings.
- You can Add Microsoft 365 Organization Account as a Data Source by using the Manual process. This method is great to understand what permissions Vembu requires and where those settings are located. You are being guided by well-written instructions.
- You can Add Microsoft 365 Organization Account as a Data Source by using PowerShell Scripts. If you are mostly working with PowerShell this method is perfect for you.
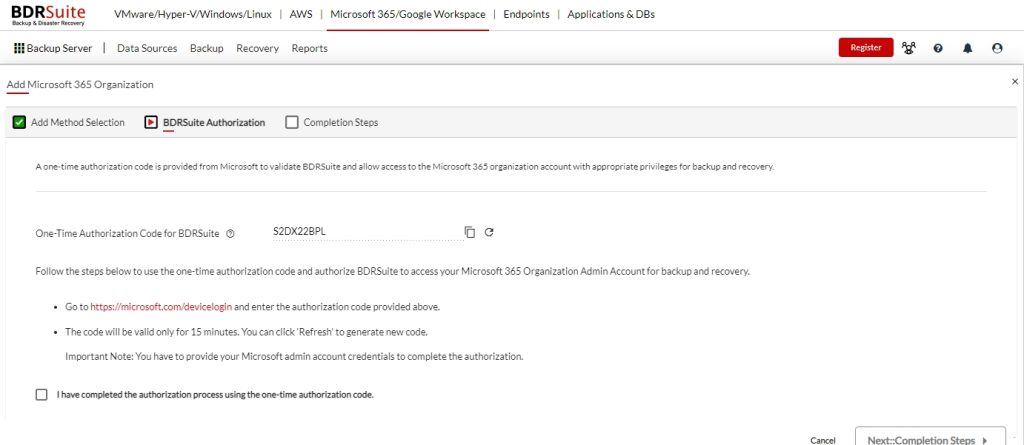
I have decided to test the faster method and chosen the Automatic Process. In the BDRSuite Authorization, you are provided with the One-Time Authorization Code for BDRSuite.
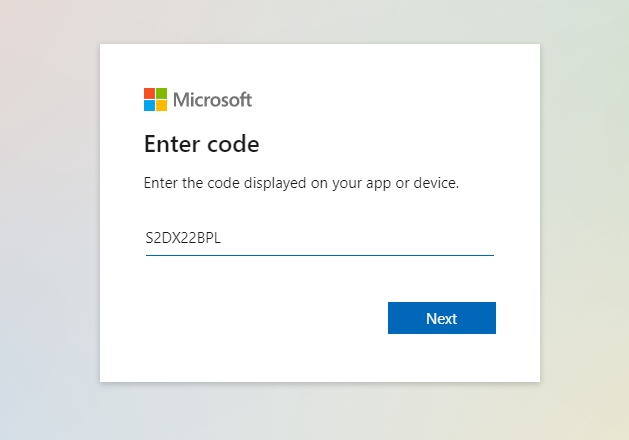
The code that is provided by Vembu, you have to enter into the Microsoft authorization window.
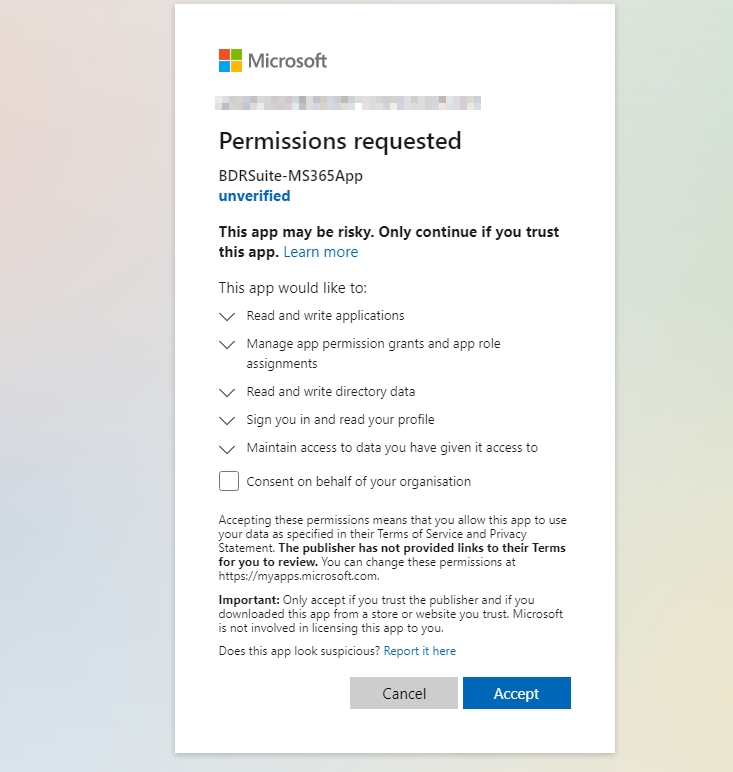
In the next step, accept the Permissions requested by Vembu BDR. Below you will find an explanation of what the app would like to do. Once you read what permissions are required click on a tick box next to the Consent on behalf of your organization and click on the Accept button.
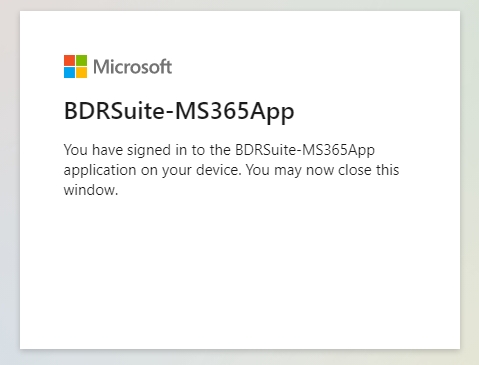
You will see another window notifying you that you have signed in to the BDRSuite application. That means that configuration was successful. You can close this window.
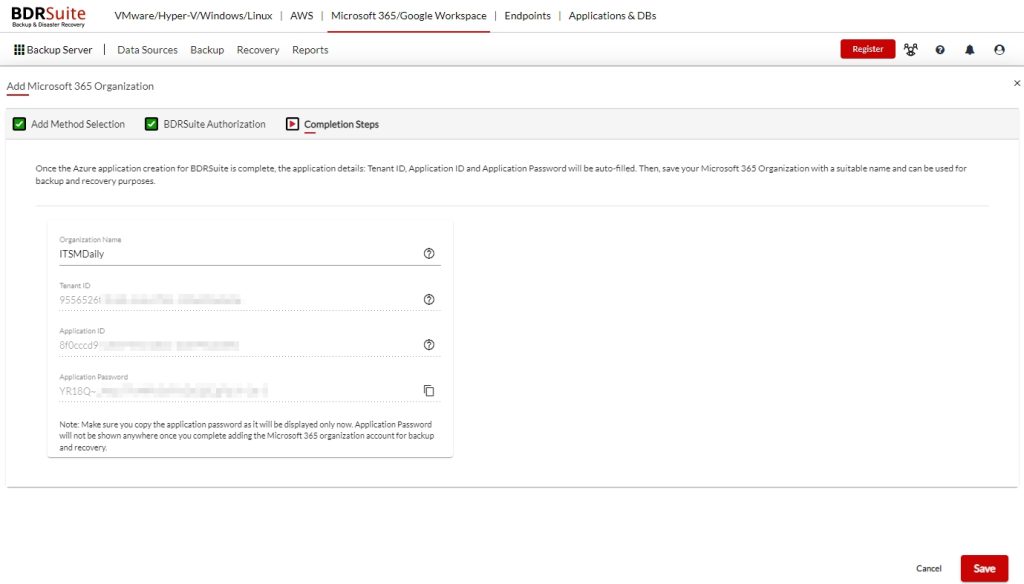
On the Completion Steps, you will see Tenant ID, Application ID, and Application Password. You must copy and save the information for later use.
To configure the backup, click on Backup, Configure Backup, and select Microsoft 365

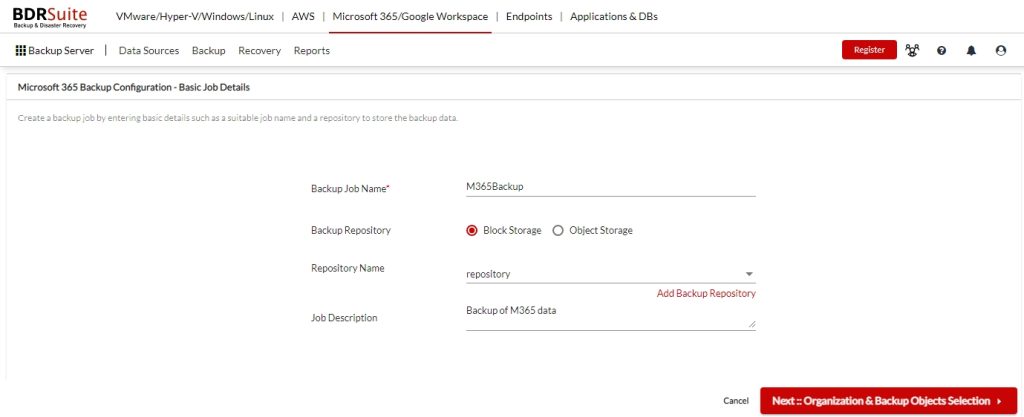
On the Microsoft 365 Backup Configuration – Basic Job Details, name the Backup Job Name, select the repository, and add the Job Description. Click on the Organization & Backup Object Selection.
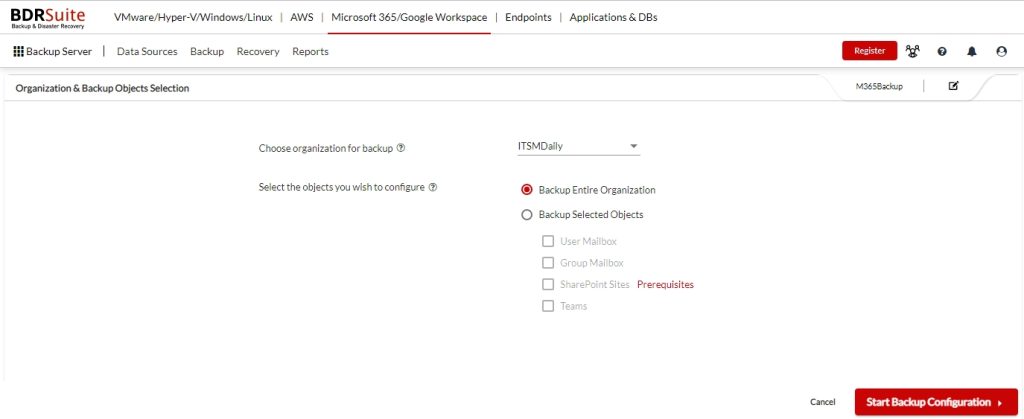
On the Organization & Backup Object Selection choose the organization for backup. Click on the Start Backup Configuration.
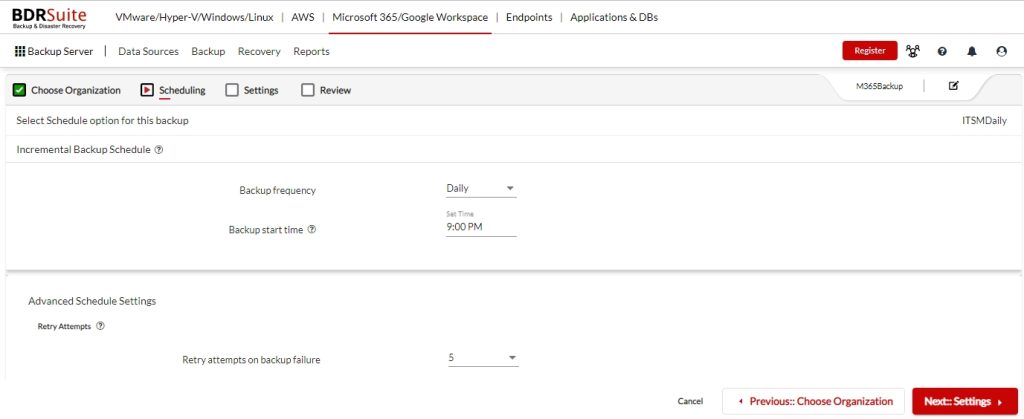
On the Scheduling step, choose the frequency of the backup. Click on Next:: Settings button.
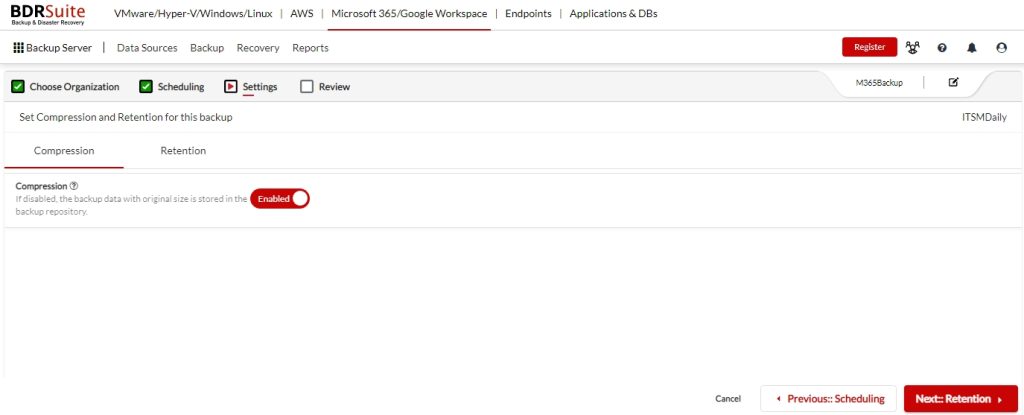
On the Settings step, you can configure the Compression. Click on the Button Next:: Retention
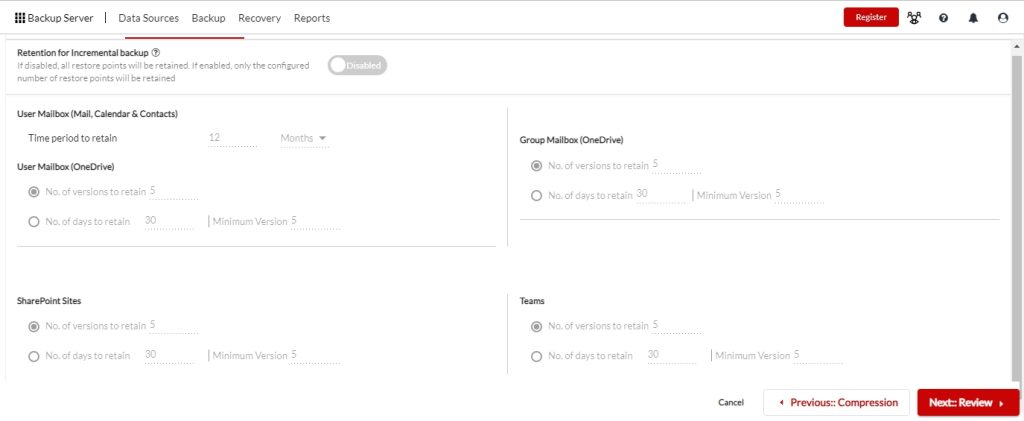
You can configure Retention for Incremental backup: period to retain User mailbox, OneDrive, SharePoint Sites, OneDrive, and Teams. Click on the Next::Button
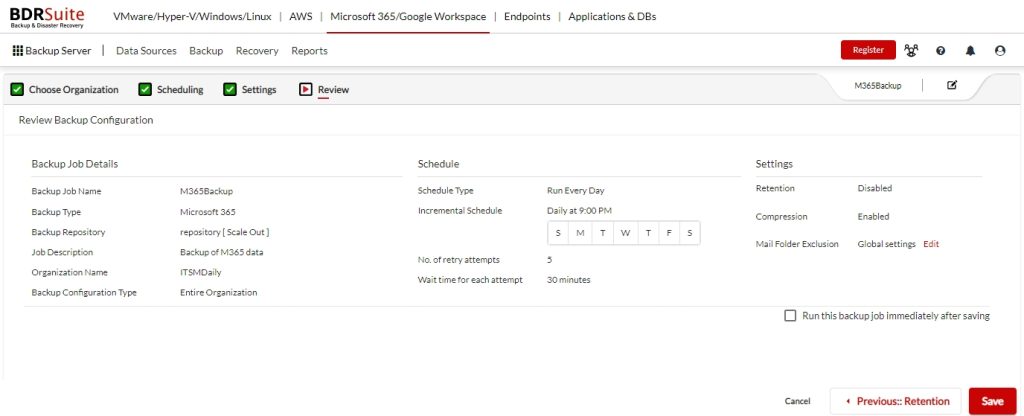
On the last step of configuration, you can review the settings and Schedule. You can also choose to run the backup immediately after saving.
Once the backup is run, you can monitor the status of the backup and view the report once the backup is complete.

Conclusion
What was once a one-hour job, where you had to find all the relevant settings in your Azure settings, can be now completed in 5 minutes thanks to Vembu’s automated process. The configuration has become so simple, that you can be done in the time a coffee is done. If you are more of an old-school person, you can still use PowerShell or manual configuration. Vembu Backup for Microsoft 365 is great, simple to use, and easy to configure. But the power of Vembu is that it can be used for your complete infrastructure, saving you time and cost. If you are evaluating backup for Microsoft 365 try BDRSuite. You may be surprised by how well it works.


Schreibe einen Kommentar